
For macOS
- Check that this machine and the PC are connected, and that the power supply is on.
- Insert the included DVD to the PC.
- Double-click on the [OKI] icon on the desktop.
- Double-click on [Drivers] - [PS] - [Installer for OSX].
Finish the installation by following the on-screen instructions.
- Select [System Preferences] from the Apple menu.
- Click [Printers and Scanners].
Click [+], and select [Add Printer or Scanner] when the menu appears.
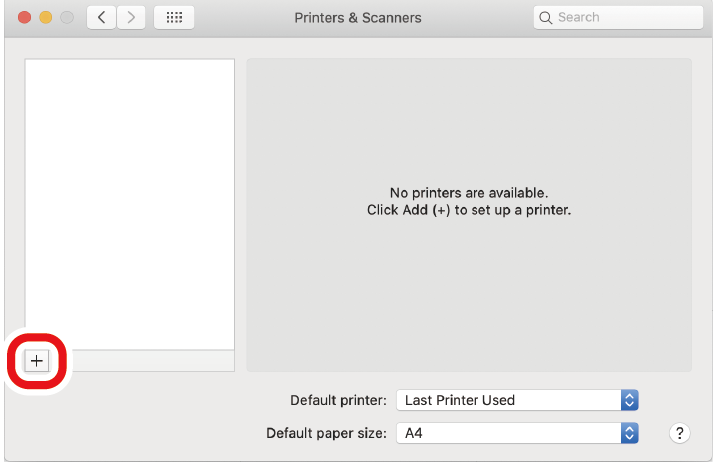

If you cannot click [+], click the key mark.
- Click [Default].
Select this machine, and select [OKI C650 PS] from [Drivers].
Connection Method
Listed name
Type
Network
OKI-C650 (Last 6 digits of the MAC address)
Bonjour
USB
OKI DATA CORP C650
USB
- The MAC address can be checked by pressing the scroll buttons on the operator panel to print the network information from [Print Information] - [Network].
- To change the name, input a new name to be used in [Name].
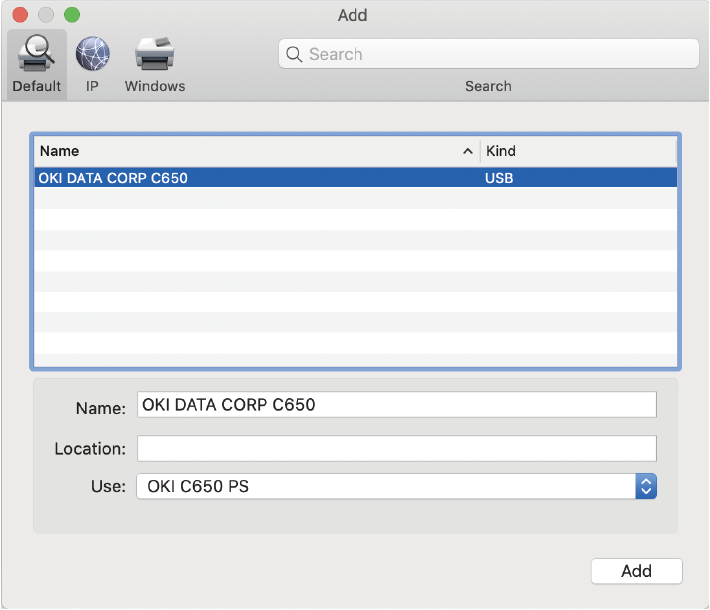
Click [Add].
- If the option confirmation screen appears, click [OK].
Make sure that this machine is added to the list of [Printers] and that "OKI C650 PS" is displayed in [Type].
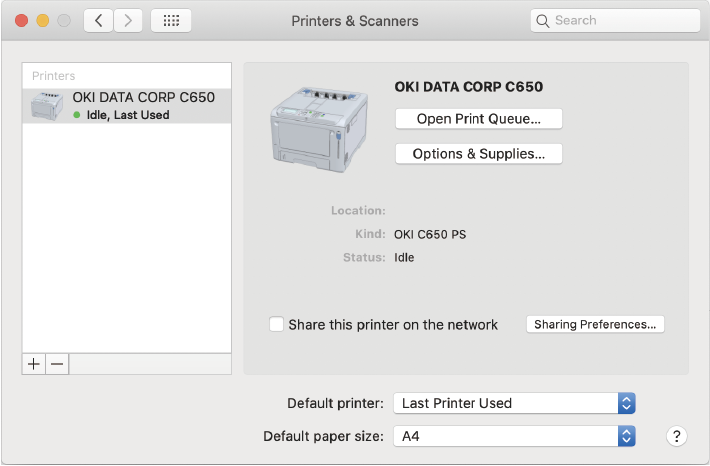

- If "OKI C650 PS" is not displayed in [Type] properly, click [-] to delete this machine from [Print], and then repeat Steps 8 - 12.
- Click [Open the Print Queue].
- Select [Print Test Page] from the [Print] menu.
Installation is completed when the test page is printed.
If you install options like the expansion tray unit, change the settings of printer driver.