For Windows
You can set the user name and user ID (PIN) in the printer driver.
![]()
- Since the job account mode will be disabled after the printer driver is updated or reinstalled, please reset the job account mode. However, when all printer drivers are set to the same mode, it is not necessary to reset the mode.
Setting the user name and user ID
You can set the user name and user ID using "Properties" in the printer driver.
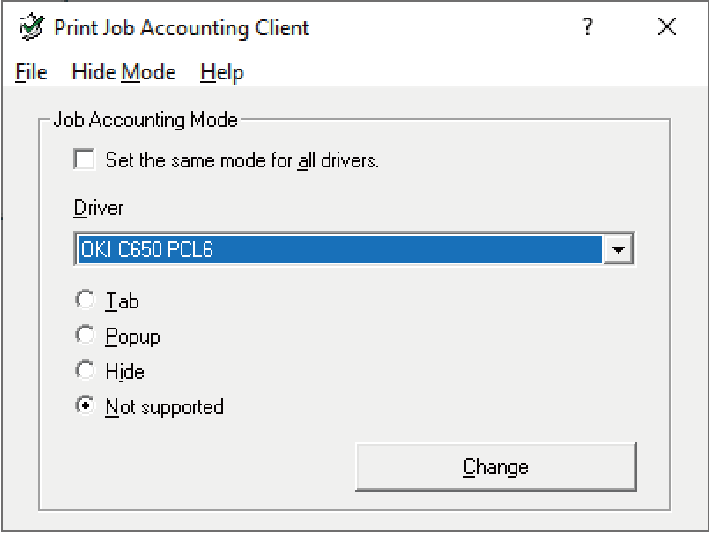
- Click [Start], and select [Okidata] or [OKI] - [Change Job Accounting Mode].
- From the list of drivers, select the driver you want to set.
To set all printer drivers to the same mode, check [Set the same mode for all drivers]. - Select [Tab], and click [Change].
A window is displayed. - Click [OK].
- Select [Close] from the [File] menu.
Open the "Devices and Printers".
- Right-click on the printer icon, and select [Printer Properties].
- Select the [Job Accounting] tab, input the user name and user ID, and click [OK].
Setting the pop-up mode
With this feature, each time you start printing, you need to enter a user name and a user ID.
- Click [Start], and select [Okidata] or [OKI] - [Change Job Accounting Mode].
- From the list of drivers, select the driver you want to set.
- Select [Popup], and click [Change].
A window is displayed. - Click [OK].
- Select [Close] from the [File] menu.
Setting the user ID for each user in the hide mode
The system administrator creates beforehand the ID file that describes the user ID and user name corresponding to the login user name for Windows. Since users are identified by this software, you do not have to enter a user name or ID when printing.
Please use the hide mode with shared printers.
Create an ID file with the Notepad or spreadsheet software.

- ID files are listed in the following order.
Login user name (the user name input when logging into Windows), user ID (the user ID corresponding to the login user name), and the user name - The user name can be omitted. When omitted, the user name will follow the login user name.
- Separate each item with a comma.
- For the spreadsheet software, input one login user name, one user ID, and one user name on each line.
- ID files are listed in the following order.
Save the file in "CSV" format.
Click [Start], and select [Okidata] or [OKI] - [Change Job Accounting Mode].
From the list of drivers, select the driver you want to set.
To set all printer drivers to the same mode, check [Set the same mode for all drivers].
- When using a shared printer, do not use the function to set all printer drivers to the same mode. The account information is not output when you are printing from a shared printer client.
- Select [Hide], and click [Change].
- Click [OK].
- Select [Import ID file] from the [Hide Mode] menu.
- Specify the ID file created in Step 1, and click [Open].
- Uncheck [Set fixed Job Account ID for all users] from the [Hide Mode] menu.
- Select [Close] from the [File] menu.


