
Shipping this machine
 | Doing so may cause injury. | |
This machine weighs approx. 30 kg, so be sure to have it lifted by at least 2 personals. | ||
| Doing so may cause burns. | |
Do not touch the fuser unit because it is hot. | ||
![]()
- Because image drums (green parts) can easily get damaged, handle with adequate care.
- Do not expose the image drum to direct sunlight or strong light (approx.1,500 lux or above). Do not leave it for more than 5 minutes even under room lighting.
- Please use the packing box and buffer material at purchase of the product.
- Power off this machine.
- Remove all cables.
- Power cord
- LAN cable/USB cable
- Remove the paper from the paper cassette.
- Pull the front cover open lever (Blue) to open the front cover.
- Take out the toner cartridge.
- Put the toner cartridge into a plastic bag.
- Close the front cover firmly with both hands.
If the optional expansion tray unit is installed, use a flat-head screwdriver to remove the parts (x 2) that fix this machine and the expansion tray unit.
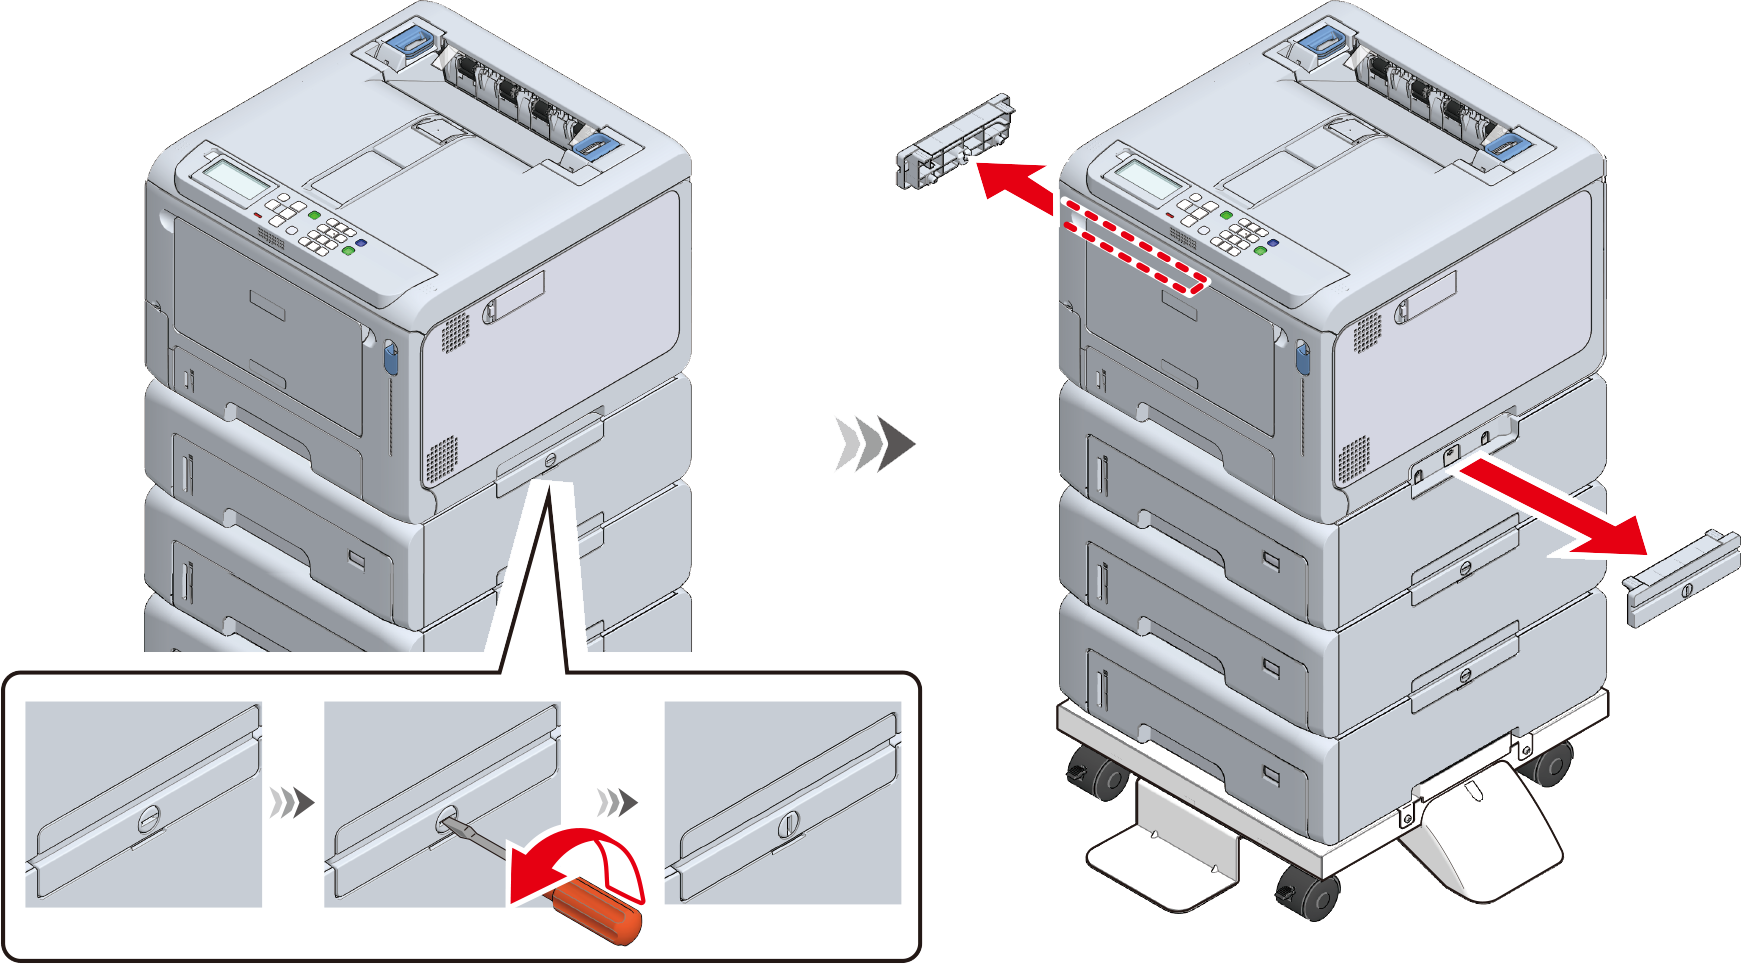

- Do not remove the parts connecting the expansion tray yet.
- Be careful not to lose the fixing parts that were removed.
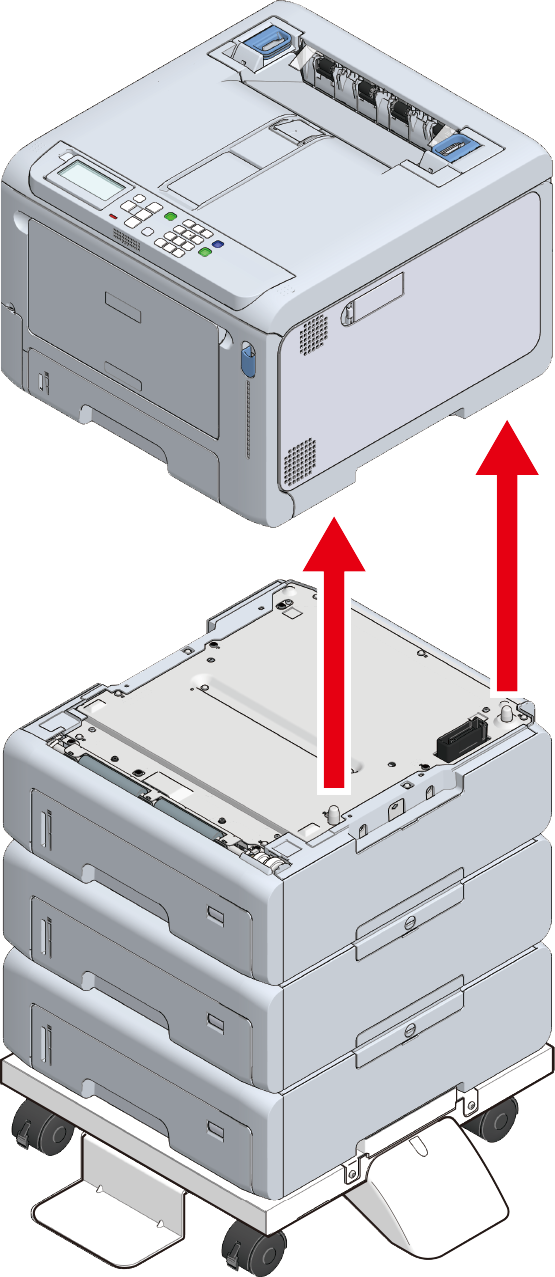
Lift the machine and remove it from the expansion tray unit.
- Pack the machine and the expansion tray separately for transportation.
Attach the buffer material to this machine and put them together in the packing box.
- Place the toner cartridge and accessories on the buffer material, close the lid of the packing box, and fix it with tape.
If there are multiple expansion tray units, use a flat-head screwdriver to remove all the fixing parts and pack them together.
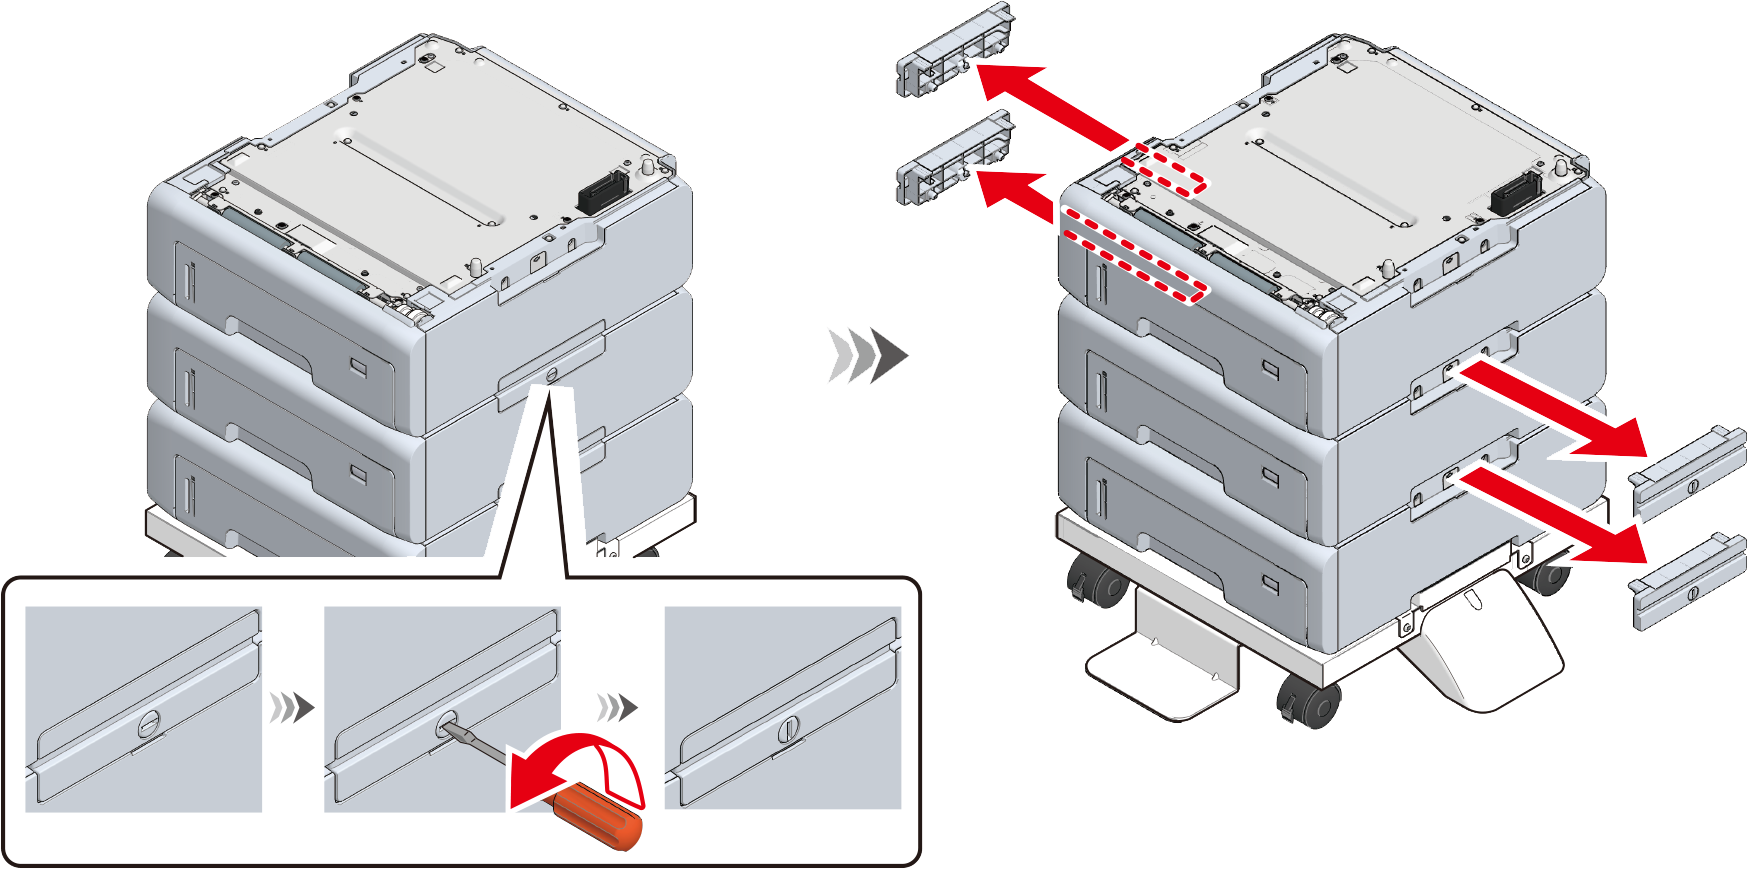
If the caster stand is installed, use a Phillips-head screwdriver to remove the metal fixtures (x 2) that fix the caster stand and the expansion tray unit.
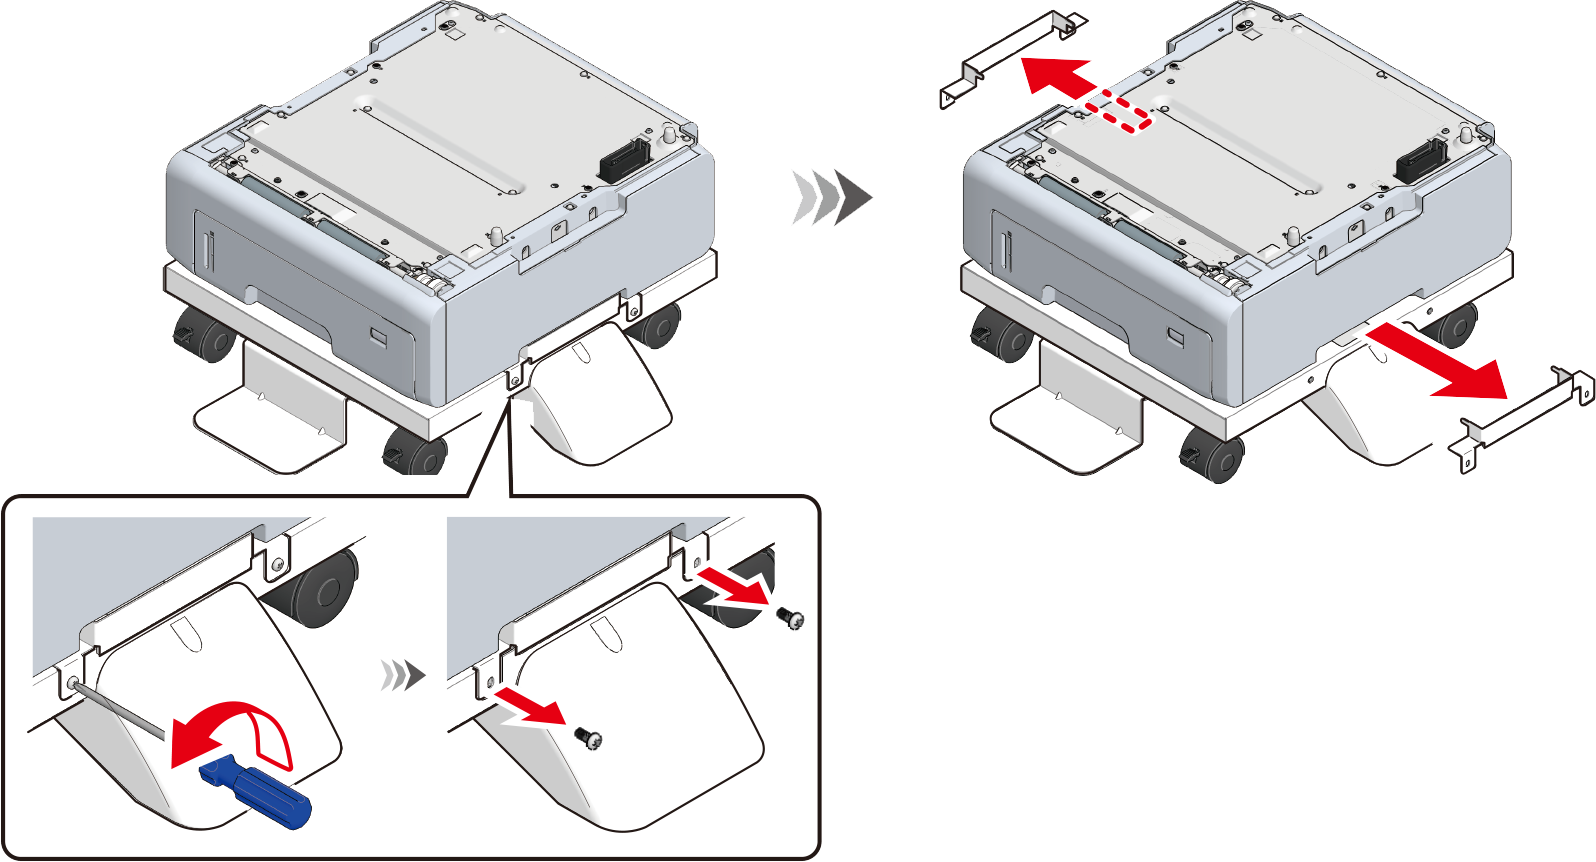
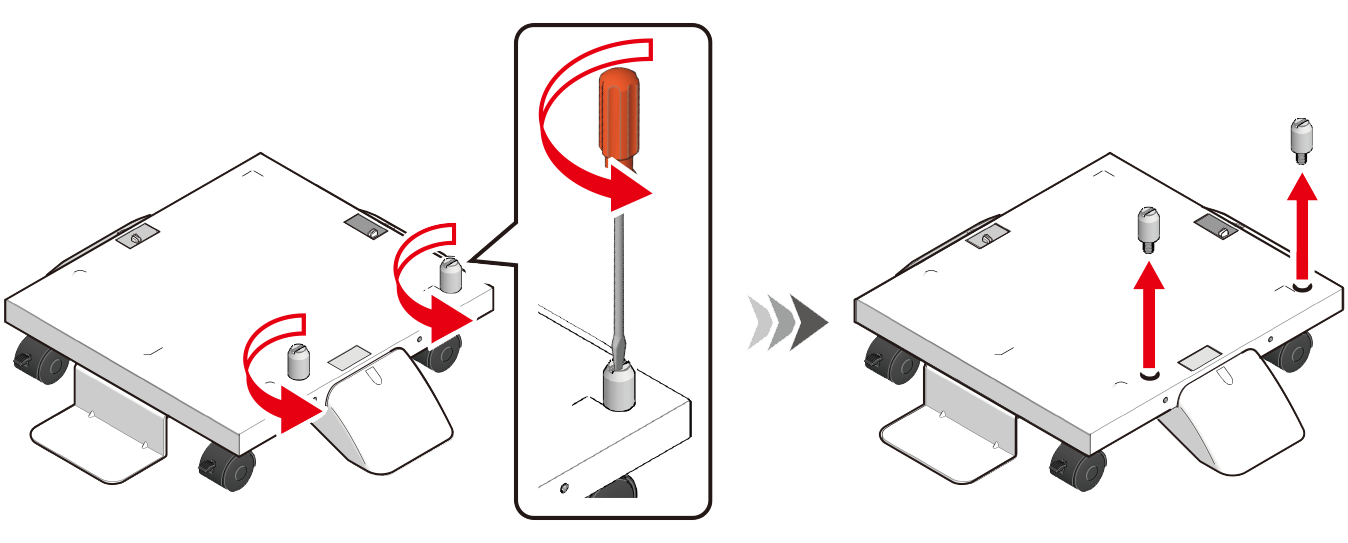
Use a flat-head screwdriver to turn the positioning pins (x 2) in the arrow direction to remove them from the caster stand.
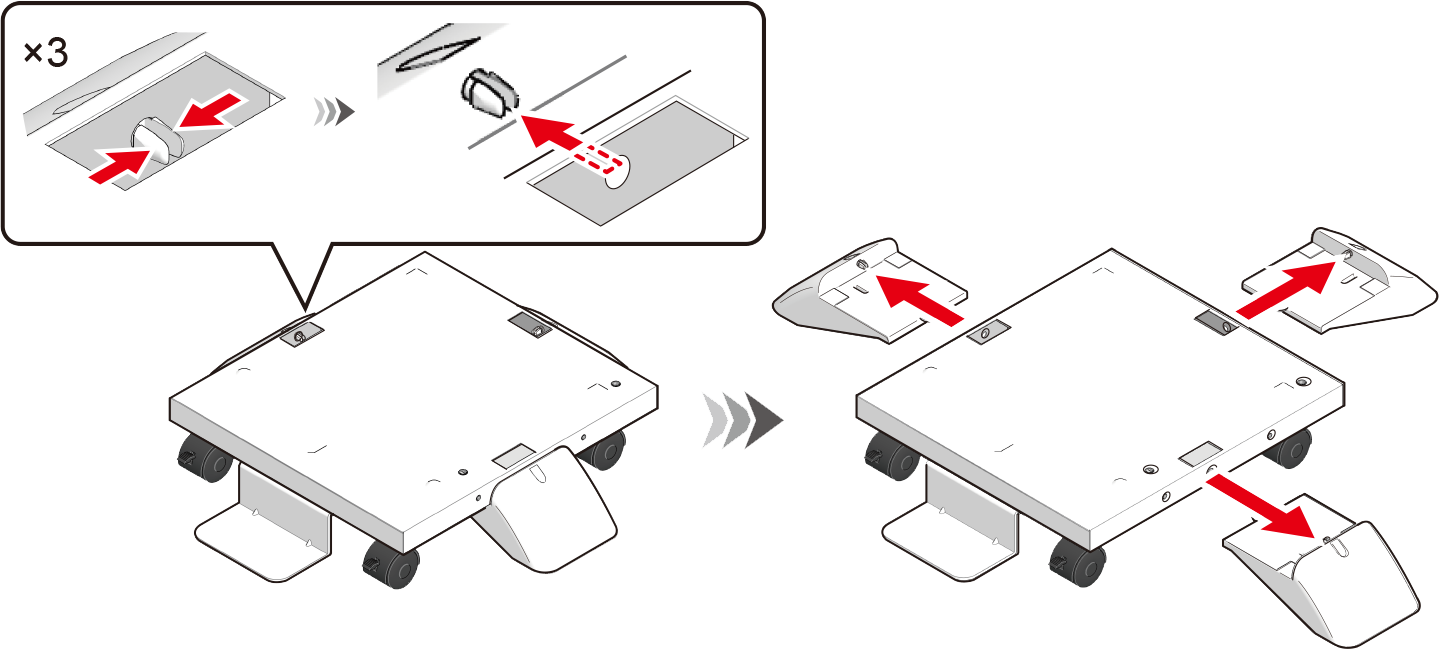
Pinch the protrusion of the anti-tip foot b through the hole on the caster stand and push it out to remove the anti-tip foot b. Follow the same procedure to remove the remaining anti-tip feet b.
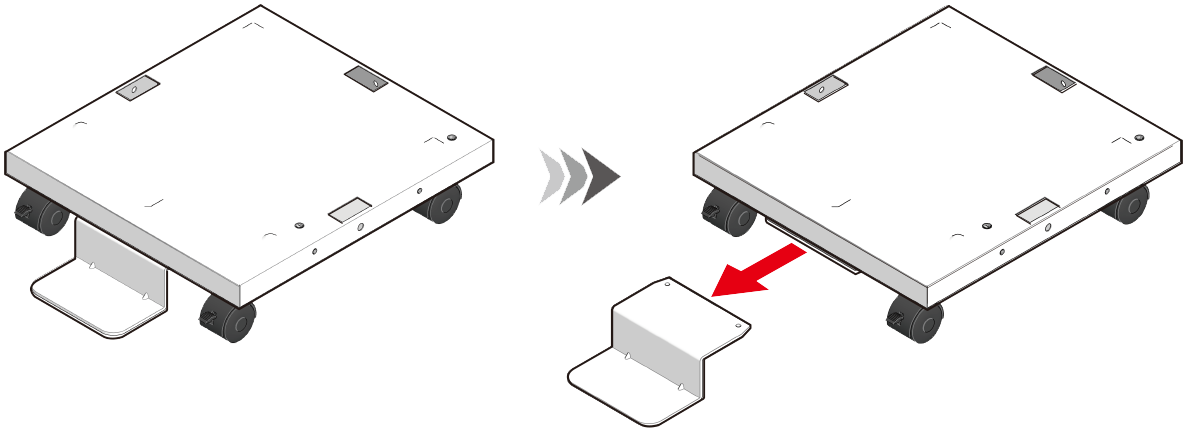
Remove the anti-tip foot a from the caster stand.
Put the caster stand in the packing box. At the same time, put the metal fixtures (x 2) of the caster stand, positioning pins (x 2), anti-tip feet b (x 3), and anti-tip foot a that were removed in Steps 13 to 16 in the packing box.
- Be careful not to lose the fixing parts that were removed.