
Changing palette colors
You can use the Color Correct Utility to specify colors of the palette selected in software like Microsoft Excel.
For Windows
Click [Start], and select [Okidata] or [OKI] - [Color Correct Utility].
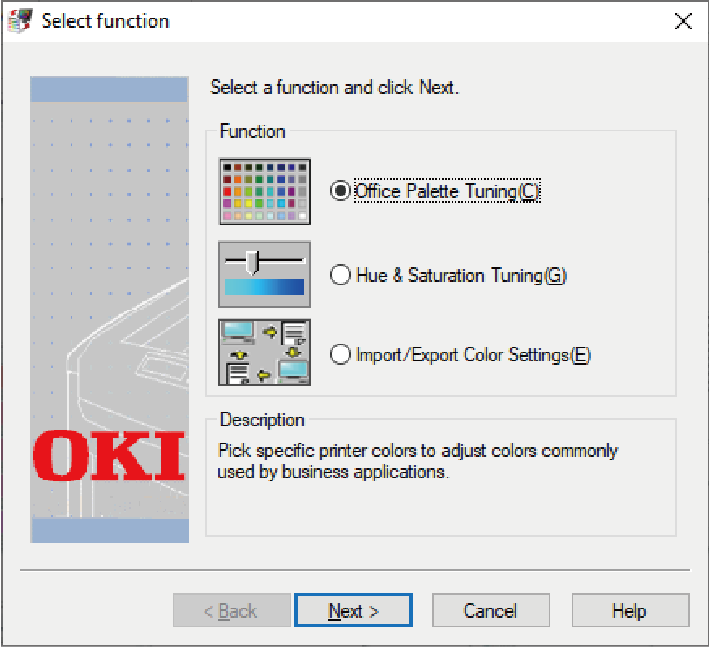
- Select [Office Palette Tuning], and click [Next]. and click [Next].
- Select the device to be adjusted, and click [Next].
Select the name of the setting, and click [Print Sample].

- If the settings are initialized after the printer driver has been updated and reinstalled, start the Color Correct Utility to automatically reset the name of the color tuning.
Check that the color tuning name is displayed on the [Select setting] screen.
- If the settings are initialized after the printer driver has been updated and reinstalled, start the Color Correct Utility to automatically reset the name of the color tuning.
- Click [Next].
- Click [Print Test].
- Compare the color palette on the screen with the colors of the printed color sample for adjustment.
The color marked with an x cannot be adjusted. - Click the color you want to adjust.
- Check the adjustable range of X and Y from the drop-down list.
The adjustable value varies with the specific color. - Check the printed color samples, select the most suitable color within the adjustable range, and then check the X and Y values.
- Select the values you checked in Step 10, and click [OK].
- Click [Print Test] to check whether the adjusted color is closer to the color you want, and then click [Next].
If you want to further change the color or change other colors, repeat Steps 8 to 11. - Input a name for the setting, and click [Save].
- Click [OK].
- Click [Finish].
For macOS
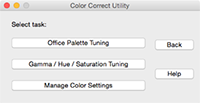
- Start the Color Correct Utility.
- Select the device you want to adjust.
- Click [Next].
- Click [Office Palette Tuning].
- Select the name of the setting, and click [Print Sample].
- Click [Next].
- Click [Print Test].
- Compare the color palette on the screen with the colors of the printed color sample for adjustment.
The color marked with an x cannot be adjusted. - Click the color you want to adjust.
- Check the adjustable range of X and Y from the pull-down menu.
The adjustable value varies with the specific color. - Check the printed color samples, select the most suitable color within the adjustable range, and then check the X and Y values.
- Select the values you checked in Step 11, and click [OK].
- Click [Print Test] to check whether the adjusted color is closer to what you want.
If you want to further change the color or change other colors, repeat Steps 9 to 13. - Input a name and click [Save].
- Select [Printers & Scanners] from [System Preferences], delete the registered adjusted device, and then re-register.