For the error code 639
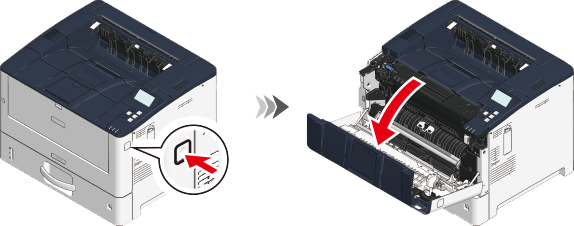
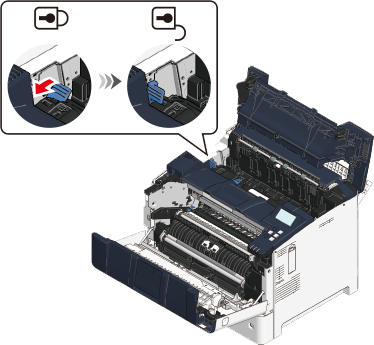
Press the front cover open button on the side of this machine, and then open the front cover toward you.
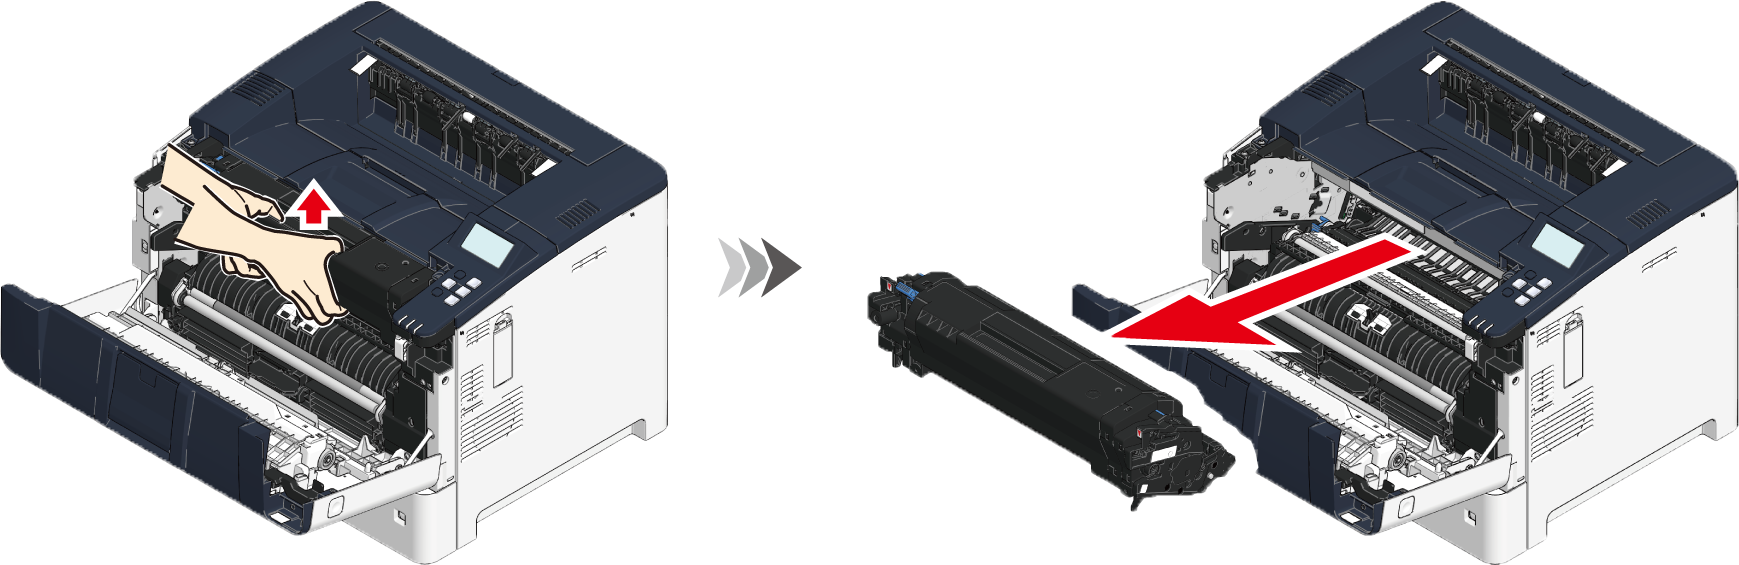
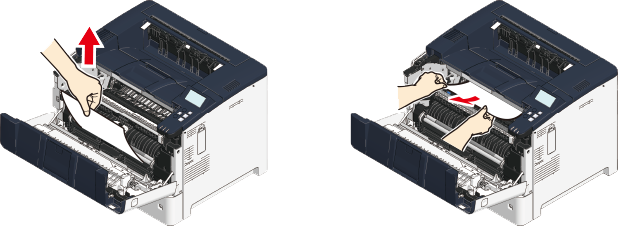
Hold the toner cartridge, push it up a little, and then pull it out toward you. Remove the toner cartridge with the image drum attached.

Do not touch the blue lever on the toner cartridge.
Handle with adequate care since the green part of the image drum is very easy to be damaged.
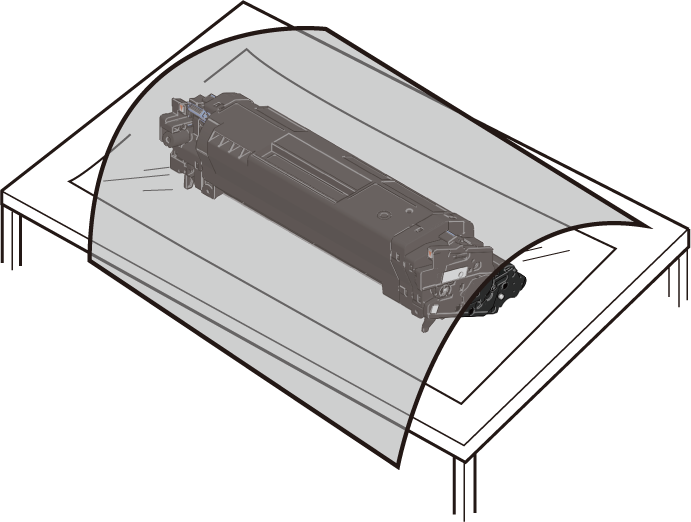
Do not expose the image drum to direct sunlight or strong light (approx. 1,500 lux or above). Do not leave it uncovered for more than 5 minutes even under room lighting.
Place the removed toner cartridge and image drum on a flat surface covered with newspaper or the like, and cover them with paper to avoid direct light.
If the paper is visible, remove the paper and proceed to Step 17.
- Do not touch the transport assistance guide. If the transport assistance guide comes off, please refer to "Installing the transport assistance guide".
If the paper is not visible, press the recess on the back of this machine, open the rear cover, and open the paper ejection guide.
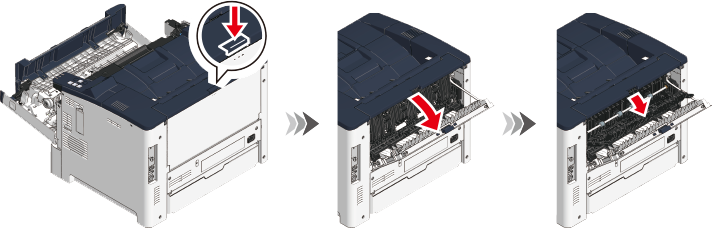
If the paper is visible, remove the paper and proceed to Step 16.
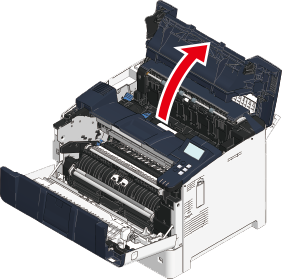
If the paper is not visible, open the output tray.

Burns may be caused. 
As the fuser may be hot, be cautious during operation and always hold the handle to lift it. When it is hot, wait until it cools down before any operation.
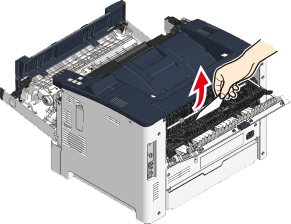
Unlock the fuser by rotating the blue lock lever on the left side in the direction of the unlock mark until it stops.
Remove the fuser from this machine by holding its central handle.

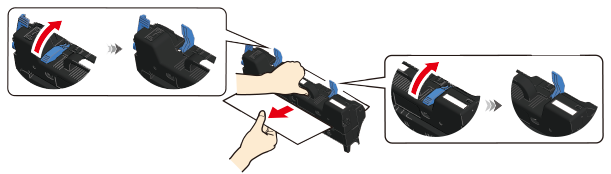
Rotate the blue lock lever on the left side, raise the jam release levers (x 2), and remove any paper left in the fuser.
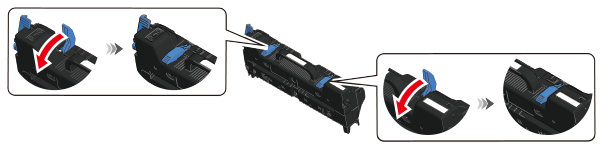
Return the jam release levers (x 2) on the fuser to their original positions.
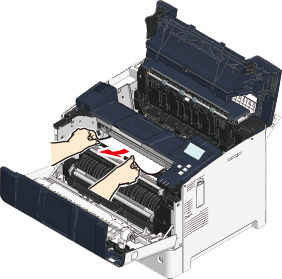
Remove any paper left in the main unit of this machine.
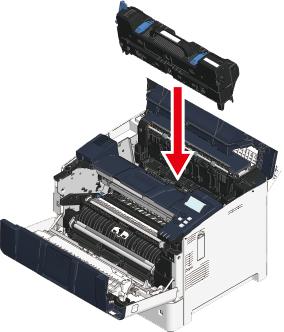
Install the fuser into this machine by holding its central handle.
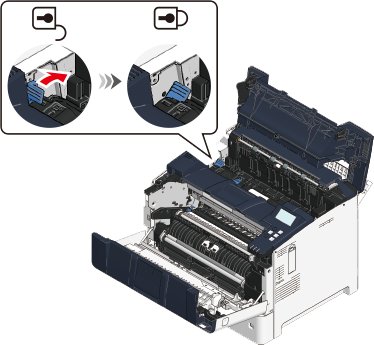
Lock the fuser by rotating the blue lock lever in the direction of the lock mark until it stops.
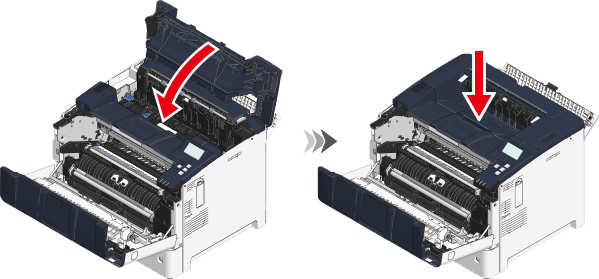
Close the output tray.
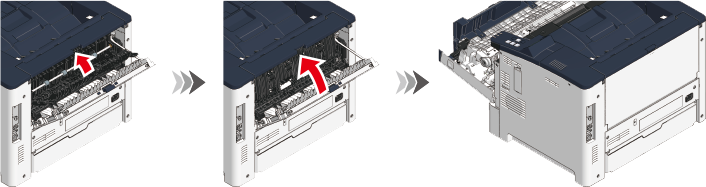
Close the paper ejection guide and then close the rear cover.
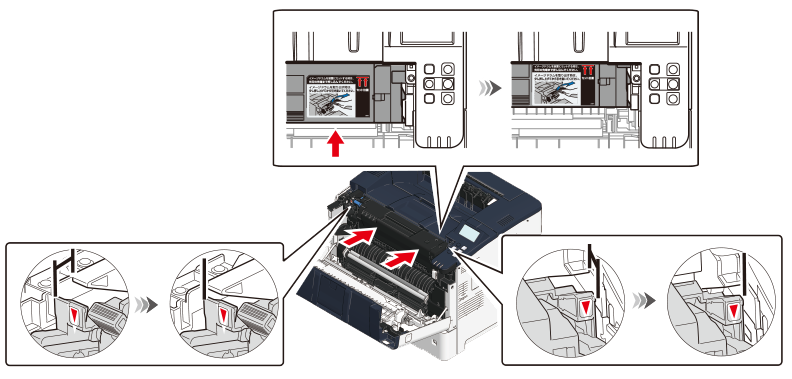
Install the toner cartridge and the image drum from diagonally above by holding the toner cartridge.
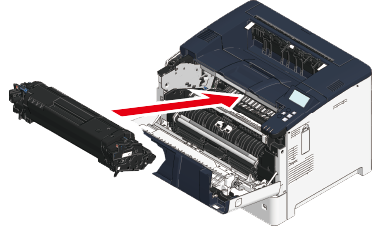
Check the [Installation position] by the right label on the toner cartridge, and press in the toner cartridge. Check that the triangular marks on the left and right sides of the image drum are all the way in.
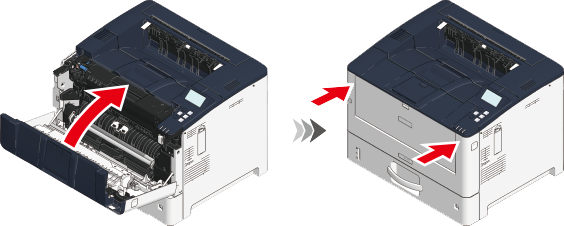
Close the front cover firmly with your both hands.