
Replacing the maintenance kit
The maintenance kit is a set of a fuser and a transfer roller. Follow the procedure below to replace the fuser and transfer roller at the same time.
Prepare a new maintenance kit and check that you have all the parts.
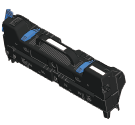
Fuser 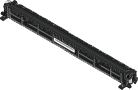
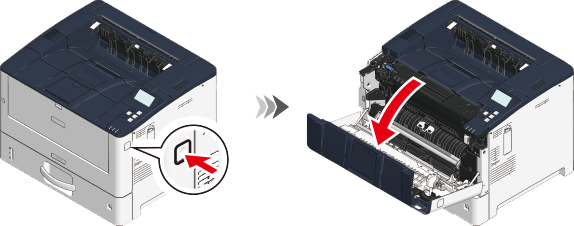
Transfer roller Open the output tray by holding its center.

Burns may be caused. 
As the fuser may be hot, be cautious during operation and always hold the handle to lift it. When it is hot, wait until it cools down before any operation.

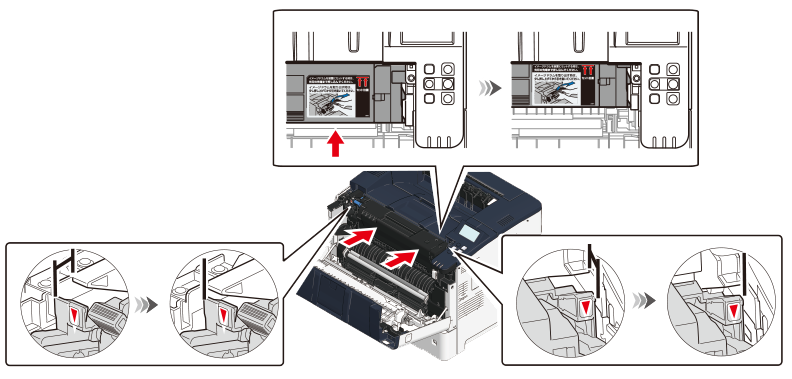
Unlock the fuser by rotating the blue lock lever on the left side in the direction of the unlock mark until it stops.
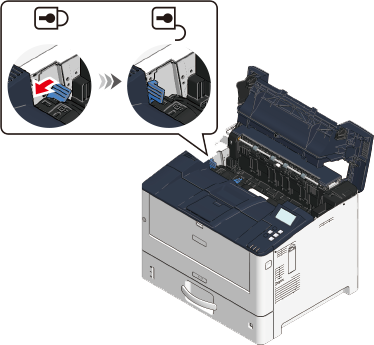
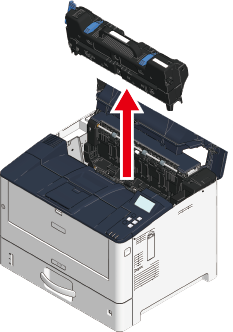
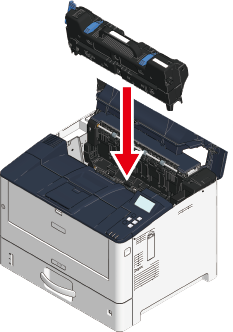
Remove the fuser from this machine by holding its central handle.
Remove the new fuser from the box and rotate the blue lock lever in the direction of the unlock mark until it stops.
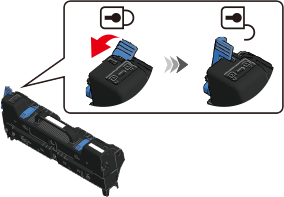
Install the fuser in this machine with the blue lock lever on the left side.
Lock the fuser by rotating the blue lock lever in the direction of the lock mark until it stops.
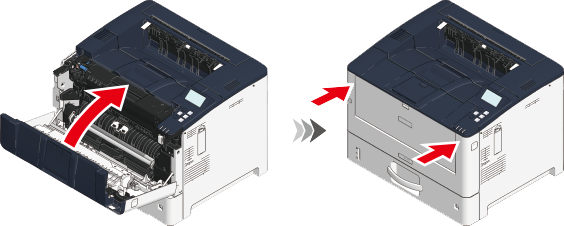
Close the output tray.
Press the front cover open button on the side of this machine, and then open the front cover toward you.
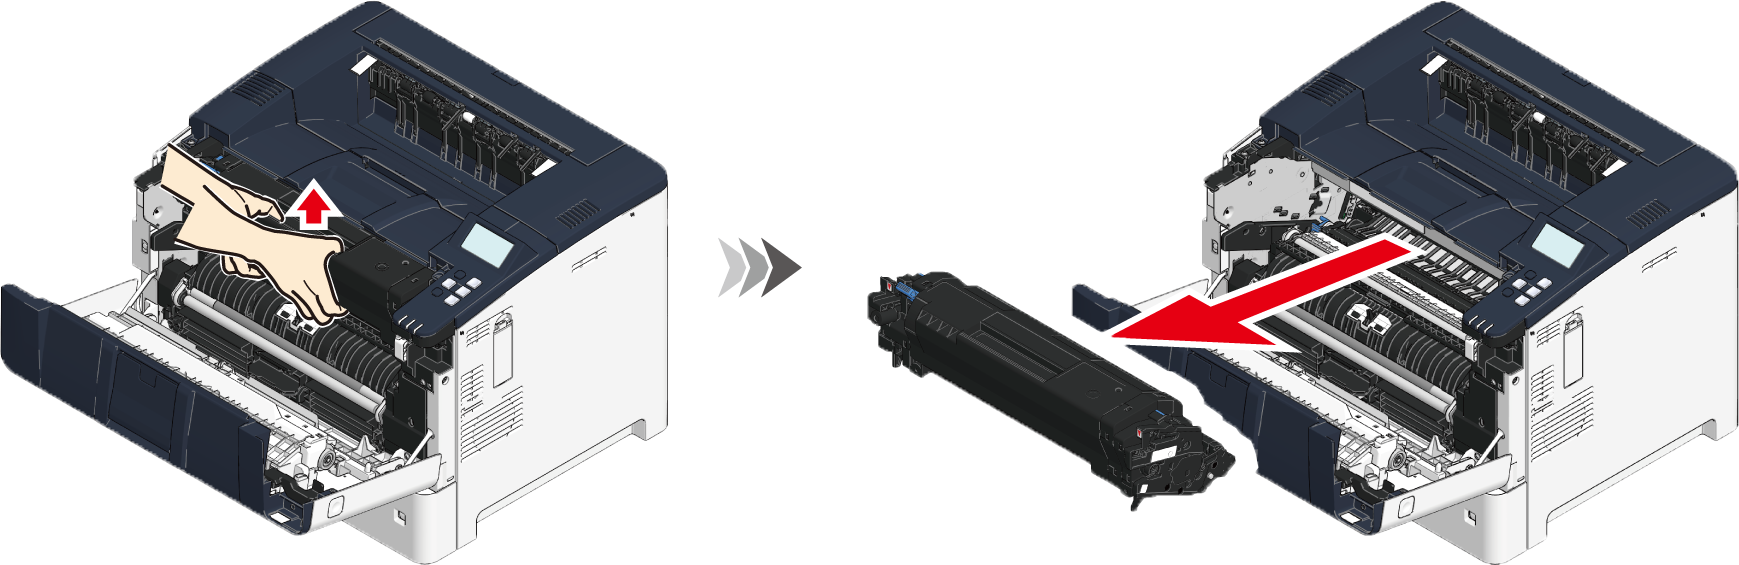
Hold the toner cartridge, push it up a little, and then pull it out toward you. Remove the toner cartridge with the image drum attached.

Do not touch the blue lever on the toner cartridge.
Handle with adequate care since the green part of the image drum is very easy to be damaged.
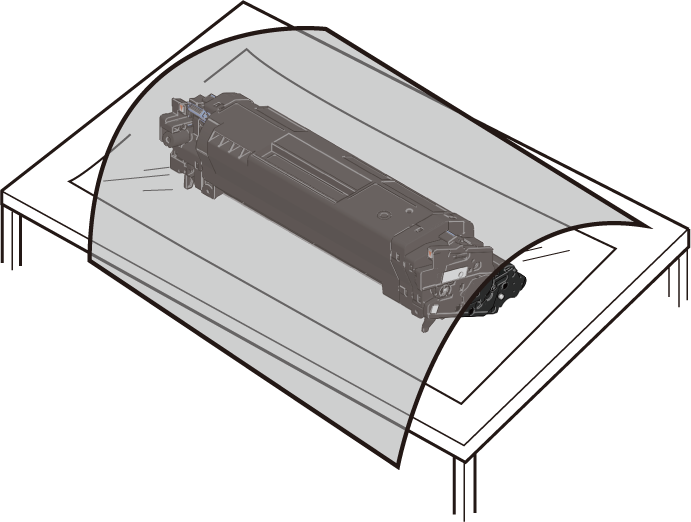
Do not expose the image drum to direct sunlight or strong light (approx. 1,500 lux or above). Do not leave it uncovered for more than 5 minutes even under room lighting.
Place the removed toner cartridge and image drum on a flat surface covered with newspaper or the like, and cover them with paper to avoid direct light.
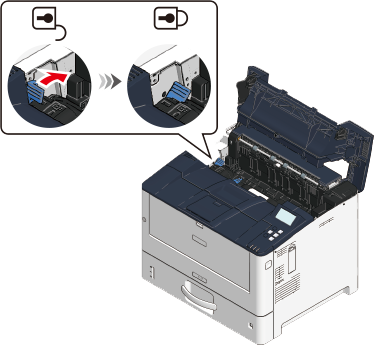
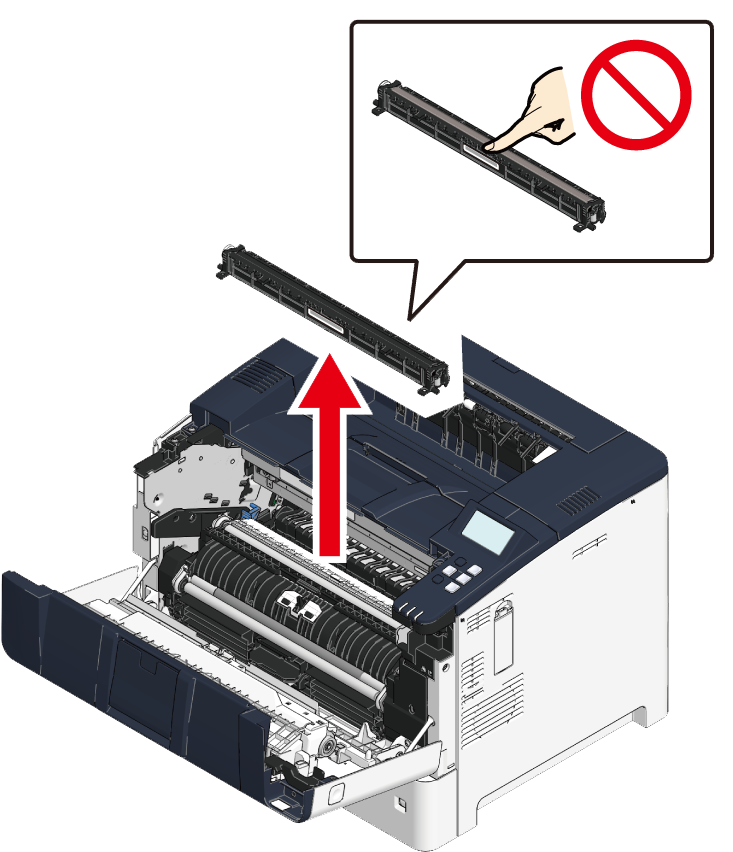
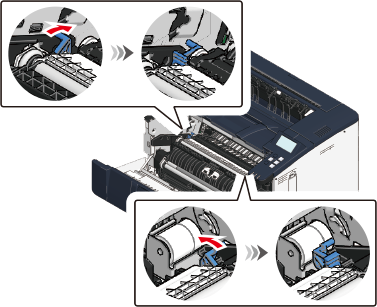
Tilt the left and right blue levers inside this machine toward you.
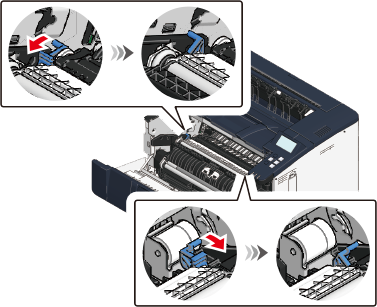
Remove the transfer roller gently by holding its both ends from above.
- Be careful not to touch the sponge section in the center.
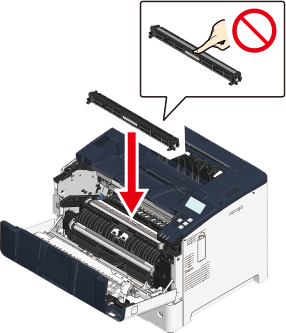
Remove the new transfer roller from the box.
Install the transfer roller into the machine by holding its both ends with the sticker in the center of the transfer roller facing you.
- Be careful not to touch the sponge section in the center.
- Install the transfer roller so that the back side is lower. If the back side is high, the transfer roller is not installed correctly.
Tilt the left and right blue levers inside this machine toward the back.
Install the toner cartridge and the image drum from diagonally above by holding the toner cartridge.
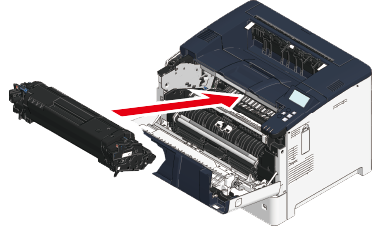
Check the [Installation position] by the right label on the toner cartridge, and press in the toner cartridge. Check that the triangular marks on the left and right sides of the image drum are all the way in.
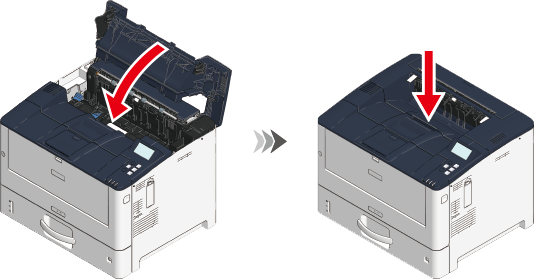
Close the front cover firmly with your both hands.
![]()
- Please support recycling of the used fuser and feed roller. For details, refer to the separate volume "COREFIDO Guide".