
Replacing the image drum
This section explains how to only replace the image drum with a new one, and continue using the existing toner cartridge.
Refer to "Replacing the image drum and the toner cartridge" if you want to replace both the image drum and toner cartridge with new ones.
![]()
- If you attach the existing toner cartridge to a new image drum, the remaining amount of the toner cartridge may not be displayed correctly. In addition, "Toner low." or "Toner Empty. Replace with a new toner cartridge." may be displayed after the replacement.
Please use genuine OKI genuine consumables for optimum performance.
Failures caused by using non-genuine consumables may void the warranty or maintenance contract. (The use of non-genuine consumables will not necessarily cause failures, but please fully take notice of such usage.)
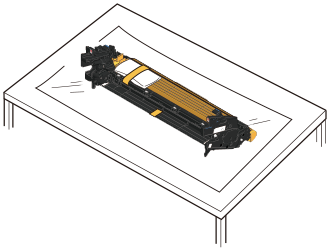
Prepare a new image drum.
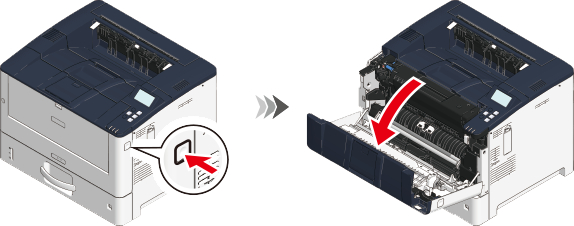
Press the front cover open button on the side of this machine and open the front cover toward you.
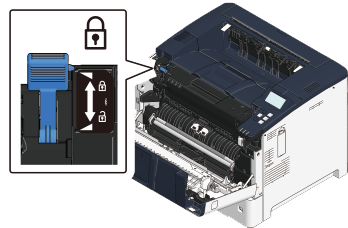
Make sure that the blue lever on the left side of the toner cartridge is aligned with the lock mark.

- Do not touch the blue lever. The image drum cannot be removed while the lever is being moved.
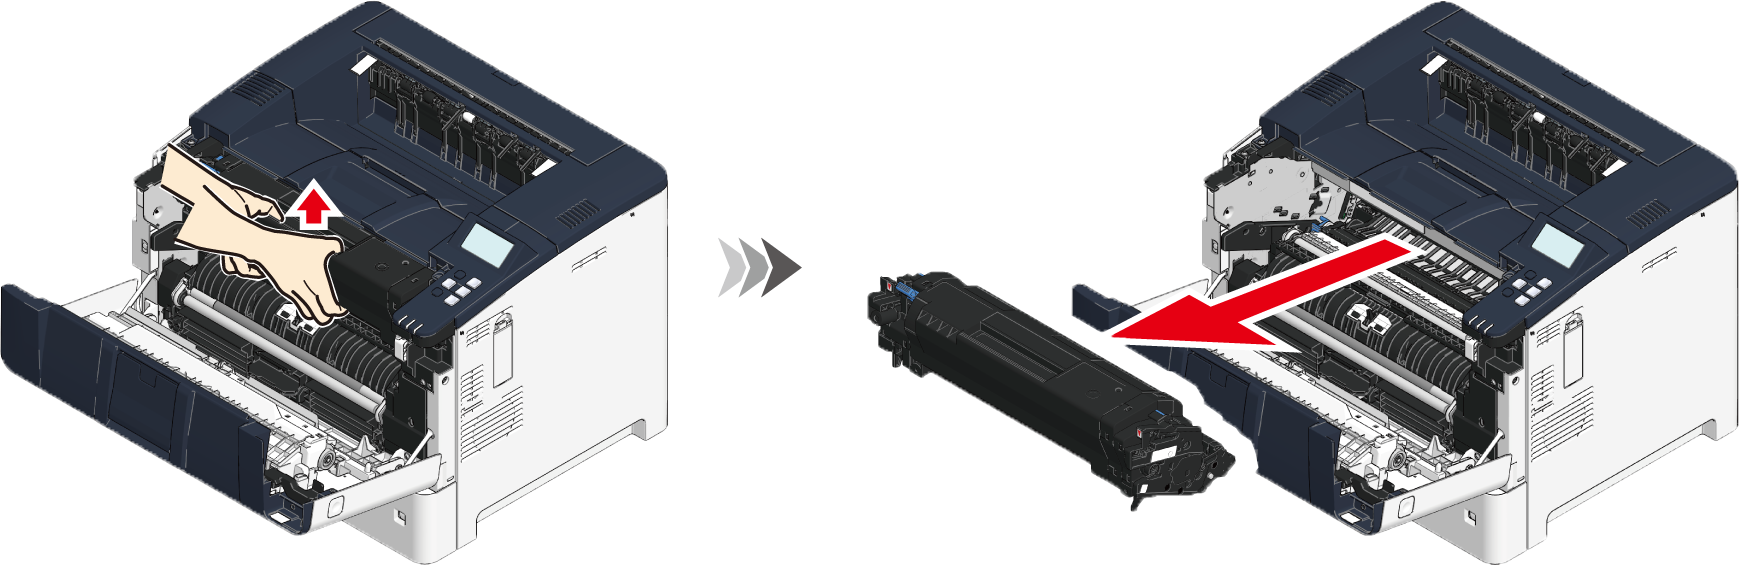
Hold the toner cartridge, push it up slightly, and then pull it out toward you. Remove the toner cartridge with the image drum attached.
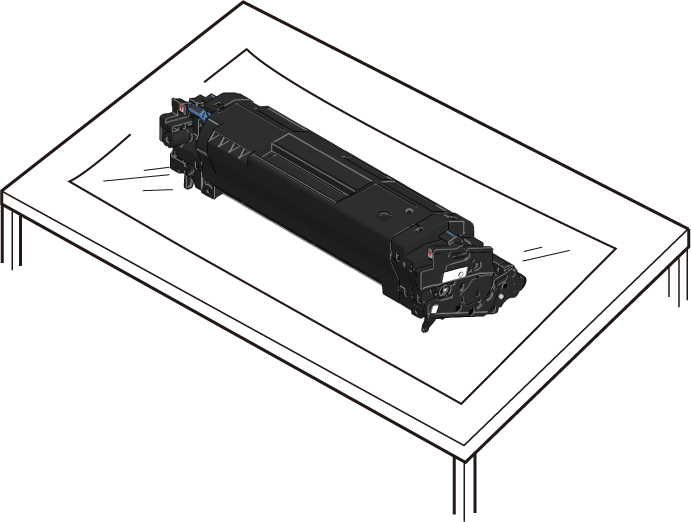
Place the toner cartridge and image drum on a flat surface covered with newspaper or the like.
Remove the new image drum from its packaging bag, and then place it on a flat surface covered with newspaper or the like.
Handle with adequate care since the green tube of the image drum is very easy to be damaged.
Do not expose the image drum to direct sunlight or strong light (about 1,500 lux or above). Do not leave it uncovered for more than 5 minutes even under room lighting.
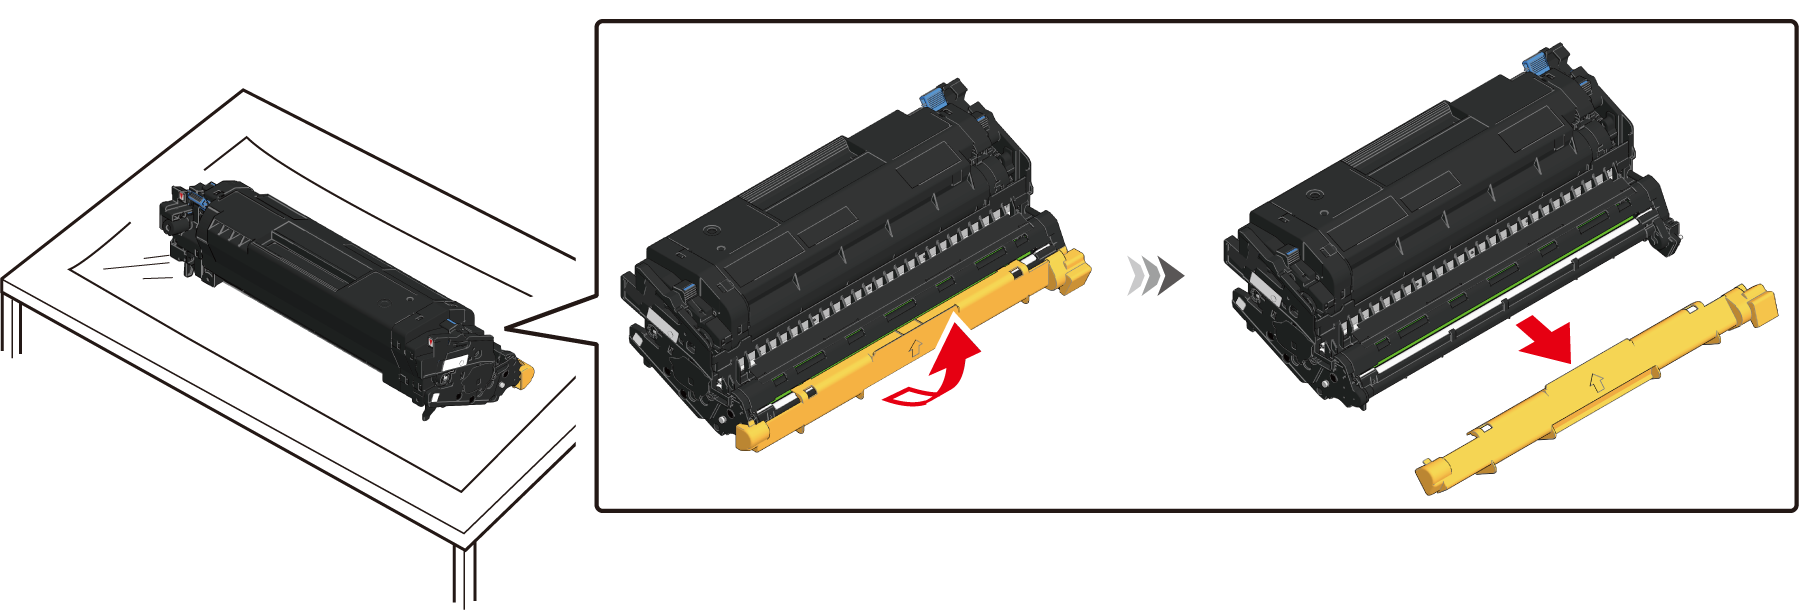
Remove the desiccant and protective sheet.
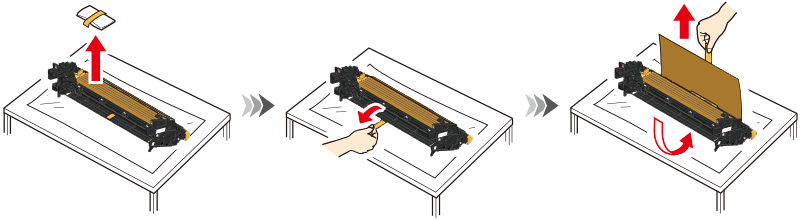
Remove the toner cover.
Handle the toner cover with your both hands and be careful not to hit it on surrounding objects.
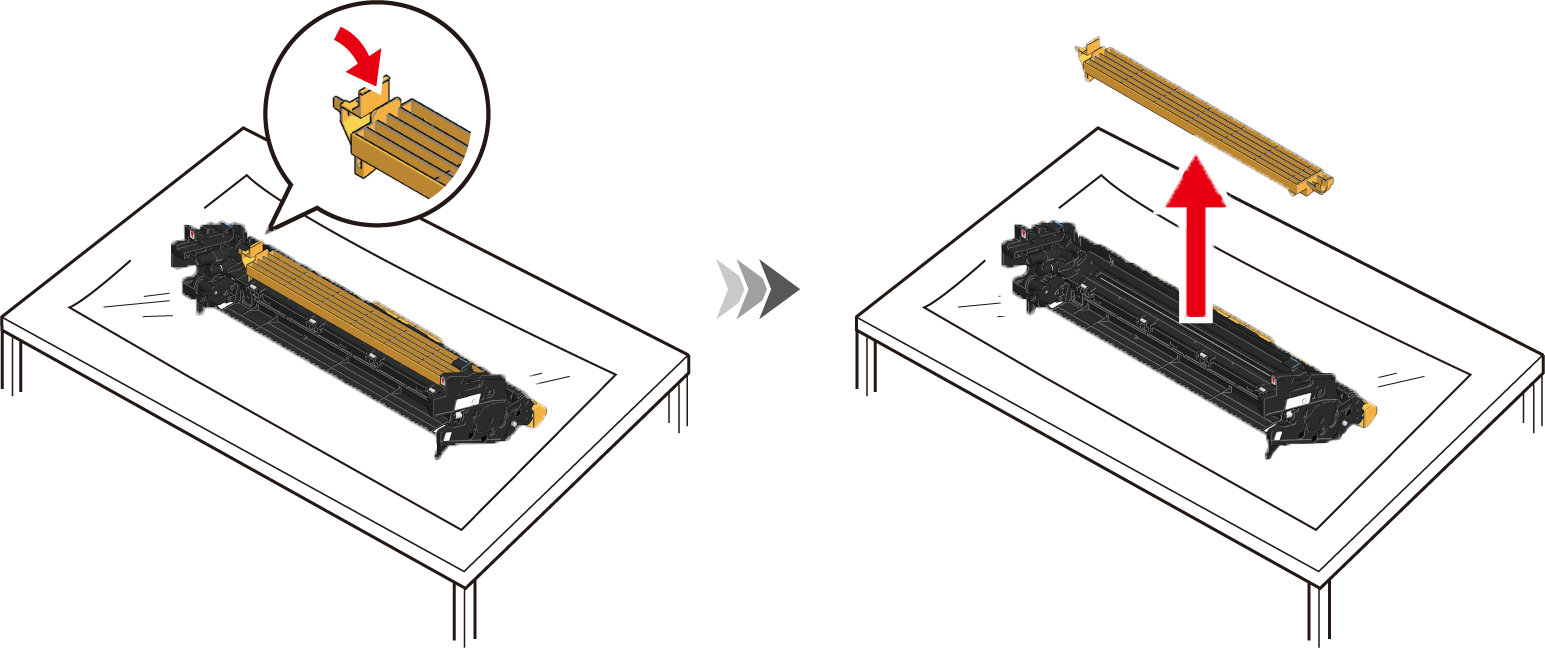
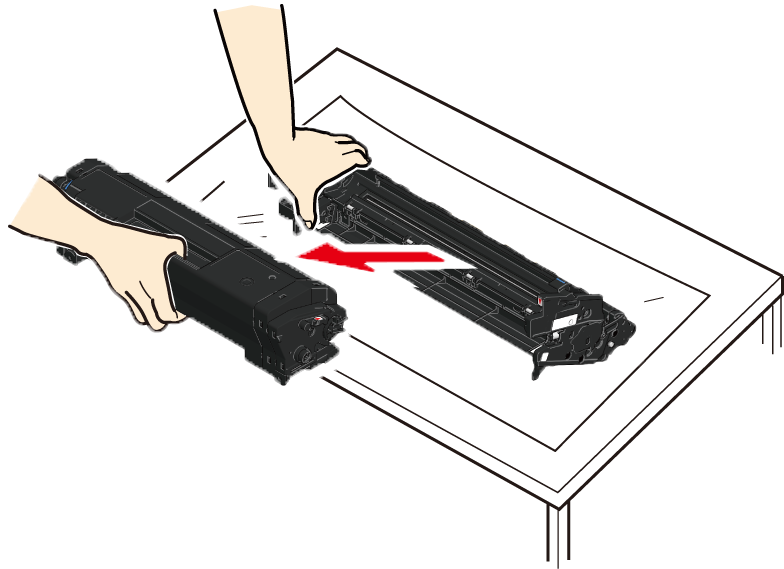
Rotate the blue lever on the left side of the toner cartridge attached to the old image drum in the direction of the unlock mark until it stops.
While pressing down the image drum, pull out the toner cartridge toward you.
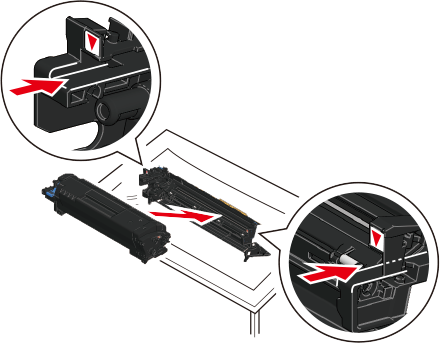
Align the triangular marks on the left and right sides of the toner cartridge with the triangular marks on the new image drum, and install the toner cartridge along the groove of the image drum.
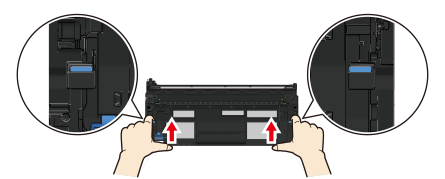
Place your fingers on the left and right protrusions (blue seals) of the image drum and press them firmly into the toner cartridge.
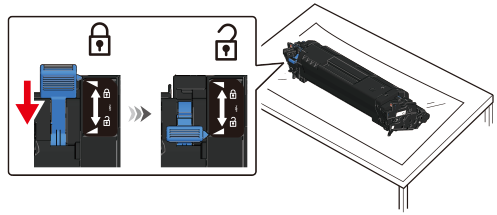
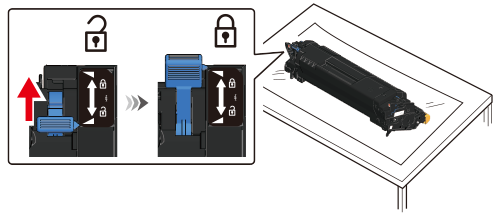
Rotate the blue lever on the left side of the toner cartridge in the direction of the lock mark until it stops.
- If the image drum and toner cartridge are not installed correctly, the toner cartridge lever will not rotate.
Remove the drum cover of the image drum.
Install the toner cartridge and the image drum from diagonally above by holding the toner cartridge.

Check the [Installation position] by the right label on the toner cartridge, and press in the toner cartridge. Check that the triangular marks on the left and right sides of the image drum are all the way in.

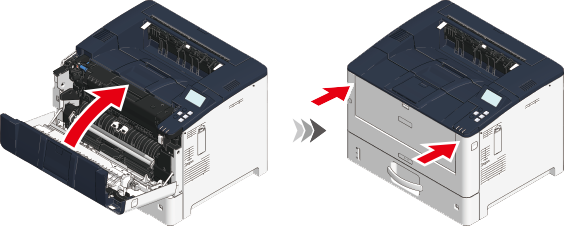
Close the front cover firmly with your both hands.
![]()
- Please support recycling of the used image drum. For details, refer to the separate volume "COREFIDO Guide".