
For macOS
- Check that this machine and the PC are connected, and that the power supply is on.
If you are downloading and installing from the website, download the "Software Package for Mac" and open that file.
If you are using the included DVD, insert the DVD to the PC.- Double-click on the [OKI] icon on the desktop.
- Double-click on [Drivers] - [PS] - [Installer for macOS].
Finish the installation by following the on-screen instructions.
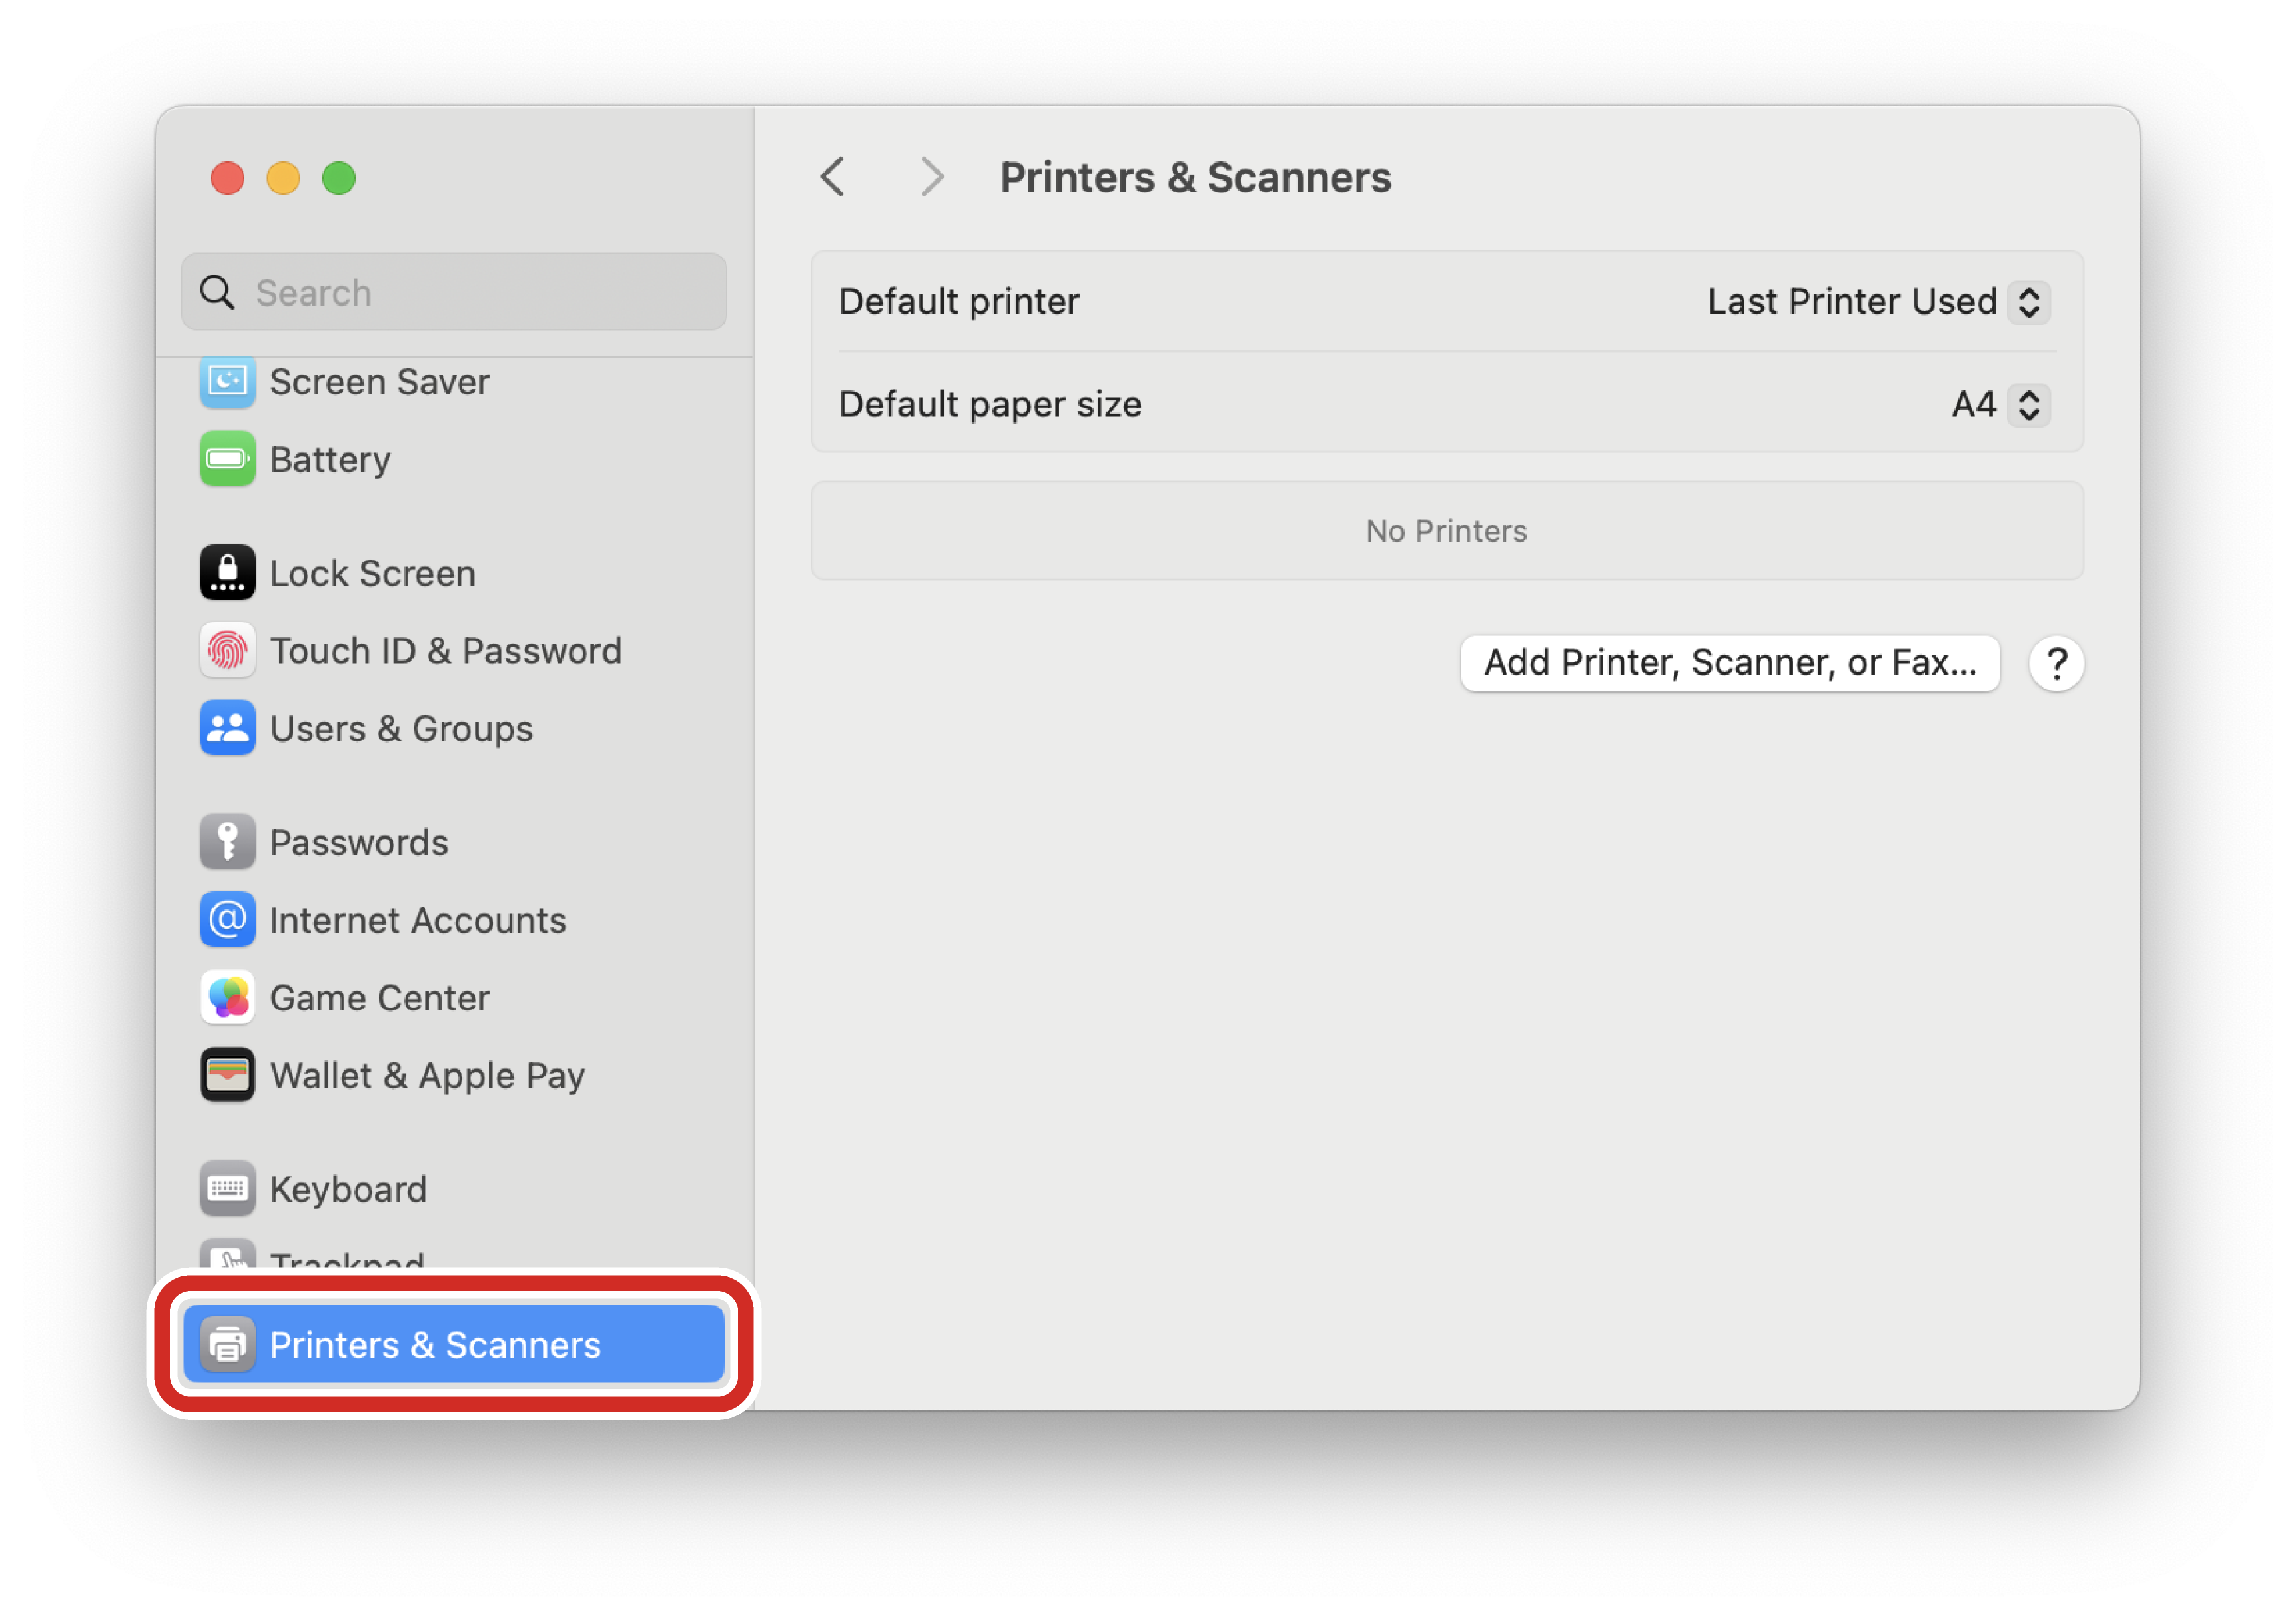
- Select [System Settings] from the Apple menu.
- Click [Printers & Scanners].
Select [Add Printer, Scanner, or Fax].

If it is requested to input the administrator name and password, input them by following the on-screen instructions.
- Click [Default].
Select this machine, then select [Select Software...] from [Use], and select [OKI C651 PS] from the [Printer Software] list.
Connection method
Listed name
Type
Network
OKI-C651 (Last 6 digits of the MAC address)
Bonjour
USB
OKI LTD C651
USB
- The MAC address can be checked by pressing the scroll buttons on the operator panel to print the network information from [Print Information] - [Network].
- To change the name, input a new name to be used in [Name].
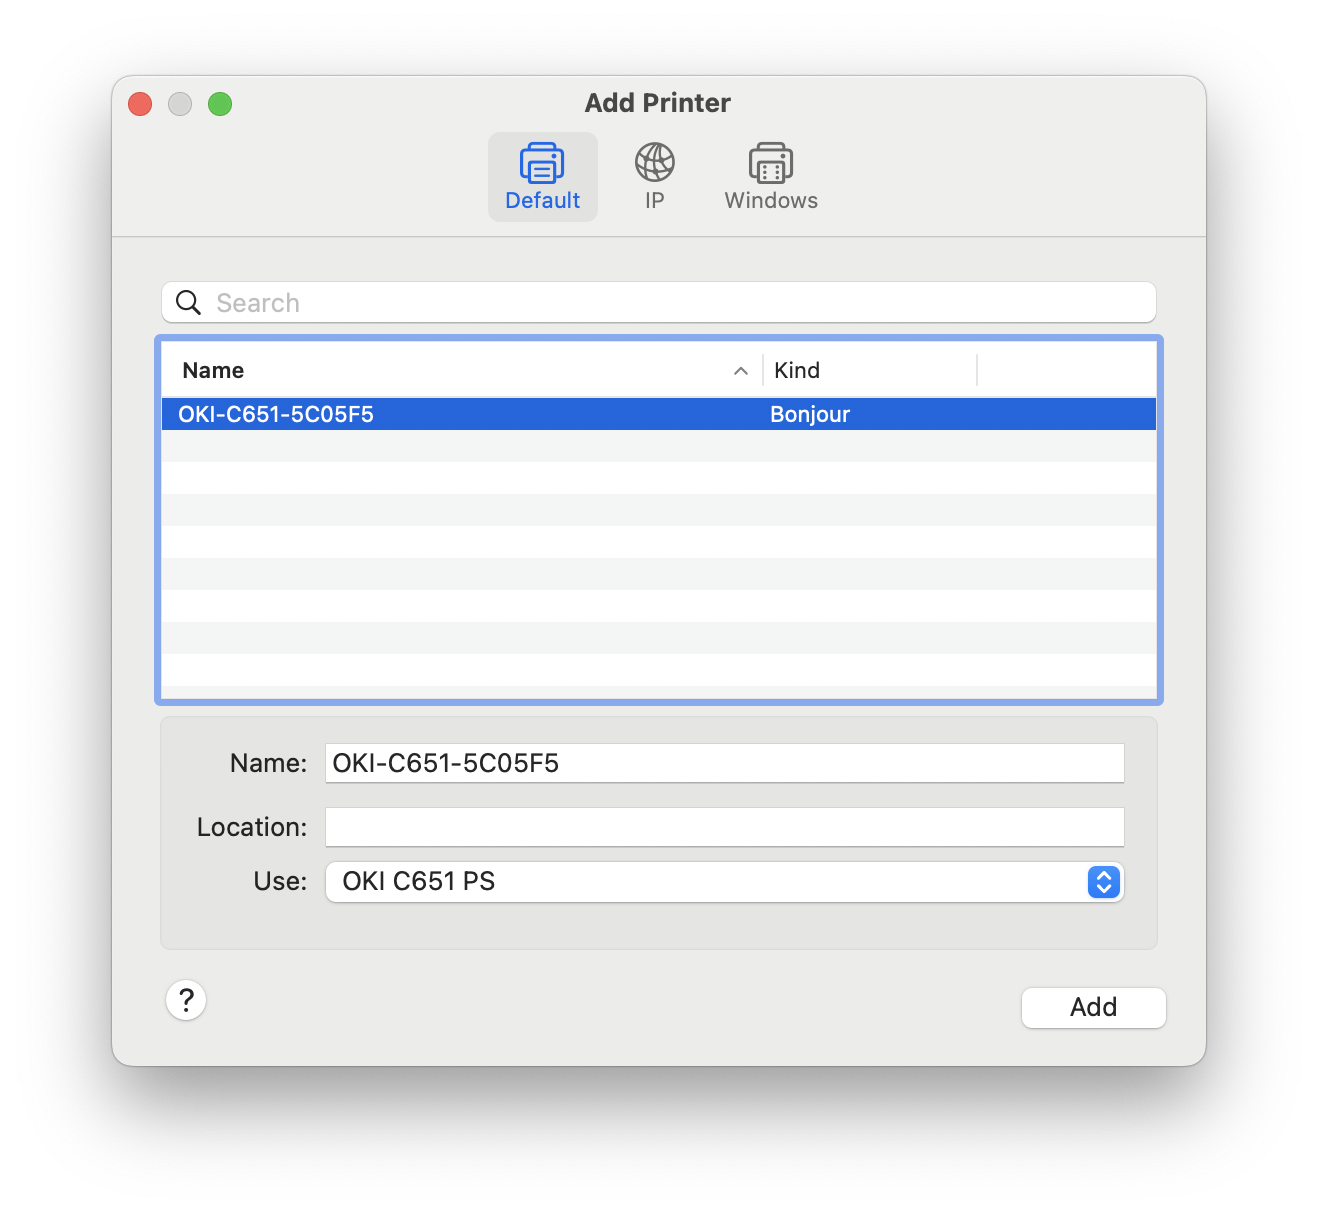
Click [Add].
- If the option confirmation screen appears, click [OK].
Once the machine is added to the [Printers] list, select the machine to display the menu. Make sure that "OKI C651 PS" is displayed in [Kind].
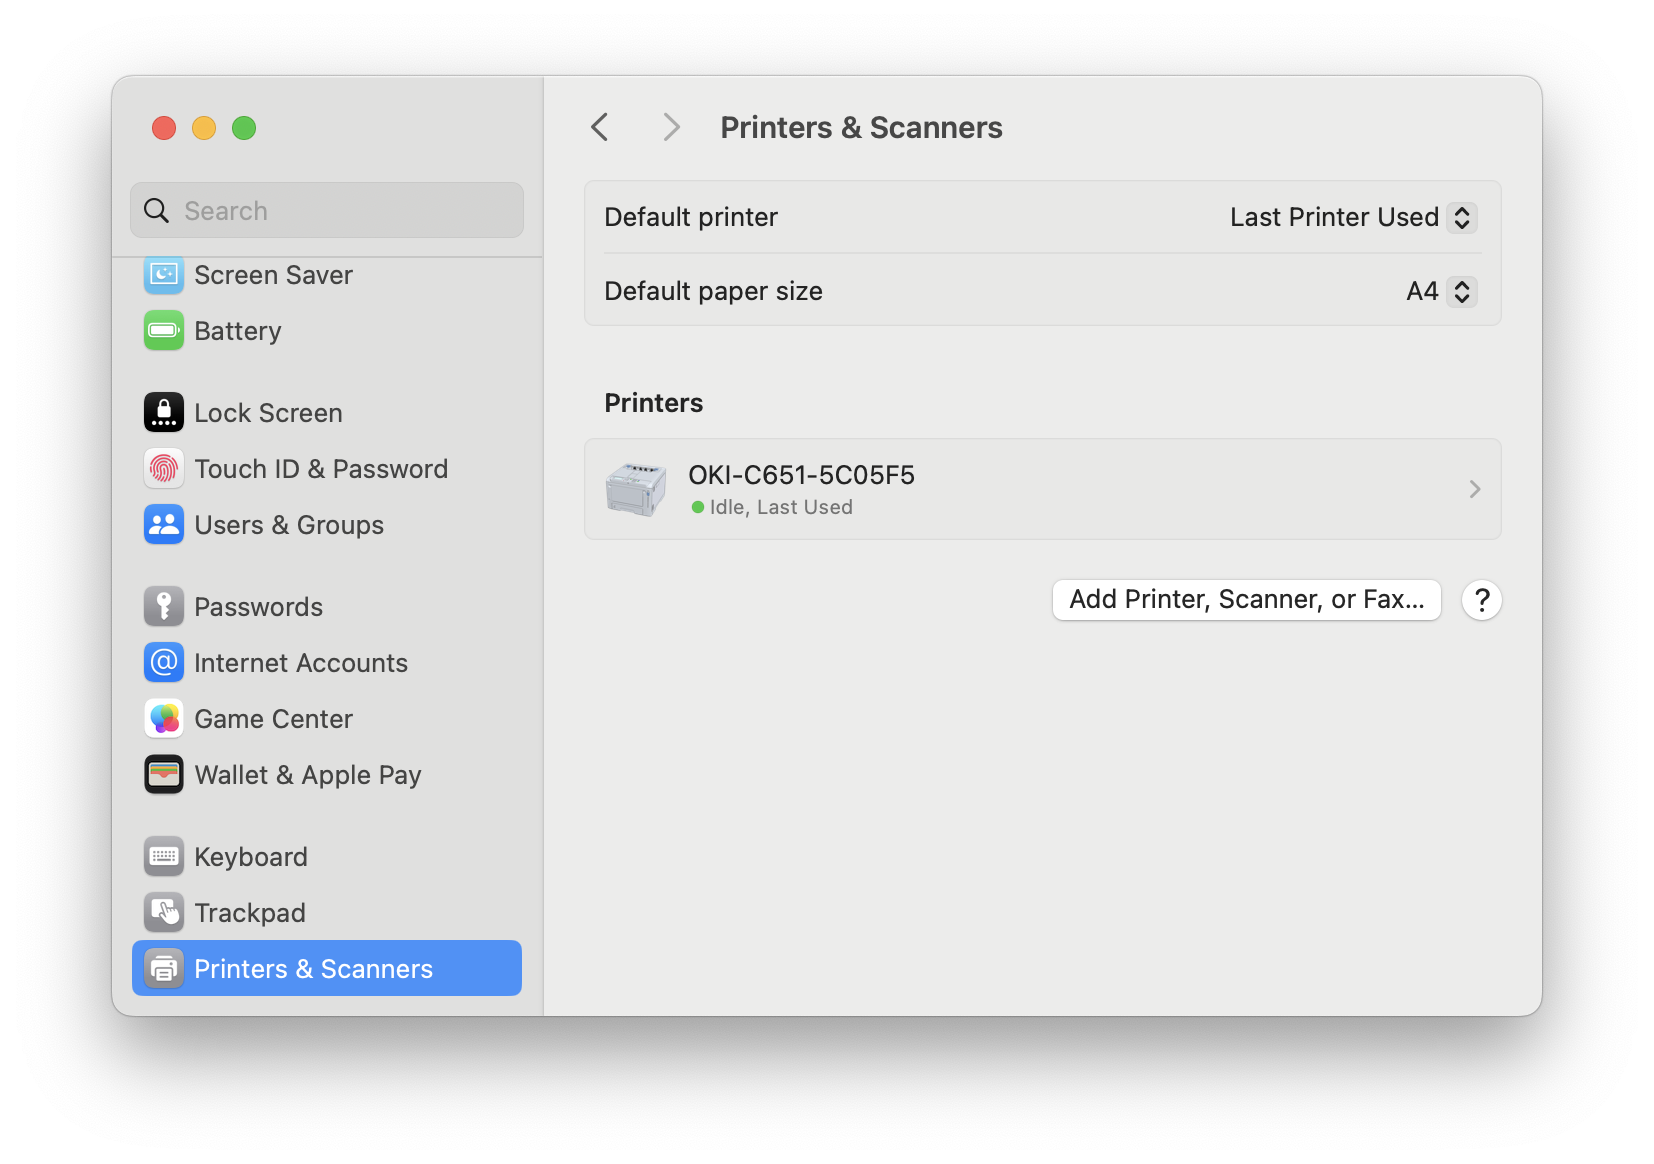

- If "OKI C651 PS" is not displayed in [Kind], select this machine from [Printers] and then click [Delete Printers] to delete it. Then, repeat Steps 8 to 12.
- Click [Print Queue].
- Select [Print Test Page] from the [Printer] menu.
Installation is completed when the test page is printed.
If you install options like the expansion tray unit, change the settings of printer driver.