
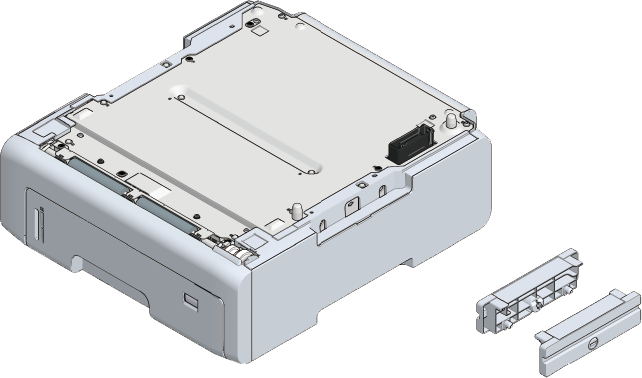
Installing the expansion tray unit
 | Otherwise, injury may be caused. | |
The machine may tip over. Be sure to attach the supplied connecting parts. To use the dedicated caster stand, be sure to mount the anti-tip feet. | ||
Install the expansion tray unit if you want to increase the amount of paper that can be loaded. After installation, set the number of trays in the printer driver.
The expansion tray can be installed up to 3 levels. Be sure to attach the supplied connecting parts.
To install any of the three expansion trays, it is recommended to install the optional dedicated caster stand to avoid the risk of tipping. Be sure to mount the anti-tip feet.
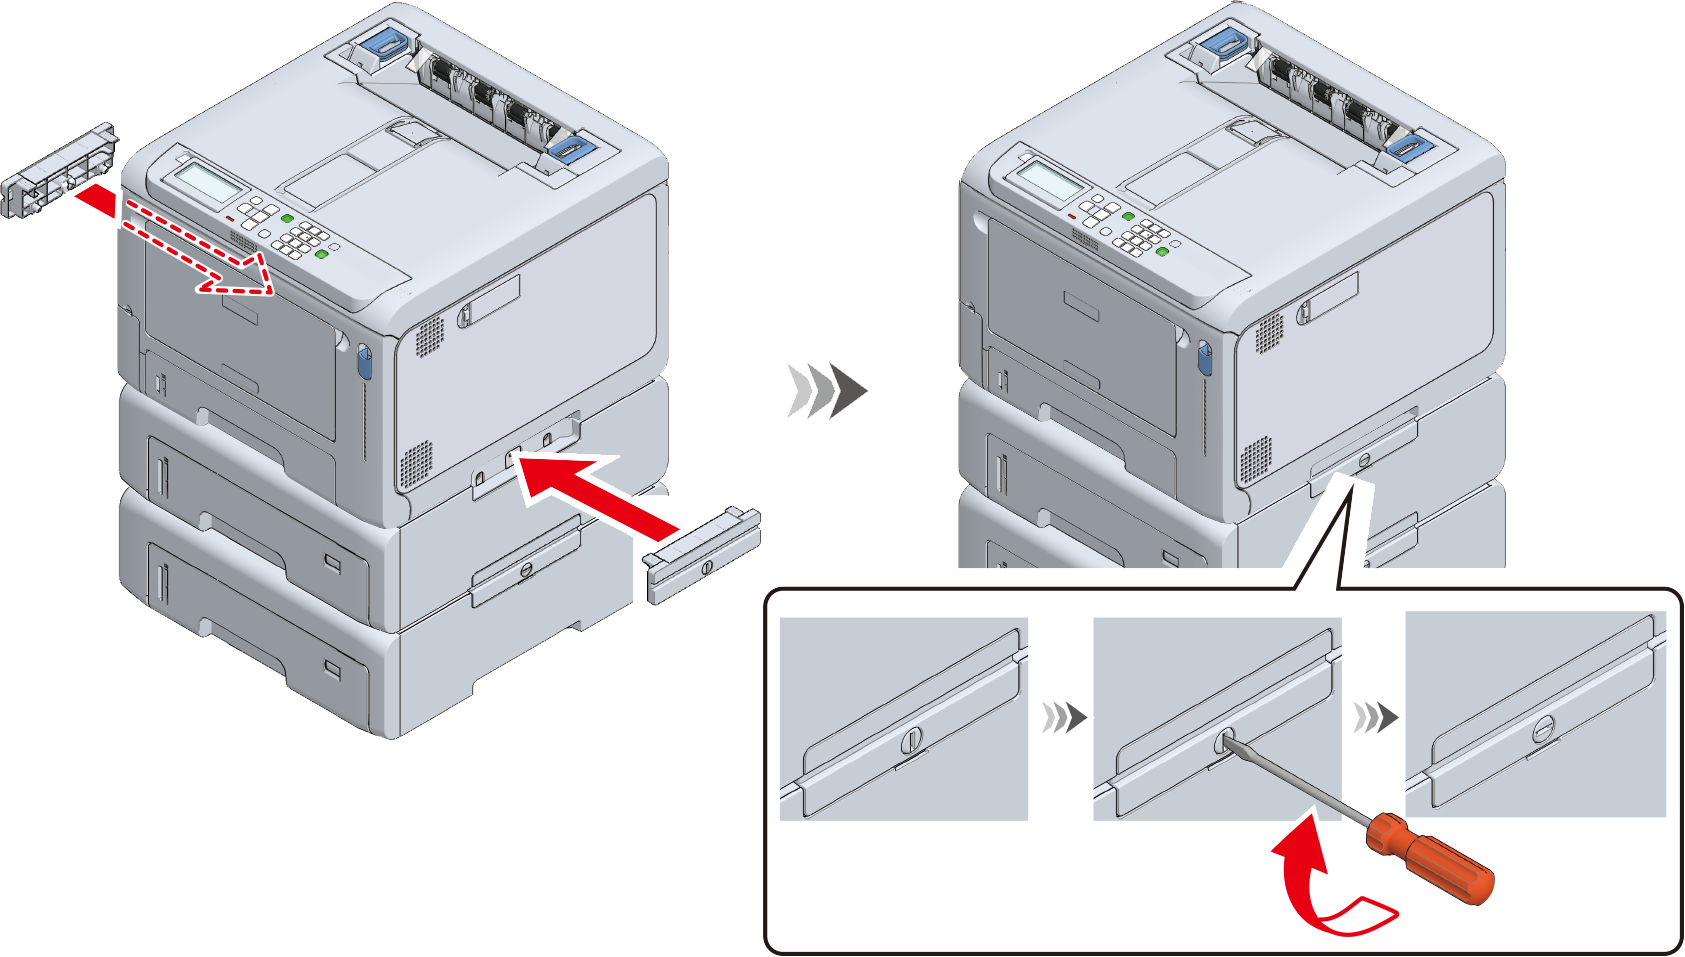
A flat-head screwdriver is required to install the expansion tray unit.
![]()
- The packing case and cushioning materials are required to ship the expansion tray unit. Keep them properly instead of discarding them.
When an extension tray is used to print from, if the printing position shifts, the printing position is corrected for each extension tray. For details, please refer to "Correcting the print position of the tray".
| Otherwise, injury may be caused. | |
This machine weighs approx. 30 kg, so be sure to have it lifted by at least 2 persons. | ||
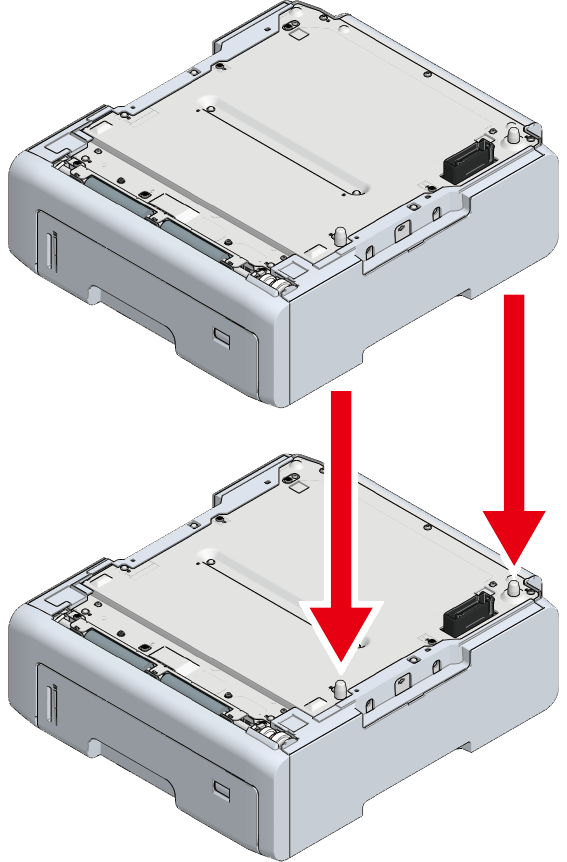
This section describes the installation of two expansion tray units as an example.
Turn off this machine and remove the power cord and all cables.

- Be sure to turn off the power supply, disconnect the power cord and any other cables, and then install the expansion tray unit. If you install the expansion tray unit while the power supply is on, this machine and the expansion tray unit may break down.
- If you install it with any cable connected, you may get injured by getting your feet trapped by the cable.
Install the first expansion tray unit.
On top of the expansion tray unit installed in Step 2, gently stack the other expansion tray unit with the right side and front side aligned so that the holes on the bottom and the protrusions are aligned.
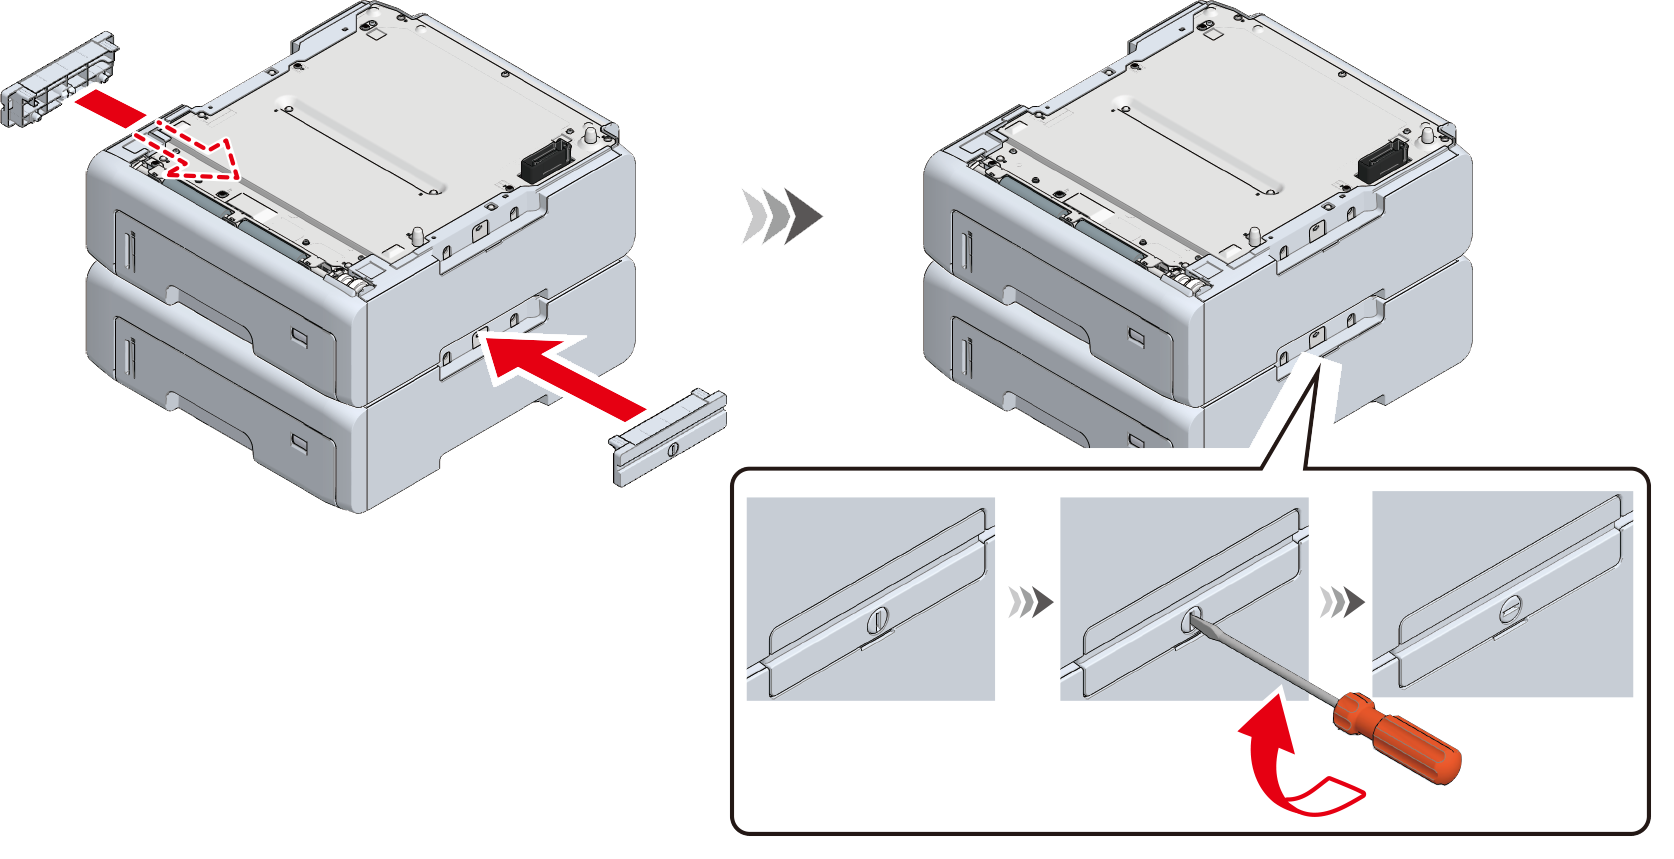
Use a flat-head screwdriver to connect the left and right sides of the stacked expansion tray units with the supplied connecting parts.
Align the right side and front of the main unit and the expansion tray unit, and gently stack them so that the holes on the bottom of the main unit and the protrusions of the expansion tray unit are aligned.
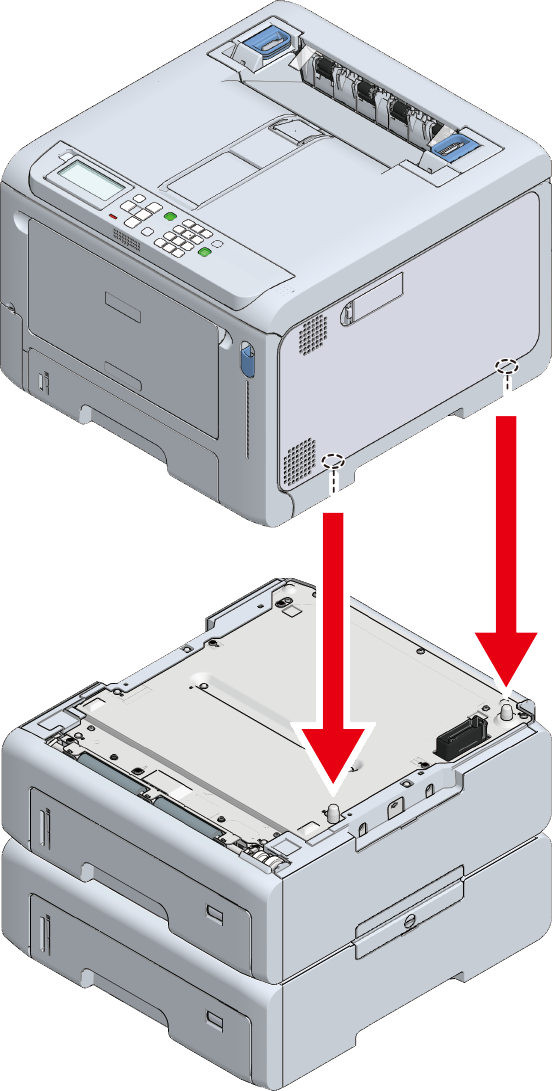
Fix the main unit and the expansion trays by using a flat-head screwdriver.
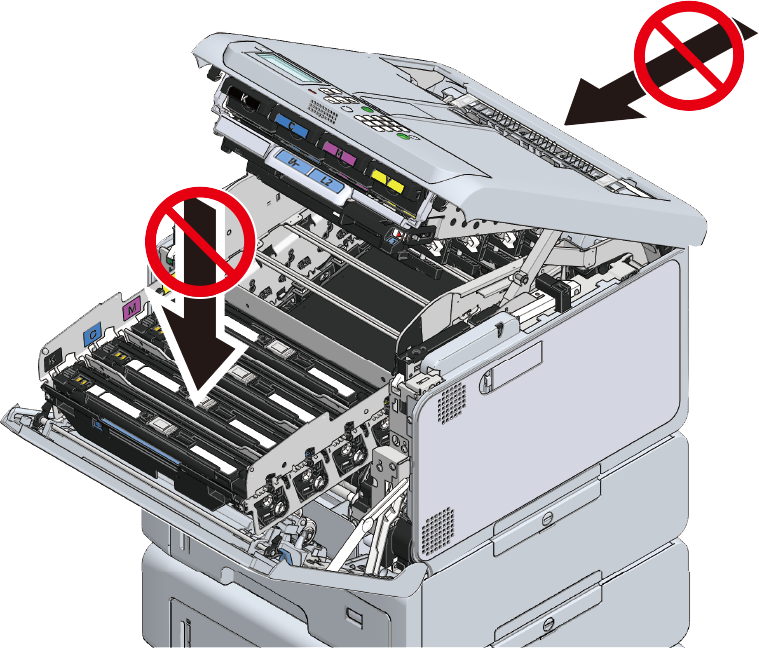
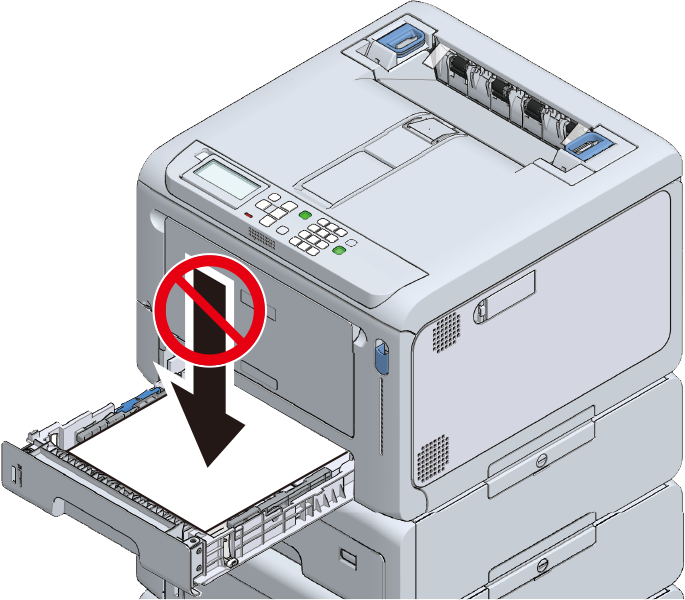
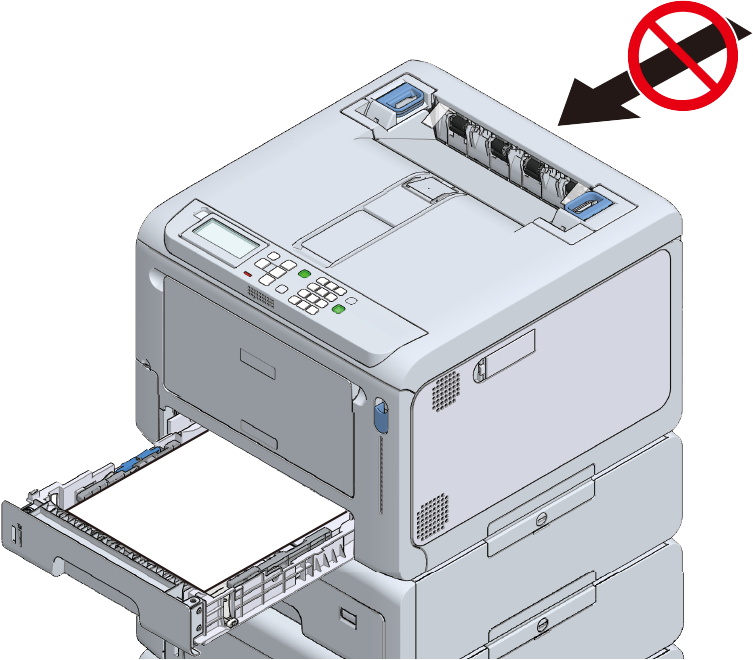
- When moving the machine or replacing consumables or maintenance parts, or loading paper in the tray, check the following points to prevent the printer from tipping over.
Do not press on the back of this machine or the image drum basket when the output tray is open and the image drum is pulled out.
Do not press on the cassette from above when the cassette is pulled out.
Do not press on this machine from the back with the cassette pulled out.
- When moving the machine or replacing consumables or maintenance parts, or loading paper in the tray, check the following points to prevent the printer from tipping over.
Plug the power cord or any removed cables back to the main unit.
Power on this machine.
- Press the scroll button on the operator panel several times to select [Configuration], and press «OK».
- Check that [Tray Count] is selected, and press «OK».
- Check that the expansion tray unit you installed appears on the display.
- After confirming the content, press «ONLINE» to return to the standby screen.
After you have connected you PC and this machine and installed the software, set the expansion tray unit in the printer driver.