
Replacing the fuser unit
For the replacement cycle, please refer to "Fuser unit".
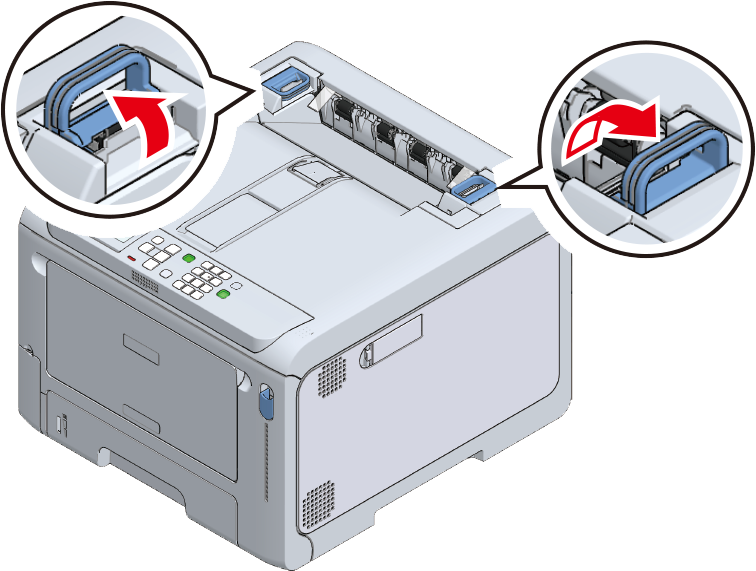
Lift the left and right handles of the fuser unit at the back of the output tray until a noise is heard, and then release the lock.

- The fuser unit cannot be removed unless its handle is raised vertically.
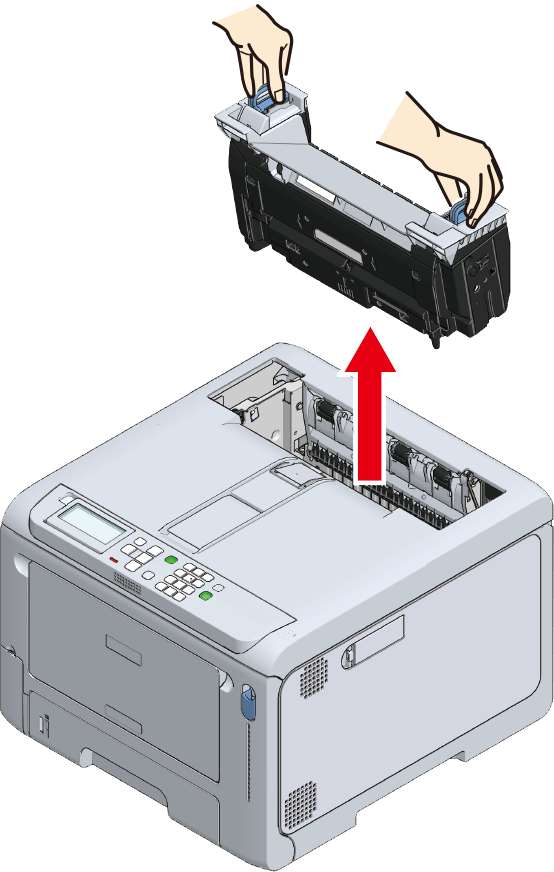
Holding both the left and right handles of the fuser unit, remove the fuser unit from this machine.

Otherwise, burns may be caused. 
When the fuser unit is hot, wait until it cools down before any operation.
- Do not expose this machine with the fuser unit removed to direct sunlight or strong light (approx. 1,500 lux or above). Do not leave it uncovered for more than 5 minutes even under room lighting.
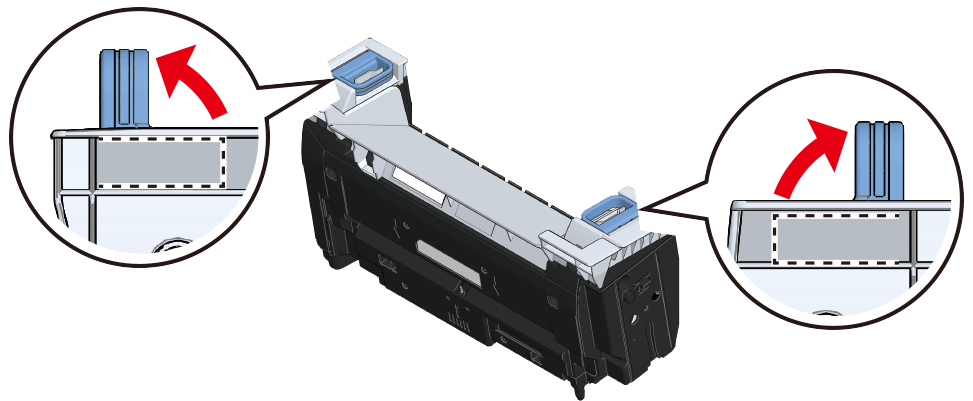
Take the new fuser unit out of its box, and lift the left and right handles up vertically until a click is heard.
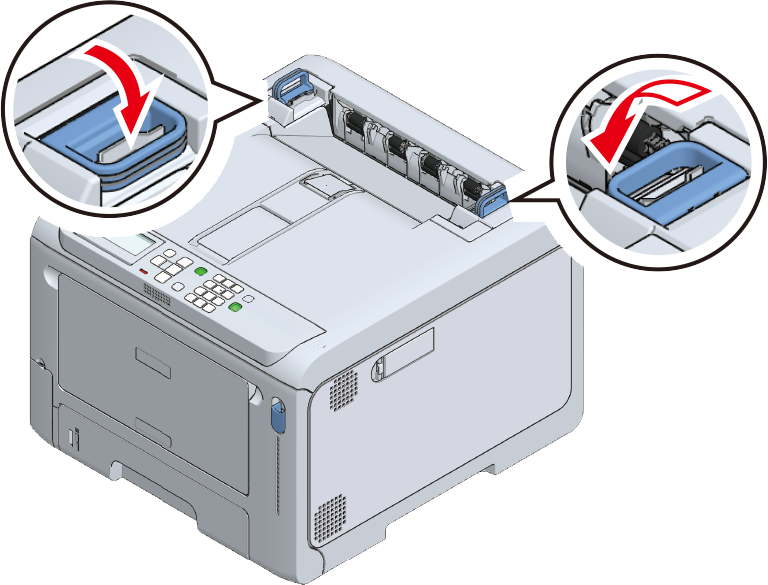
With the warning label of the new fuser unit facing you, hold both the left and right handles and install the fuser unit into this machine.

Push down the left and right handles of the fuser to lock.
- Make sure that the fuser unit does not float from the top of the output tray. If floating, the fuser unit will not be recognized so that it is not possible to start printing.
![]()
- Please support recycling of the used fuser unit.