Setting the printer driver
If an expansion tray unit has been installed, after installing the printer driver, change the settings of the printer driver by the following procedure.
![]()
- To perform this procedure, you will have to login to the PC as a user with administrator privileges.
For the Windows PCL printer driver
Open [Devices and Printers].
- Right-click on the [OKI *** PCL6] icon (where *** is your model name) and select [Printer Properties].
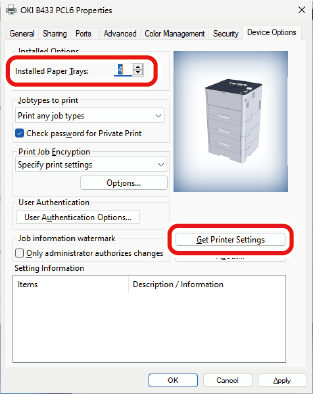
- Select the [Device Options] tab.
Click [Get Printer Settings].
- Click [OK].
For the Windows PS printer driver
Open [Devices and Printers].
- Right-click on the [OKI *** PS] icon (where *** is your model name) and select [Printer Properties].
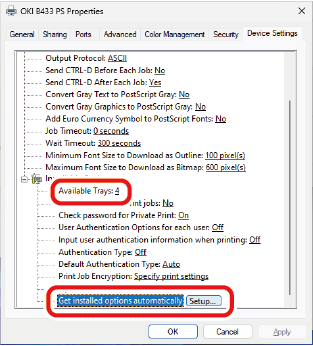
- Select the [Device Settings] tab.
Select [Get installed options automatically] in [Installable Options], and click [Setup].
- Click [OK].
For the macOS PCL printer driver
![]()
- Depending on the timing when the printer is added, the information for the expansion tray unit may have been set.
- Select [System Preferences] from the Apple menu.
- Click [Printers & Scanners].
- Select your model, and click [Options and Supplies].
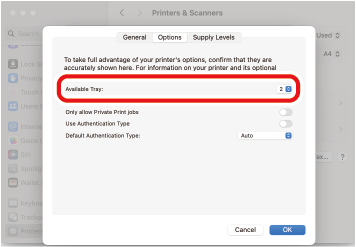
- Select the [Options] tab.
Select the total number of trays from [Available Trays], and click [OK].
For the macOS PS printer driver
![]()
- Depending on the timing when the printer is added, the information for the expansion tray unit may have been set.
- Select [System Preferences] from the Apple menu.
- Click [Printers & Scanners].
- Select your model, and click [Options and Supplies].
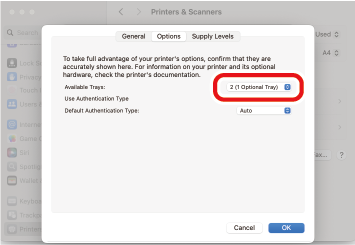
- Select the [Options] tab.
Select the total number of trays from [Available Trays], and click [OK].