
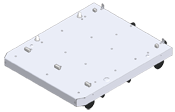
Caster Base is a base with casters for moving the printer.
Stoppers for fall prevention are equipped. When you attach the additional tray units, the use of the caster base is highly recommended.
Note
-
When attaching three or more additional tray units, be sure to install the caster base.
-
The packing box and packing material are required for transporting the caster base. Do not dispose of them, and keep them for future use.

|

|
It may cause injury! |

|
|---|---|---|
|
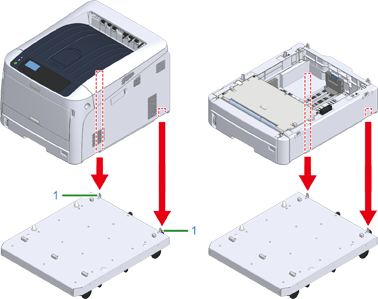
At least two people are needed to lift the printer safely because it weighs about 40 kg. |
||
-
Turn off your printer, and then unplug the AC cord and the Ethernet or USB cable.
Note
-
If you mount the printer with a cable plugged, you may catch your foot on the cable and get injured.
-
-
Place the printer unit or the additional tray unit on the base so that the back of the printer unit or the additional tray unit aligns to the protrusion (1) on the back of the caster base.
-
Connect the printer unit and the caster base or the additional tray unit and the caster base.
The figure shows an example of the additional tray unit and the caster base connected.
-
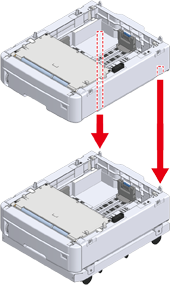
When adding on a further additional tray unit, gently place the unit on top so that the protrusions at the rear of the additional tray unit to be attached are aligned with the back of the additional tray unit that is already connected to the caster base.
-
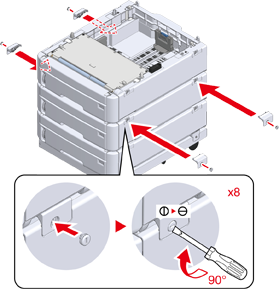
Join the additional tray units together.
-
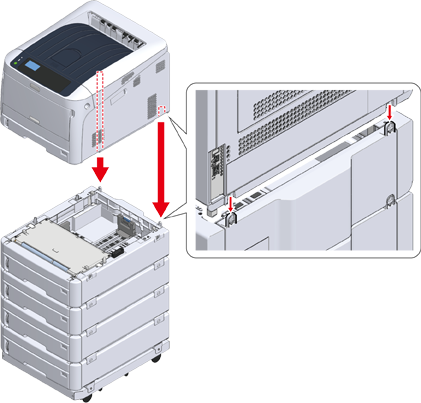
When two or more additional tray units have been attached, gently place the printer unit on top so that the back of the additional tray unit is aligned with the back of the printer unit.
-
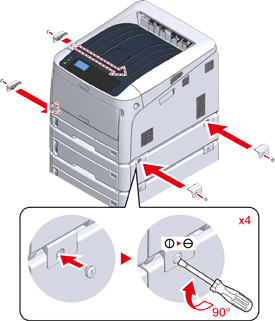
When attaching the additional tray unit, connect the printer unit and the additional tray unit.
-
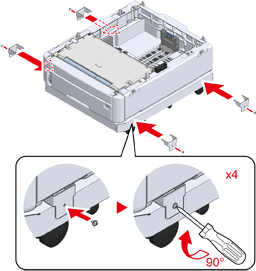
Lock the casters.
-
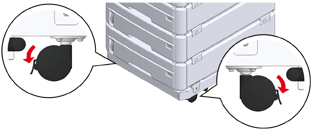
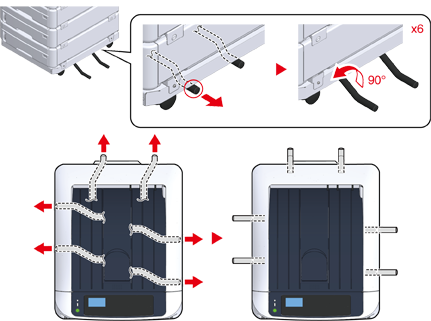
When three or more additional tray units have been attached, pull out the tip-over protection tools before using the printer.
Up to four additional trays may be installed.
How to Use the Tip-over
You can find two tip-over protection tools on the left and right sides of the caster base, and also two tools on its back side. Pull them straight out, then turn them 90° counter-clockwise until they click.
Injury may result.
When the number of additional tray units is three or more, completely pull out the tip-over protection tools. If these tip-over protection tools are not set in place, the printer might tip over and cause an injury.
Note
-
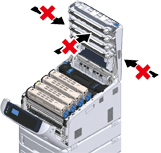
When performing actions such as transporting this machine, replacing consumable and maintenance parts, or setting paper onto the tray, please observe the following precautions to prevent the machine from tipping over.
-
Do not push the output tray when the machine’s output tray is open.
-
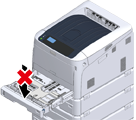
Do not push down on the paper cassette while it is pulled out.
-
Do not push the machine from the behind while the paper cassette is pulled out.

-
-
-
Plug the power cord and the unplugged cables, and then turn on the machine.
After the additional tray unit is mounted, you need to check the mounting status and make the settings of the printer driver.
Refer to “When Adding Options”.