

|
Injury may result. |

|
|---|---|---|
|
Lift this machine by 2 persons, because it weighs approximately 40 kg. |
||
|
|
Burns may result. |

|
|---|---|---|
|
The fuser unit is extremely hot. Do not touch it. |
||
Note
-
Use extra care when handling the image drum (the green cylinder), because it is fragile.
-
Do not expose the image drum to direct sunlight or strong light (approximately 1,500 lux or more). Do not leave the image drum for 5 minutes or more even under room light.
-
Please use the packaging and packing materials that came with the product at the time of purchase.
-
Turn off the machine.
-
Unplug all the cables.
-
Power cord
-
LAN or USB cable
-
-
Remove any paper from the paper cassettes.
-
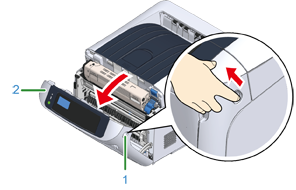
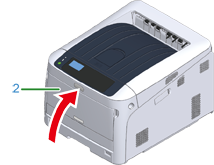
Insert your finger into the recess on the right side of the machine and pull the front cover open lever (1) to open the front cover (2) forward.
-
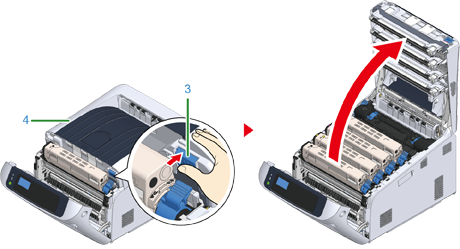
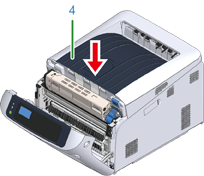
Press the open button (3) and open the output tray (4).
Burns may result.
The fuser unit is extremely hot. Do not touch it.
-
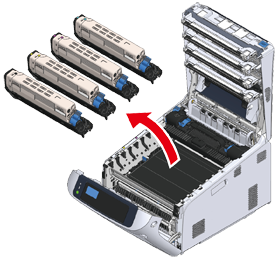
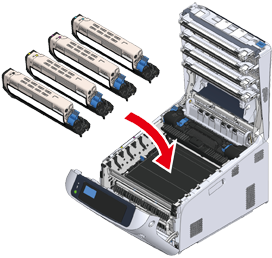
Hold the toner cartridge with both hands and pull it out along with the image drum. Pull out all 4 colors of toner cartridge and image drums, and set it on a flat surface covered with sheets of newspaper, etc.
-
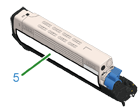
Secure the toner cartridge with plastic tape (5) on each image drum.
-
Put the 4 image drums/toner cartridges into the machine.
-
Close the output tray (4) by pushing the center of the output tray firmly.
-
Close the front cover (2).
Note
-
The front cover cannot be closed securely if the output tray is not closed.
-
-
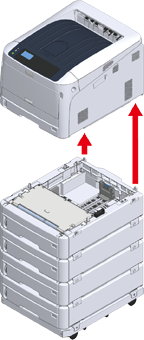
If optional additional tray units are installed, detach the parts connecting the machine and the additional tray units.
Follow the steps for installation in reverse to detach.
Installing the Additional Tray Unit(s)
Note
-
Take care not to lose the connecting parts.
-
Do not yet detach the parts connecting the additional trays.
-
-
Lift the printer up and detach from the additional trays.
Note
-
Pack the printer unit and optional additional tray units separately and transport them.
-
-
Attach the packing material to the machine, and put it in the packing box.
-
If there are multiple additional trays or caster bases installed, detach the parts connecting them and pack together with each connecting part.
Follow the steps for installation in reverse to detach.
Installing the Additional Tray Unit(s)
Note
-
Take care not to lose the connecting parts.
-
Note
-
After transporting the machine, when reinstalling, remove the tape securing the image drums and toner cartridges.