
Before Using WSD Scan
About WSD Scan
This section describes how to set a computer to use the WSD Scan function. To use the WSD Scan function, install the machine to the computer.
You can set WSD Scan from Scan To Computer or Remote Scan via a network.
To use WSD Scan, the machine must be connected to a computer with the following installed via a network: Windows 10/Windows 8.1/Windows 8/Windows Vista/Windows 7/Windows Server 2012/Windows Server 2012 R2/Windows Server 2008/Windows Server 2008 R2
Check the network connection before starting the procedure below.
Setting to Use WSD Scan
To use the Scan To Computer (WSD Scan) function and the Remote Scan (WSD Scan) function via the WSD Scan connection, follow the procedure below.
-
Press [Device Settings] on the touch panel.
-
Press
 or
or  several times to select [Admin Setup].
 -
Enter the administrator name and password and press [OK].
The factory default administrator name and password are "admin" and "aaaaaa" respectively.
-
Press [Scanner Setup].
-
Press [WSD Scan Setup].
-
Check that [WSD Scan] is set to [Enable].
Memo
Pressing [WSD Scan] switches between [Enable] and [Disable].
-
Press [Back] until the home screen is displayed.
Installing This Machine as a WSD Device to a Computer
Install this machine as a WSD Scan device with a Windows computer that supports WSD Scan so that you can use the WSD Scan function.
Note
-
If a computer for WSD Scan recognizes this machine and the IP address of this machine is changed, you must register from the beginning. Uninstall this machine, and then install it again.
-
Before starting this installation, check that Network Search is enabled.
From [Control Panel], click [Network and Internet] > [Network and Sharing Center] > [Change advanced sharing settings], select [Turn on network discovery] for [Network discovery], and then click [Save Changes].
Memo
You can register up to 50 computers in this machine.
Installing This Machine in a Computer
-
Select [Computer] on the [Start] menu and select [Network].
The devices that are connected to the network are displayed.
-
Right-click the MC873 icon under [Multifunction Devices], and then select [Install].
If the [User Account Control] dialog box is displayed, click [Yes].
-
When a balloon message is displayed to inform you that the installation is complete on the task bar, click the balloon to check the details, and then click [x (Close)].
Check the device installation on the machine as follows.
Checking That the Machine is Connected to a Computer
-
Press [Scan] or the
 (SCAN) button.
 -
Press [Scan To Computer].
-
Press [Select A Connecting PC].
-
Press [From WSD Scan].
-
Check that a computer is displayed on this machine as a connection destination of WSD Scan.
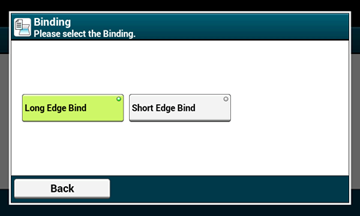
Setting a Binding Position for Duplex Scanning
To set a binding position for duplex scanning with Scan To Computer and Remote Scan via WSD Scan, follow the procedure below.
-
Press [Device Settings] on the touch panel.
-
Press
or several times to select [Admin Setup]. -
Enter the administrator name and password and press [OK].
The factory default administrator name and password are "admin" and "aaaaaa" respectively.
-
Press [Scanner Setup].
-
Press [WSD Scan Setup].
-
Press [Binding].
-
Select a binding position.
-
Press [Back] until the home screen is displayed.