
JOB MACRO
You can register macros for frequently used function settings for copying, scanning, faxing, Internet faxing, and printing in the machine and create shortcuts. This "Job Macro" allows you to perform operations more simply and quickly.
You can create a macro for settings on the following functions.
-
Copying
-
Printing from USB Memory
-
Scanning to e-mail
-
Scanning to network PC
-
Scanning to USB Memory
-
Fax Sending
-
Internet Fax Sending
-
Scanning to Fax Server
Note
If the user authentication is enabled, log in to the machine before creating or editing a macro.
Memo
You can register up to 16 macros.
Registering a Frequently-used Setting as a Macro
You can create a macro for a frequently-used setting.
Registering Newly
-
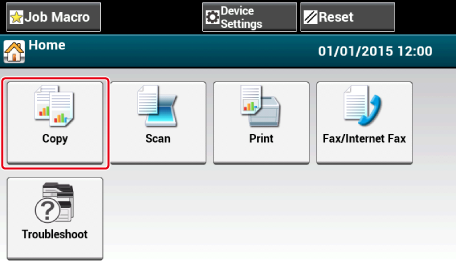
Press [Copy] on the touch panel.
-
Press [Job Macro] on the touch panel.

Memo
The Job Macro list screen also appears if [Register to Job Macro] is pressed in the following operation procedure. In this case, proceed to step 4.
Function
Display on the touch panel and operation procedures
Copy
[Basic] tab > [Register to Job Macro]
Scan To E-mail
[Basic] tab > [Register to Job Macro]
Scan To USB Memory
[Scan To USB Memory] tab > [Register to Job Macro]
Scan To Computer
[Basic] tab > [Register to Job Macro]
Print from USB Memory
[Register to Job Macro]
Fax Sending
[Basic] tab > [Register to Job Macro]
Internet Fax Sending
[Basic] tab > [Register to Job Macro]
Scanning to Fax Server
[Basic] tab > [Register to Job Macro]
-
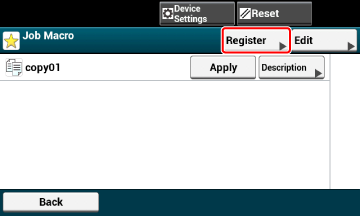
Press [Register] in the Job Macro list screen.
-
Check the setting, and then press [Yes].
-
Enter a new macro name.
-
Press [OK].
A confirmation screen is displayed.
Using a Registered Macro
You can use a macro by reading out it.
-
Press [Job Macro] on the touch panel.
-
Select a macro to use, and then press [Apply].
If the access control is enabled on the functions you want to use, a message is displayed to inform you that you are not permitted to use them, and the screen returns to the JOB MACRO menu.
-
Perform a job.
Editing a Macro Title
You can edit a macro title.
-
Press [Job Macro].
-
Press [Edit].
-
Select a macro, and then press [Title Edit].
-
Enter a new title.
-
Press [OK].
Checking the Macro Content
-
Press [Job Macro].
-
Select a macro, and then press [Description].
-
Check the content, and then press [Back].
If you press [Apply] instead of [Back], the macro is applied.
Deleting a Registered Macro
You can delete a macro.
-
Press [Job Macro].
-
Press [Edit].
-
Select a macro, and then press [Delete].
A confirmation screen is displayed.
-
Press [Yes].
JOB MACRO (Web Browser)
This machine is equipped a web browser on the touch panel. The browser helps you access web application running on the server to use various solutions.
The affiliate software vendors offer the web application which becomes available only if you make an agreement with the vendor and install it. The application created based on our solution platform (smart Extendable Platform(sXP)) to run on the server is called sXP application.
The sXP application operation screens are displayed on the web browser of the machine. To open the sXP application operation screen, register the URL for the sXP application and call from JOB MACRO.
The web browser on the machine is only for using the sXP application.
Memo
The sXP application can offer solutions which manage printing process, digitalize paper documents to systematize work, etc.
Registering sXP Application
The sXP application can be registered on the Web page of this machine.
-
Open the Web page of this machine.
-
How to log in to the Web page
Checking or Changing the Settings of This Machine from a Computer
-
-
Log in as the administrator.
-
Click [sXP Application].
-
Click [+].
-
Enter "Application Name" and "URL Address", and then click [OK].
The application name set here is registered as a job macro name and is displayed in the Job Macro list.
Memo
-
"Application Name" and "URL Address" used when registered are regulated by the sXP application supplier.
-
For the "URL Address", always enter the complete address.
-
If "Web browser" is set as the default mode of the machine, the selected sXP application will be displayed on "Default Mode". To set on "Default Mode", select the radio button for sXP application and click [OK].
Starting the Registered sXP Application
You can start the registered sXP application.
The registered sXP application is saved in Job Macro. Refer to "Using a Registered Macro".
Editing the Name and URL of sXP Application
The name and URL of sXP application can be edited from the Web page of this machine.
-
Open the Web page of this machine.
-
How to log in to the Web page
Checking or Changing the Settings of This Machine from a Computer
-
-
Log in as the administrator.
-
Click [sXP Application].
-
Click the application name you want to edit.
-
Edit "Application Name" and "URL Address" and click [OK].
Deleting the Registered sXP Application
The sXP application can be deleted on the Web page of this machine.
-
Open the Web page of this machine.
-
How to log in to the Web page
Checking or Changing the Settings of This Machine from a Computer
-
-
Log in as the administrator.
-
Click [sXP Application].
-
Select the check box for the application name you want to delete.
-
Click [Delete].