
Installing the Additional Tray Unit(s) to the Machine
If you want to load more paper, install additional tray units. You must set the printer driver after installing.
Installing the Additional Tray Unit(s)
|
Additional Tray Unit |
Cabinet |
Caster Base |
|---|---|---|

Model Number: N35110A |

|

|
Note
Be sure to turn the machine off and unplug the power cord and all the cables before installing the additional tray. Installing the additional tray with the machine turned on may cause the machine and additional tray to malfunction.
Available Combinations
|
Machine + Cabinet |
|
Machine + Additional Tray + Cabinet |
|
Machine + Additional Tray + Additional Tray + Caster Base |
|
Machine + Additional Tray + Additional Tray + Additional Tray + Caster Base |
This section describes how to install three additional trays as an example.
If you use the cabinet, install in the same manner.

|
Injury may result. |

|
|---|---|---|
|
Lift this machine by 3 persons, because it weighs approximately 64 kg. |
||
-
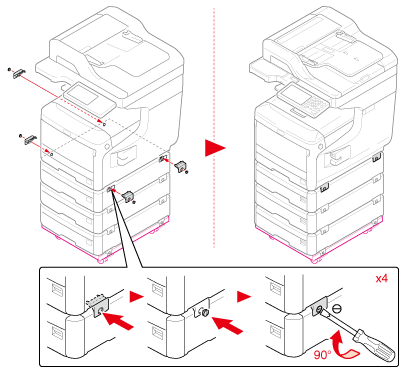
Stack 3 additional trays on the caster base aligning a back side of each tray.
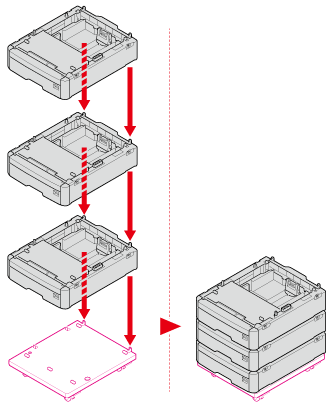
-
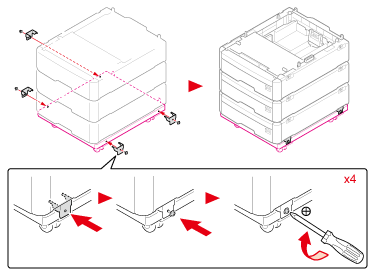
Screw the additional trays on the caster base.
-
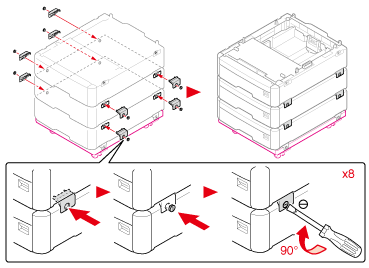
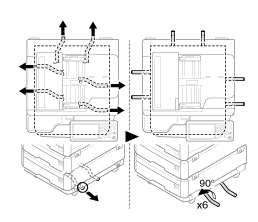
Join the additional trays.
-
Place the machine on the additional trays gently aligning the back sides of the machine and the additional trays.
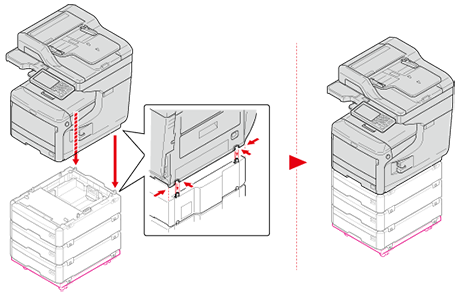
-
Join the machine and additional trays.
-
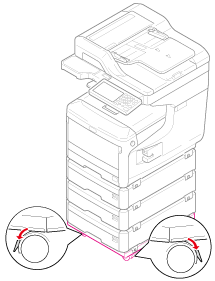
Lock the casters.
-
Set the tip-over protection tools.
You can find two tip-over protection tools on the left and right sides of the caster base, and also two tools on its back side. Pull them straight out, then turn them 90° counter-clockwise until they click.
-
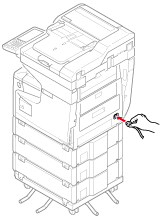
Plug the power cord and the unplugged cables.
-
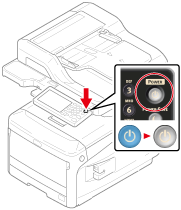
Press the power switch for approximately a second.
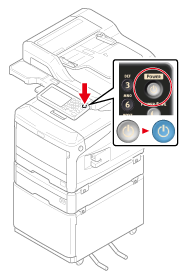
When the machine is turned on, the power switch LED lamp is lit.

Note
-
Do not push the machine with the ADF or scanner unit open.
-
Do not apply force from above to the cassettes when they are pulled out.
-
Do not push the machine from the back with the cassettes pulled out.
-
Setting the Printer Driver
If the additional tray unit(s) are installed, set the tray(s) to a printer driver.
Note
-
To follow this procedure, you must log in to a computer as the administrator.
-
If your Mac OS applies to the following conditions, the information about the installed option is automatically obtained, not requiring you to set the printer driver.
If the USB connection or the network connection with Bonjour is used and you install the option to the machine before installing the driver
-
The Windows XPS printer driver is not available with Windows Server 2003.
-
You must register the printer driver in the computer in advance.
Setting Additional Tray(s) to the Windows PCL Printer Driver
-
Click [Start], and then select [Devices and Printers].
-
Right-click [OKI MC873], and then select [OKI MC873(PCL6)] from [Printer properties].
-
Select the [Device Options] tab.
-
Enter the total number of trays and then click [OK].
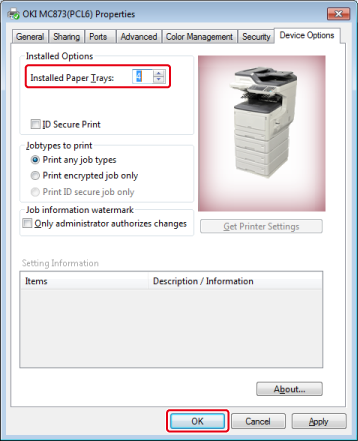
Memo
If a TCP/IP network connection is used, click [Get Printer Settings] to set the driver automatically.
Setting Additional Tray(s) to the Windows XPS Printer Driver
-
Click [Start], and then select [Devices and Printers].
-
Right-click [OKI MC873], and then select [OKI MC873(XPS)] from [Printer properties].
-
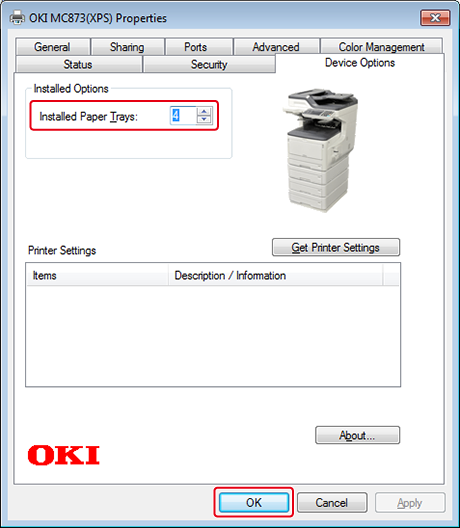
Select the [Device Options] tab.
-
Enter the total number of trays and then click [OK].
Setting Additional Tray(s) to the Windows PS Printer Driver
-
Click [Start], and then select [Devices and Printers].
-
Right-click [OKI MC873], and then select [OKI MC873(PS)] from [Printer properties].
-
Select the [Device Settings] tab.
-
Select [Get installed options automatically] for [Installable Options], and then click [Setup].
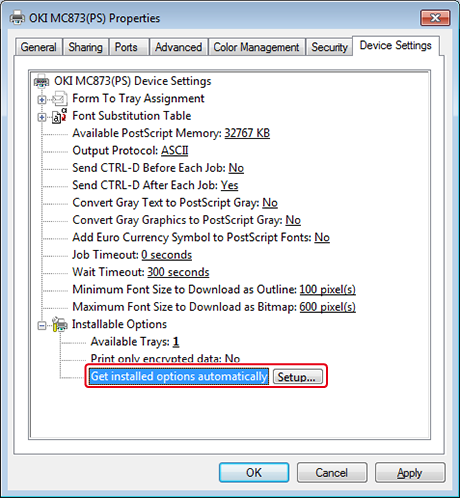
Memo
When using a USB connection, select the total number of trays for [Available Trays] in [Installable Options].
-
Click [OK].
Setting Additional Tray(s) to the Mac OS X Printer Driver
-
Select [System Preferences] from the Apple menu.
-
Click [Print & Scan].
-
Select the machine, and then click [Options & Supplies].
-
Select the [Driver] tab.
-
Select the total number of trays for [Available Tray], and then click [OK].
