Installing a Driver and Software to a Computer
When using the print, scan, and fax functions of this machine from your computer, you must install the printer driver, scanner driver, and fax driver that meet your computer.
Install the driver with the "Software DVD-ROM".
You can install other utility software besides drivers using the "Software DVD-ROM".
For the utility software that can be used on the machine, refer to the following.
For Windows
Connect this machine to the Internet or connect to a computer with a USB cable, and then start installing.
Note
Check the status of this machine before installing. This machine is turned on. For network connection, this machine is connected to the network via a network cable and required information such as IP address is already set. USB connection is disabled by factory default. You need to change the USB mode setting before connecting this machine to a computer with a USB cable. Select [AdminSetup] - [Manage Unit] - [Local Interface] - [USB Menu], and then change [USB Assignment] from [IPP] to [Legacy], and then connect the computer and the machine via a USB cable.
-
Insert the included "Software DVD-ROM" into a computer.
-
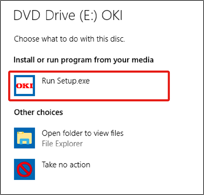
When [Auto Play] is displayed, click [Run setup.exe].
Memo
If the [User Account Control] dialog box is displayed, click [Yes].
-
Select a language from the drop-down list.
-
Read the license agreement, and then click [Accept].
-
Read [Environment advice], and then click [Next].
-
Select [Network(Wired/Wireless)] or [USB] in accordance to the connection method of the machine and computer, and then click [Next].
Memo
If the [Windows Security Alert] dialog box is displayed, click [Allow access].
-
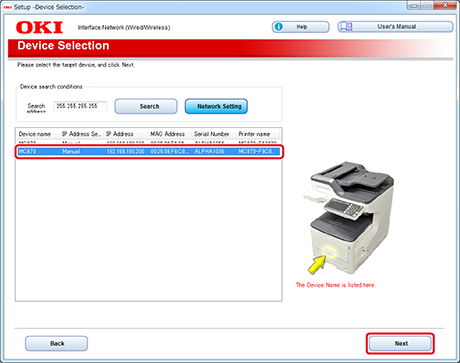
Select the model name of the machine, and then click [Next].
-
Click [Install Optional Software].
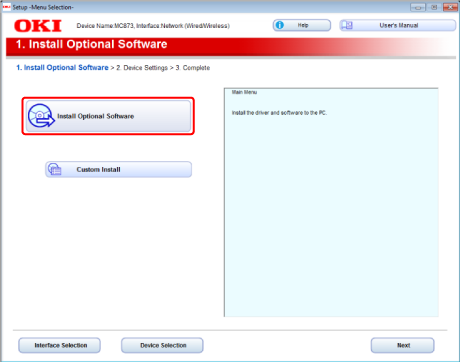
Installation starts.
Memo
The following software is installed.
-
PCL6 Printer Driver
-
Scanner Driver
-
ActKey
-
FAQ
Install other software from Custom Install.
-
-
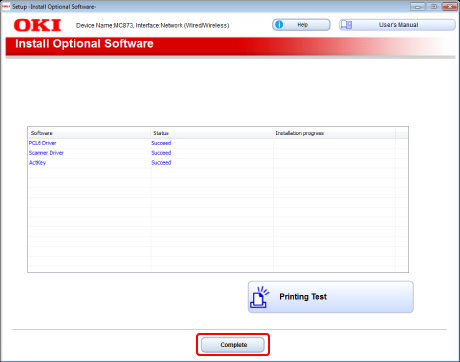
Make sure that the software is successfully installed, and then click [Printing Test].
-
Select the printer for test printing, and the click [Printing Test].
-
Make sure that the test printing was successful, and then click [OK].
-
Click [Complete].
-
Click [Next].
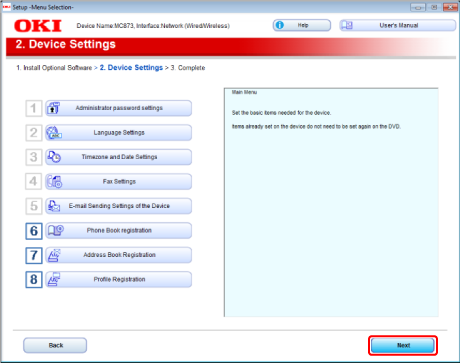
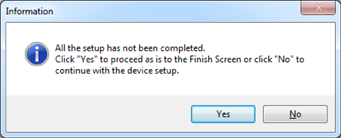
If the following dialog box is displayed, click [Yes].
-
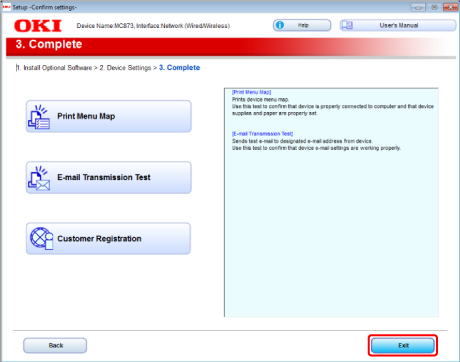
Click [Exit].
For Mac OS X
This section describes how to install the PS printer driver and scanner driver.
For installation of utilities, see the following.
Note
USB connection is disabled by factory default. You need to change the USB mode setting before connecting this machine to a computer with a USB cable. Select [AdminSetup] - [Manage Unit] - [Local Interface] - [USB Menu], and then change [USB Assignment] from [IPP] to [Legacy].
Install the Mac OS X scanner driver.
-
Make sure that the machine and a computer are connected and the machine is turned on, and then insert the included "Software DVD-ROM" into the computer.
-
Double-click the [OKI] icon on the desktop.
-
[Drivers] > [Scanner] > Double-click [Installer for OSX10.8-10.10] or [Installer for OSX10.6-10.7] in accordance to your Mac OS X version.
-
Click [Continue].
-
Click [Continue].
-
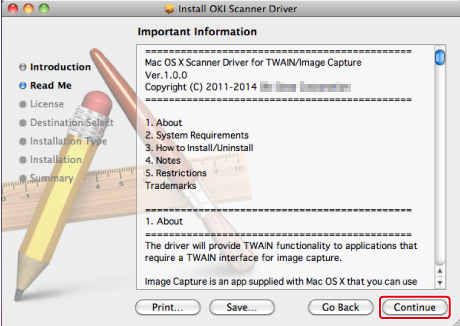
Check that the displayed content, and then click [Continue].
-
Read the license agreement, and then click [Continue].
-
Click [Agree].
-
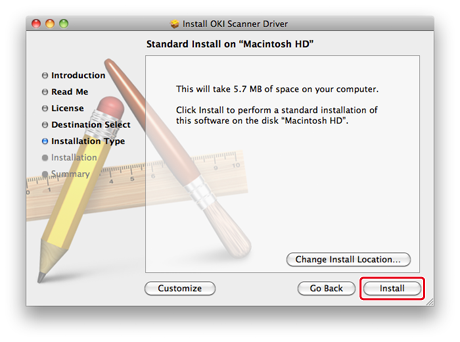
Click [Install].
To change the driver installation location, click [Change Install Location].
-
Enter the administrator name and password, and then click [OK].
-
Click [Continue Installation].
-
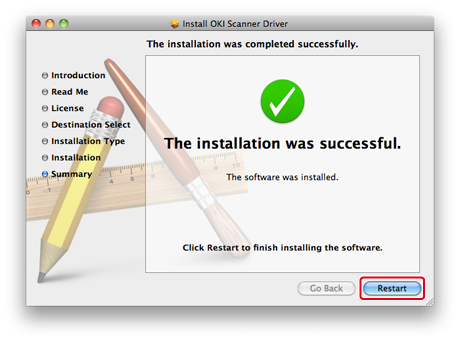
Click [Restart].
Install the Mac OS X printer driver.
When the installation is complete, print a test page in step 14.
-
Make sure that the machine and a computer are connected and the machine is turned on.
-
Insert the "Software DVD-ROM" into a computer.
-
Double-click the [OKI] icon on the desktop.
-
[Drivers] > [PS] > Double-click [Installer for OSX].
-
Enter the administrator password, and then click [OK].
Follow the on-screen instructions to complete the installation.
-
Select [System Preferences] from the Apple menu.
-
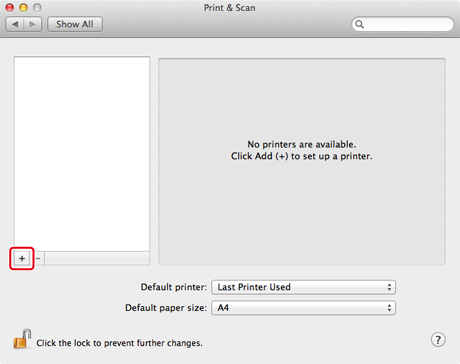
Click [Print & Scan].
-
Click [+]. Select [Add Printer or Scanner...] when the menu is displayed.
-
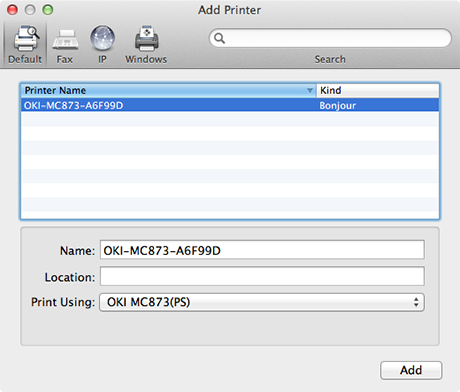
Click [Default].
-
Select the machine , and then make sure that [OKI MC873(PS)] is displayed for [Use].
Types of Names
Displayed in the Connection
Methods List
Network
OKI-MC873 (last 6 digits of MAC address)
Bonjour
USB
OKI DATA CORP MC873
USB
Memo
To change the name, enter a new name into [Name:].
-
Click [Add].
-
When the confirmation dialog box is displayed, click [OK].
-
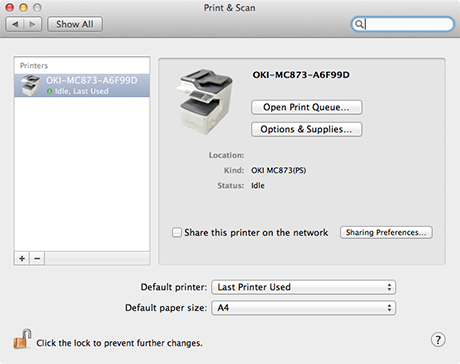
Make sure that the machine is added to [Printers] and [OKI MC873(PS)] is displayed for [Kind].
Note
If [OKI MC873(PS)] is not displayed for [Kind] correctly, click [-], delete the machine from [Printers], and then perform steps 8 to 12 again.
-
Click [Open Print Queue...].
-
Select [Print Test Page] from the [Printer] menu.

