
How to Use Scan To Computer
To use Scan to Computer, you must prepare the following:
The procedure depends on the operation system of your computer and connection method.
On the Windows computer, Scan To Computer function can be used with ActKey or WSD Scan.
See the following:
Using ActKey (Windows)
Using WCD Scan
If you use Mac OS X, you can use Image Capture.
See the following:
Using Image Capture (Mac OS X)
Using ActKey (Windows)
You can use ActKey to display the scanned image on an application, save the image in a folder, or start a fax transmission application.
Memo
-
If you use ActKey via network, start Network Configuration in advance.
-
Click [Start], and then select [All Programs] > [Okidata] > [ActKey] > [Tools] > [Network Configuration].
-
Press [Scan] or
 (Scan).
 -
Set a document in the ADF or on the document glass.
-
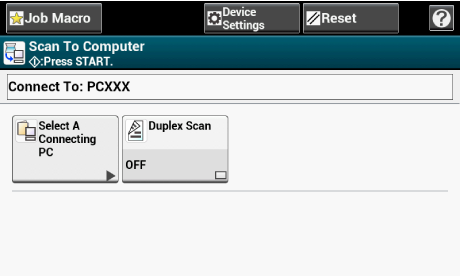
Press [Scan To Computer].
If [Select A Connecting PC] does not appear, proceed to step 7.
-
Press [Select A Connecting PC].
-
Press [From Network] or [From USB Interface] in accordance with the connection method of the machine and computer.
-
For the network connection, select a destination computer to which the data is sent.
If the targeted computer is not displayed, register the computer to the machine.
-
Press [Select An Application].
Memo
-
If you select [Application], the application that you specify [Application-1] of ActKey or dedicated application for Windows starts, and then the scanned image is displayed on the application.
-
If you select [Folder], the scanned document is saved in the specified folder.
-
If you select [PC-FAX], a fax transmission application starts. After sending the scanned document, send a fax with the fax transmission application on your computer.
-
-
Select the destination.
-
Press
 (START).
ActKey starts automatically, and then the scanner driver starts scanning.
Using WCD Scan
Memo
-
To start duplex scanning, turn the setting on, and then set a document in the ADF. The machine cannot scan the both side of the document set on the document glass even if you turn duplex scanning on.
-
If you use the scanner application on a computer, a document is scanned with the scanner type of the scan profile setting on the computer, regardless of the place where the document is set or the [Duplex Scan] setting.
-
Press [Scan] or
(Scan). -
Set a document in the ADF or on the document glass.
-
Press [Scan To Computer].
-
Press [Select A Connecting PC].
-
Press [From WSD Scan].
-
Select a destination computer to which the data is sent.
-
Press
(START).
Using Image Capture (Mac OS X)
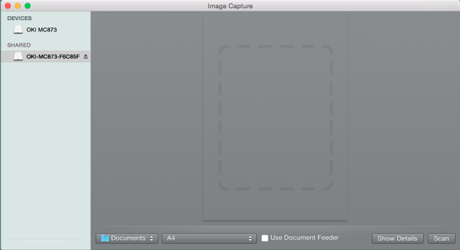
Start Image Capture included to Mac OS X as standard to capture scanned images.
Note
-
A document on a flatbed scanner can be scanned to the A4 size only.
-
A file can be saved only in JPEG.
-
When scanning via network connection, start Image Capture in advance. Select a device from a list that is displayed on the left side of the Image Capture screen.
-
Use Image Capture in the standard view. This function cannot be used in the detail view.
-
Press [Scan] or
(Scan). -
Set a document in the ADF or on the document glass.
-
Press [Scan To Computer].
If [Select A Connecting PC] does not appear, proceed to step 7.
-
Press [Select A Connecting PC].
-
Press [From Network] or [From USB Interface] in accordance with the connection method of the machine and computer.
-
For the network connection, select a destination computer to which the data is sent.
If the targeted computer is not displayed, register the computer to the machine.
-
Press [Select An Application].
Memo
If you select [Application] or [PC-FAX] on Mac OS X, the same action as when [Folder] is selected takes place.
-
Select the destination.
-
Press
(START).