
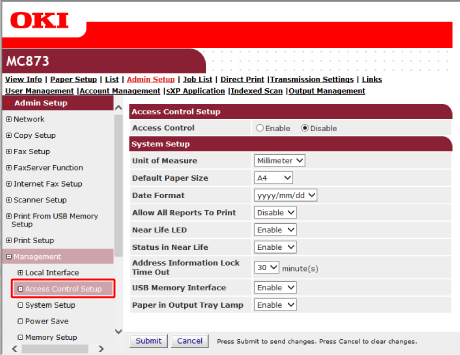
Enabling Access Control
After the user information is registered and the server authentication setting is completed, enable the access control.
-
Open the Web page of the machine.
-
Log in as the administrator.
-
Click [Admin Setup].
-
Click [Management].
-
Click [Access Control Setup].
-
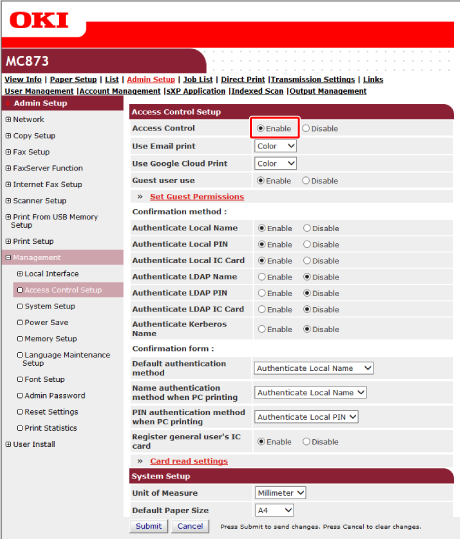
Select [Enable] for [Access Control].
-
Make the access control setting according to your environment.
Use Email print: Make settings for printing files attached to a received e-mail.
Use Google Cloud Print: Set the details of Google Cloud Print.
Guest user use: Set the authorization for guest users.
Confirmation method: Enable/disable each authentication method.
Confirmation form: Set the authentication method used when logging in the machine or printing.
Card read settings: Set for when authenticating with a FeliCa card.
-
Click [Submit].
When the access control function is enabled, the top screen on the control panel of the machine is changed as follows.
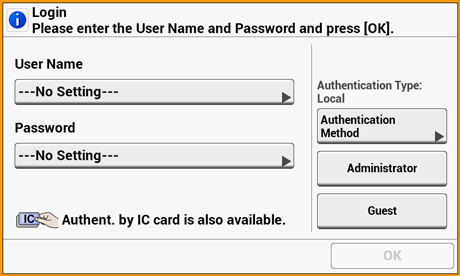
Memo
To use IC card authentication, connecting an IC card reader is required. (Recommended product: ELATEC TWN4 MIFARE NFC Version P)
The message, "Authent. by IC card is also available." is not displayed if no IC card reader is connected.