
If a wireless LAN access point supports WPS, you can easily connect to the wireless LAN with the easy setup button (WPS button).
Connect by following the procedure below.
-
Check the position of the WPS button by referring to the instruction manual that is included in a wireless LAN access point or other document.
-
Check that the wireless LAN access point starts and is operating properly.
-
Turn the machine on.
Memo
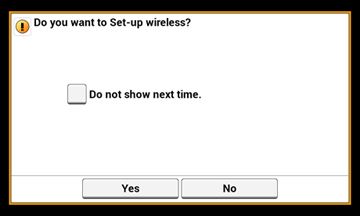
If the following screen is displayed, press [Yes], and then proceed to step 6.
-
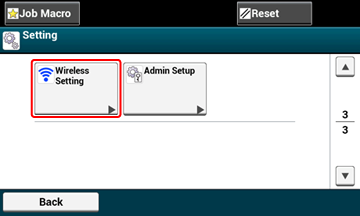
Press [Device Settings].
-
Press [Wireless Setting].
-
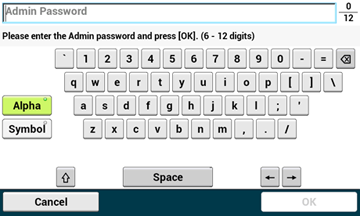
Enter the administrator password, and then press [OK].
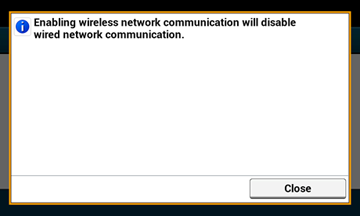
The following message is displayed for approximately 5 seconds.
-
Press [Automatic Setup (WPS)].
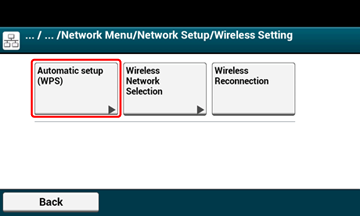
-
Press [WPS-PBC].
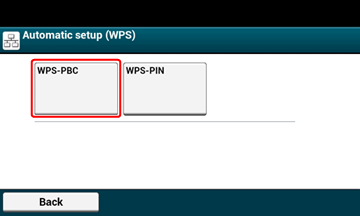
-
Press [Yes].
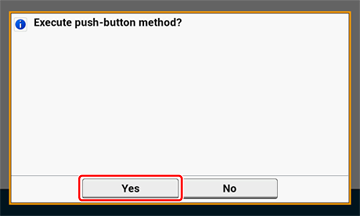
The machine starts searching for wireless LAN access points. The following screen is displayed for approximately 2 minutes, during which press and hold the WPS button for the wireless LAN access point for a few seconds.
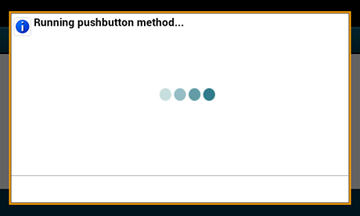
Note
You cannot operate the panel when WPS is in progress.
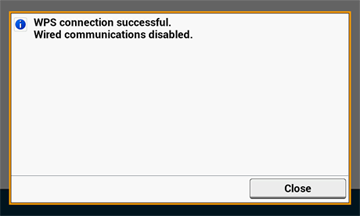
When the following screen is displayed, the setting of the wireless LAN is complete.
Memo
-
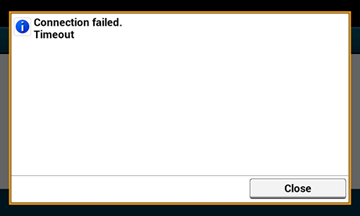
If the following screen is displayed, repeat the procedure from step 8.
-
[Overlap] is displayed when multiple WPS push buttons are pressed almost at the same time at two or more wireless LAN access points and connection is not established. Wait for a while, and then try again.
-
-
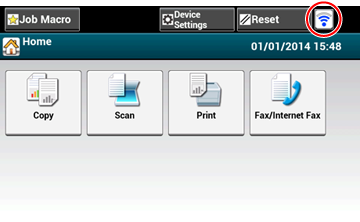
If the antenna mark is displayed at the top right of the touch panel, the connection is established correctly.
Memo
The antenna mark may not be displayed on some screens such as the copy top screen.