
Attach the additional tray unit when increasing the number of sheets or paper to be set is needed.
You must set the printer driver after installing.
|
Model Number N22204A |
|---|

|

|
Injury may result. |

|
|---|---|---|
|
Lift this machine by 2 persons, because it weighs approximately 23 kg. |
||
-
Check that the machine is turned off and power cord and all the cables are unplugged.
Note
Installing the additional tray unit with the machine turned on may cause the machine and additional tray unit to malfunction.
-
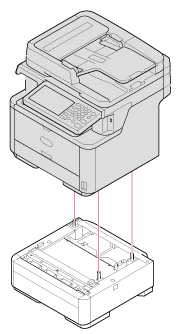
Slowly stack the machine on the additional tray unit aligning the three pins if the second tray unit with the holes at the bottom of the machine.
-
Screw the machine and additional tray unit with the lock pieces.
-
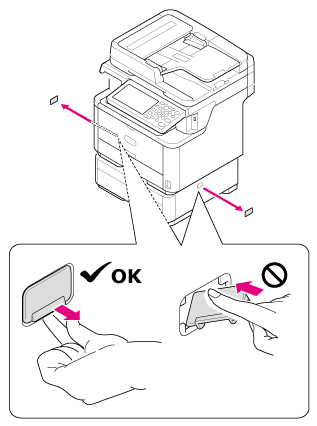
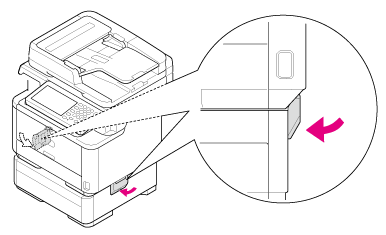
Remove the left and right covers from the lock holes.
-
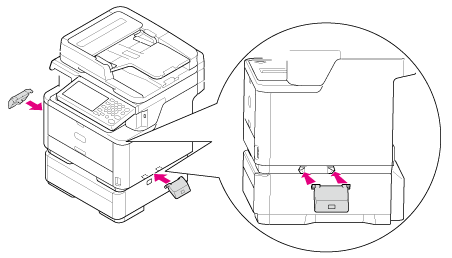
Align the tabs (two pieces) on the upper side of the lock pieces with the holes on the machine.
-
Insert the tabs (two pieces) on the upper side of the lock pieces into the holes on the machine.
-
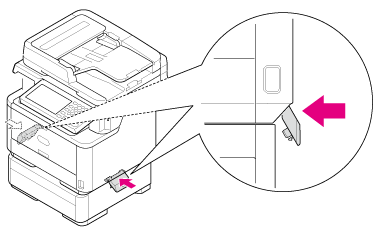
Insert the protrusion on the lock piece into the lock hole by pushing the lower side of the lock piece onto the second tray.
Note
If the lock parts are not attached, the machine may be detached from the second tray unit when you open the scanner unit.
-
After the printer driver is installed, make a setting for the additional tray unit.