This section describes how to unpack and install the machine.

|
Injury may result. |

|
|---|---|---|
|
Lift this machine by 2 persons, because it weighs approximately 23 kg. |
||
Note
-
Use extra care when handling the image drum (the green cylinder), because it is fragile.
-
Do not expose the image drum to direct sunlight or strong light (approximately 1,500 lux or more). Even under room lighting, do not leave the image drum for 5 minutes or more.
-
Packaging and cushioning materials are required for transporting the machine. Do not dispose of it, and keep it for future use.
-
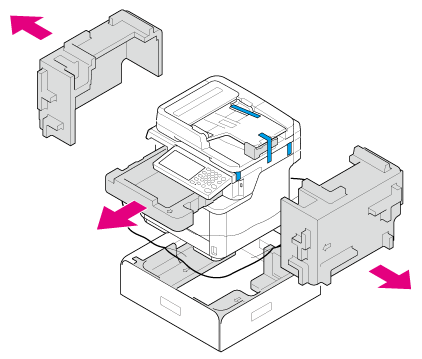
Remove the machine from the box, and then remove accessories, cushioning materials and the plastic bag from the machine.
A set of accessories is packed within the cushioning material.
-
Lift the machine, and then place it where it is to be installed.
Note
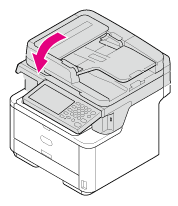
Do not open the scanner unit until step 4.
-
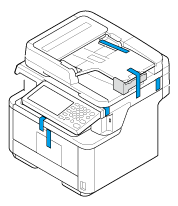
Remove the cushioning materials, protection tapes, protective sheet, and desiccant packs.
-
Open the scanner unit.
-
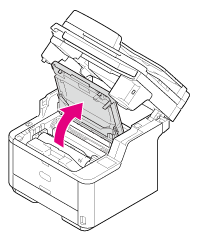
Press the top cover open button.

-
Open the top cover until it stops.
-
Take the image drum out.
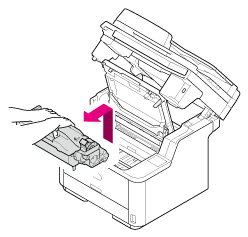
Note
-
Do not expose the image drum to light for 5 minutes or more.
-
Do not touch the shiny green surface at the bottom of the image drum.
-
-
Remove the desiccant pack from the image drum.

-
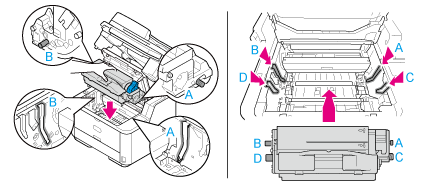
Align the image drum pins (A to D) with the grooves (A to D) inside the machine, and then reinstall the image drum into the machine.
-
Rotate the blue lever of the toner cartridge in the direction of the
 (Unlock) arrow until it stops.
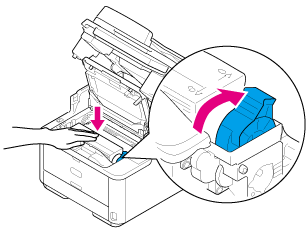
Memo
-
Align the arrow on the lever with the arrow on the image drum.
-
If the toner cartridge is not securely attached, printing quality may decline.
-
-
Close the top cover slowly and push the center of the top cover for confirmation.
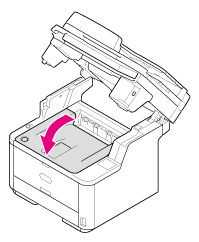
Note
If the error message that the top cover is open does not disappear, make sure that the top cover is closed securely.
-
Close the scanner unit.