If the "Paper jam has occurred. Please open the scanner unit and the top cover to check." message is displayed, a paper jam has occurred near the image drum.
Remove the jammed paper by following the procedure below.
-
If documents are set in the ADF or on the document glass, remove them.

-
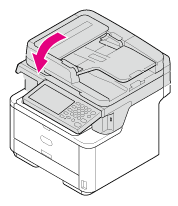
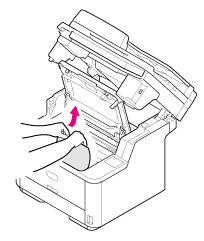
Open the scanner unit.
-
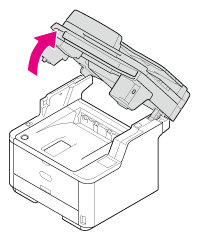
Press the top cover open button.
-
Open the top cover.

Burns may result.

The fuser is extremely hot. Do not touch it.
-
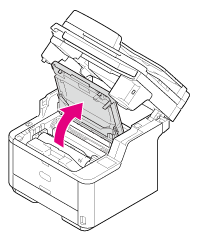
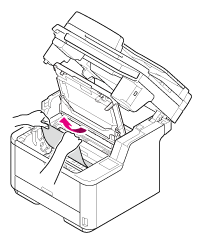
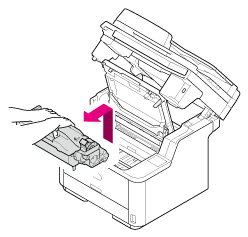
Hold the image drum handle with both hands, and then remove the image drum from the machine gently.
Note
-
Use extra care when handling the image drum (the green cylinder), because it is fragile.
-
Do not expose the image drum to direct sunlight or strong light (approximately 1,500 lux or more). Even under room lighting, do not leave the image drum for 5 minutes or more.
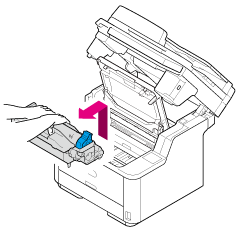
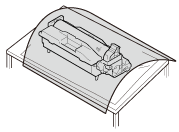
The toner cartridge is removed with the image drum. Place the toner cartridge on a flat surface and put a paper over it to avoid the light.
-
-
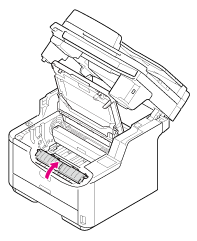
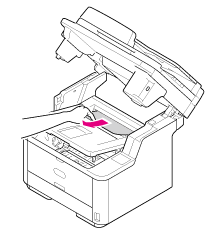
Remove the jammed paper.
Note
-
Check that there is no paper remaining inside the machine.
-
Remove the jammed paper carefully and slowly not to tear the paper. If the paper is torn, remove all paper fragments.
The solution varies depending on the location of the paper jam.
-
If the edge of paper is visible on the back side of the resist guide, turn the resist guide toward the fuser unit, pick the edge of jammed paper, and pull it out gently to remove.
-
If the top end of the paper is visible behind the transparent resist guide, pull out the paper gently while holding its top end.

-
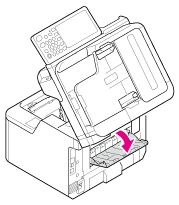
If any part of the paper other than its top and bottom ends is visible, move the paper in the direction of the arrow. Pull out the paper gently while holding its top end.
-
If the bottom end of the paper is visible, pull out the paper in the direction of the arrow gently while holding its top end.
-
If the bottom end of the paper is visible inside the machine, pull out the paper gently while holding it.
Note
If paper jams in the paper output part and the paper is visible inside the top cover, pull out the paper toward inside the machine.
-
If the bottom end of the paper is not visible but its top end is visible in the paper output unit, pull out the paper gently while holding its top end.
(1) Open the faceup stacker.
(2) Pull out the paper in the direction of the arrow.

-
If you cannot remove the paper, follow the procedure below.
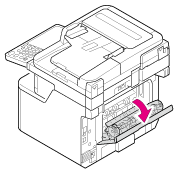
(3) Open the rear cover.
(4) Open the scanner unit and top cover.

(5) Take the image drum out.
(6) Pull out the paper horizontally.

(7) Pull out the paper upward.

-
If you fail to remove the jammed paper, do not pull out the paper forcibly but follow the procedure below.

(1) Return the image drum into the machine, and then close the top cover.
(2) Turn the machine off, and then turn it on again. When the motor starts rotating, pull out the paper while holding its top end.
Note
If paper jams when you set it, check that no paper has been left in the paper feed units. To release the alarm display, open and close the top cover.
-
-
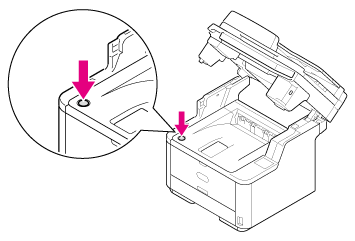
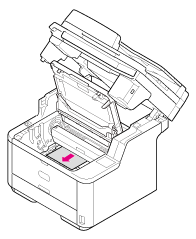
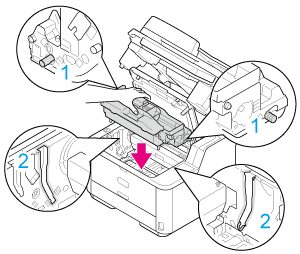
Check that the right and left pegs (1) of the image drum are fitted into both slots (2) of the machine, and then return the image drum with the toner cartridge into the machine.
-
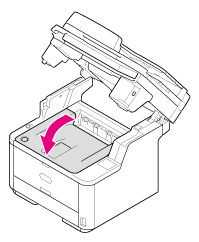
Close the top cover.
-
Close the scanner unit.