
A paper jam has occurred near the fuser unit.
Remove the jammed paper by following the procedure below.
-
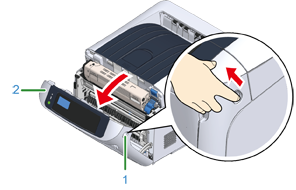
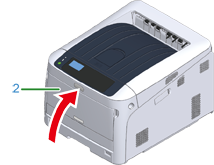
Insert your finger into the recess on the right side of the machine and pull the front cover open lever (1) to open the front cover (2) forward.
-
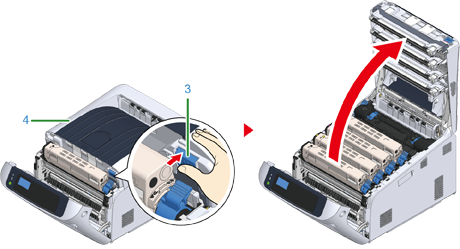
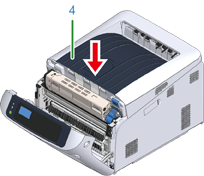
Press the open button (3) and open the output tray (4).

Burns may result.

The fuser unit is extremely hot. Do not touch it.
-
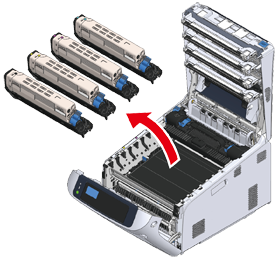
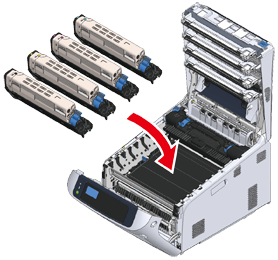
Remove all four image drums and place them on a flat surface.
Note
-
Use extra care when handling the image drum (the green cylinder), because it is fragile.
-
-
Cover the removed image drums with paper so that the image drums are not exposed to light.

-
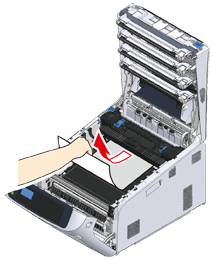
Remove the jammed paper remaining inside of the unit.
-
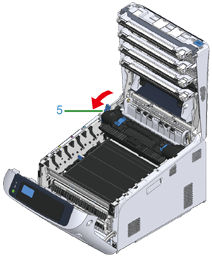
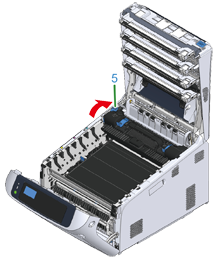
Lift the left lock lever (5) of the fuser unit forward.
-
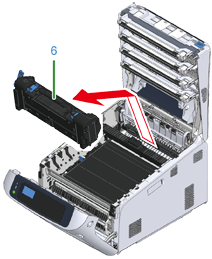
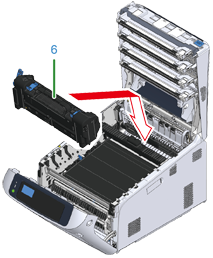
Hold the fuser unit handle (6) and lift the fuser unit out of the machine.
-
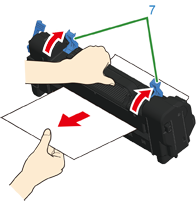
Lift the release levers (7) on the fuser unit, and pull out the jammed paper forward gently.
Note
-
If paper is pulled out towards the rear, this may result in soiled prints.
-
-
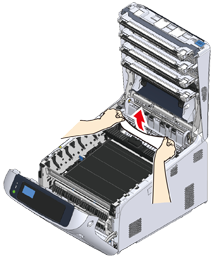
If jammed paper remains in the machine, hold the both sides of the paper to remove it gently.
-
Hold the fuser unit handle (6) and place the fuser unit into the machine.
-
Push the left lock lever (5) of the fuser unit backward.
-
Return all four image drums into the machine carefully.
Note
-
Use extra care when handling the image drum (the green cylinder), because it is fragile.
-
-
Close the output tray (4) by pushing the center of the cover firmly.
-
Close the front cover (2).
Cannot close the front cover securely if the output tray is not closed.
Task is complete.