
Install the utility you want to use by following the procedure below.
For Windows
Install utility software by using the Software DVD-ROM.
-
PCL6 Printer Driver
-
PS Printer Driver
-
XPS Printer Driver
-
OKI LPR Utility
-
Color Correct Utility
-
Color Swatch Utility
-
PS Gamma Adjuster
-
Configuration Tool
-
PDF Print Direct
-
Print Job Accounting Client
Connect the machine to a computer via a network or USB interface.
Note
Check the status of this machine before installing.
-
This machine is turned on.
-
This machine is connected to a network with a network cable and the IP address or other settings are set.
-
Insert the "Software DVD-ROM" into a computer.
-
When [AutoPlay] is displayed, click [Run Setup.exe].

Memo
If the [User Account Control] dialog box is displayed, click [Yes].
-
Select a language from the drop-down list.
-
Read the license agreement, and then click [Accept].
-
Read Environmental advice for Users and click [Next].
-
Select [Network] or [USB] corresponding to your connection environment, and then click [Next].
If the [Windows Security Alert] dialog box is displayed, click [Allow access].
-
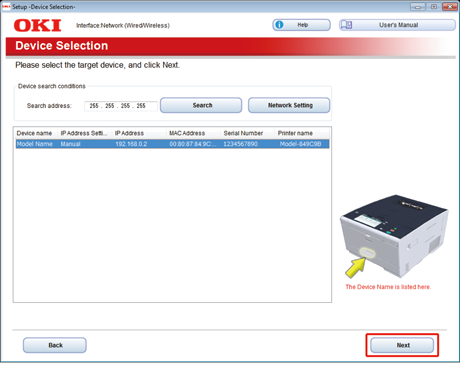
Select the model name of this machine, and then click [Next].
-
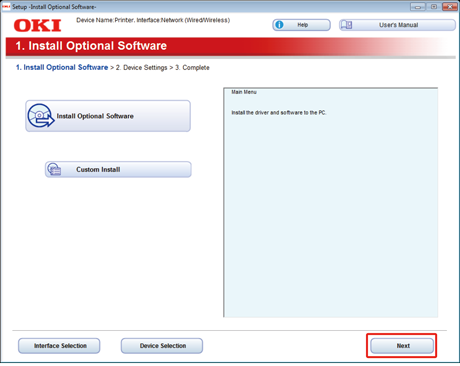
Click [Custom Install].
-
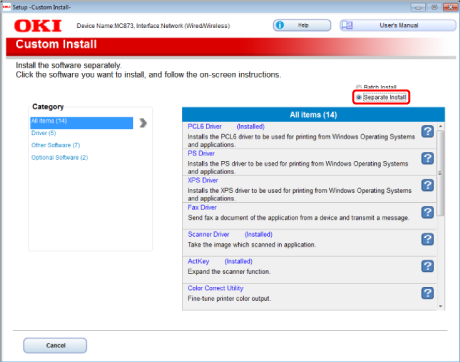
Click [Separate Install].
-
Click a driver or software to install.
Installation starts.
Memo
The procedure below varies depending on the selected software.
The installation of the Configuration Tool is used as an example.
-
Select plug-ins you want to install and click [Install].
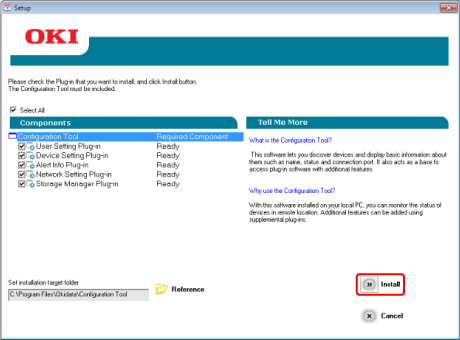
Install starts.
-
When installation is complete, click [Close].
For Mac OS X
You can copy a utility by dragging to any location. You can also run a utility directly from the "Software DVD-ROM".
-
Insert the included "Software DVD-ROM" into a computer.
-
From [OKI] > double-click the [Utilities] folder.
-
Copy the folder of a utility to install by dragging to any location.
Memo
To start utility software, double-click the software icon in the folder.