-
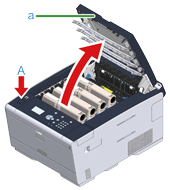
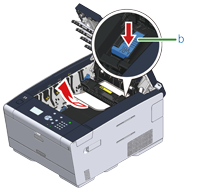
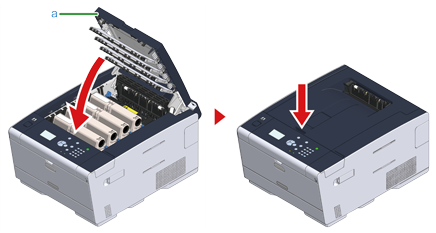
Press the button (A) and open the output tray (a) completely.

Burns may result.

The fuser unit is extremely hot. Do not touch it.
-
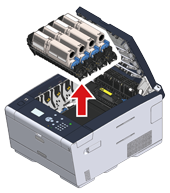
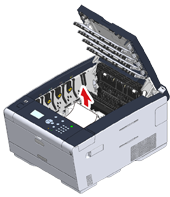
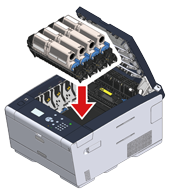
Remove the four image drums from the machine and place the image drums on a flat surface.
Note
While removing consumables, be careful not to hit them to the LED head.
-
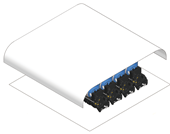
Cover the removed image drums with paper so that the image drums are not exposed to light.
-
Pull out the jammed paper gently to the rear of the machine (the direction of the arrow) if an edge of jammed paper can be seen.
-
If paper jams in the fuser unit, press the jam release lever (b) on the fuser unit and slowly pull the jammed paper toward you.
-
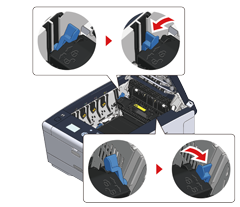
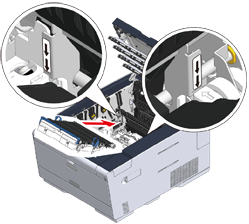
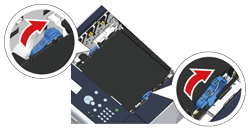
Tilt back the lock levers on the both sides of the fuser unit toward you.
-
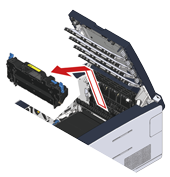
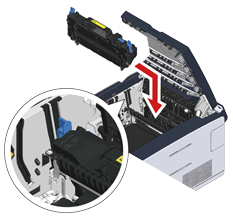
Hold the fuser unit handle and lift the fuser unit out of the machine.
-
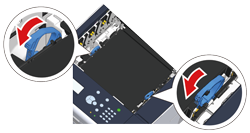
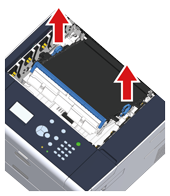
Turn the lock levers on the both sides of the belt unit toward you and remove the belt unit by holding the lock levers.
-
Remove the jammed paper slowly by pulling the edge of paper.
-
Hold the lock levers of belt unit and place the belt unit into the machine.
-
Turn the lock levers on the both sides of the belt unit forward.
-
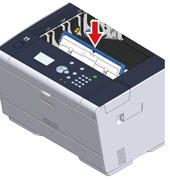
Hold the fuser unit handle and place the fuser unit into the machine.
-
Tilt the lock levers on the both sides of the fuser unit.

-
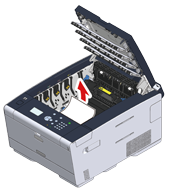
Replace the four image drums into the machine
-
Close the output tray (a) slowly and push the center of the output tray for confirmation.
Task is complete.
