
Replacing the Fuser Unit
When the "Fuser Unit Near Life" message appears on the display screen, prepare a replacement fuser unit. You can keep printing approximately 2,500 pages until the next message appears.
When the "Change Fuser Unit" message appears, replace the fuser unit.
The life expectancy of the fuser unit is up to 100,000 pages for A4 simplex printing.
Note
-
The actual number of pages you can print with the fuser unit depends on how you use it.
-
Though opening and closing the Output Tray may extend the life of the fuser unit somewhat, you should replace it soon after "Change Fuser Unit" is displayed to prevent malfunction.
-
If you replace the fuser unit, use it until the end of its usable life. If you remove the fuser unit and install and use another one before its usable life has expired, the use life will not be correctly displayed.
-
When the [Device Setting] > [Admin Setup] > [Manage Unit] > [System Setup] > [Near Life Status] is set to [Disable], the [Fuser Unit Near Life] message does not appear.
-
Do not expose the image drum to direct sunlight or very bright interior light (approximately more than 1,500 lux). Even under the normal interior light, do not leave it for more than 5 minutes.
Memo
You can change the setting for displaying the "Fuser Unit Near Life" message. Set from [Device Setting] > [Admin Setup] > [User Install] > [Fuser Near Life Timing]. Available values are from 500 to 5,000 (in 500 increments).
-
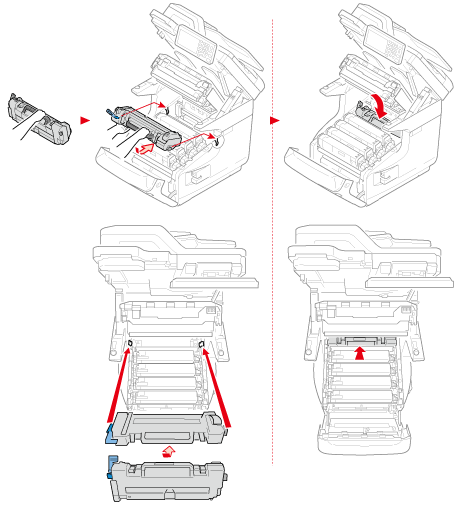
Prepare a new fuser unit.

-
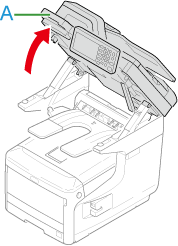
Hold the handle (A) to open the scanner unit.
-
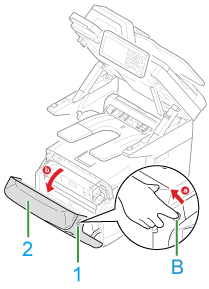
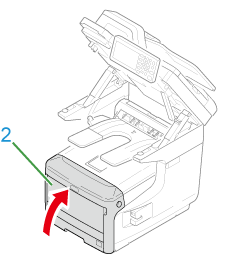
Insert your finger into the recess (B) on the right side of the machine and pull the front cover open lever (1) to open the front cover (2) forward.
-
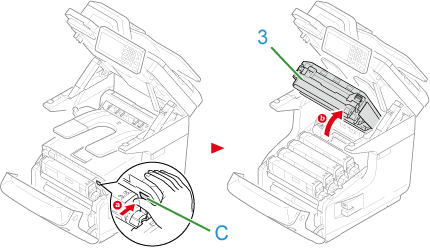
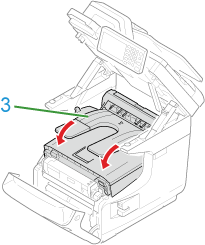
Press the button (C) and open the Output Tray (3).

Possible to get burned.

Since the fuser unit gets hot, carry out the operation carefully, and when lifting it up you must hold it by the handle. Do not try to hold it whilst it is hot. Wait until it has cooled down and then carry out the operation.
-
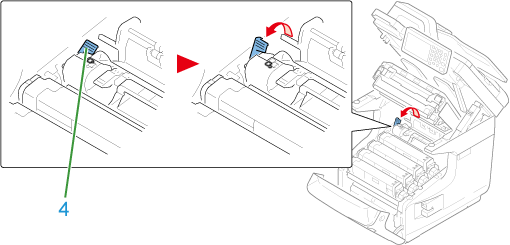
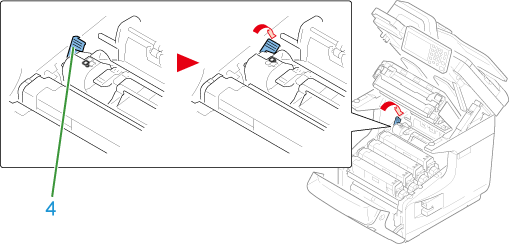
Pull forward the left locking lever (4) of the fuser unit to unlock.
-
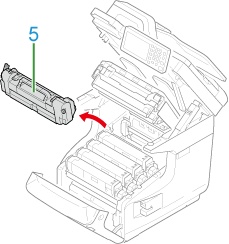
Hold the fuser unit handle (5) and lift the fuser unit out of the machine.
-
Hold the handle and place the new fuser unit into the machine.
-
Push back the left locking lever (4) of the fuser unit to lock.
-
Close the Output Tray (3) by pushing the both sides of the Output Tray firmly.
-
Close the front cover (2).
Note
The front cover cannot be closed if the output tray is not closed securely.
-
Hold the handle (A) to close the scanner unit.

-
Please recycle fuser unit.
Memo
If you must dispose of a fuser unit, put it in a plastic bag or similar container and dispose of it in accordance with your municipality's ordinances or guidelines.