
-
Press the power switch on the operator panel for a second to turn the machine on.
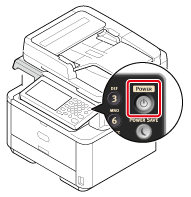
When the machine is turned on, the power switch LED lamp is lit.

The machine enters standby status, and then the home screen is displayed.
-
Press [Device Settings] on the touch panel.
-
Press [
 ] once to switch the screens, and then press [Easy Setup].
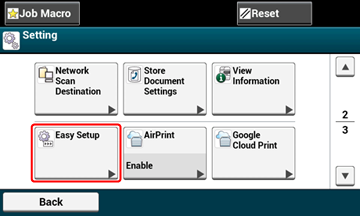
-
Enter the administrator password, and then press [OK].
-
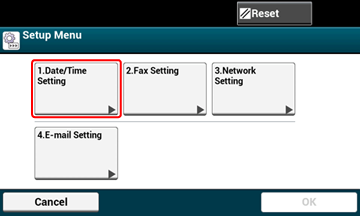
Press [1. Date/Time Setting].
The time zone setting screen appears.
-
Press [Select] for the time zone you want to use.
Memo
Press [
 ] [] to switch screens.
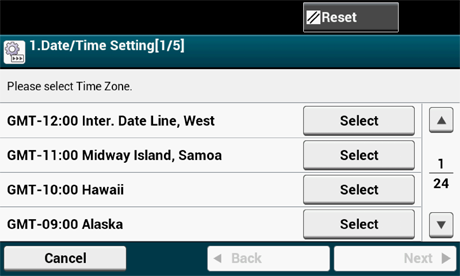
-
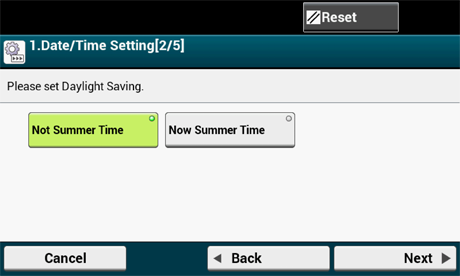
Set Daylight Saving.
-
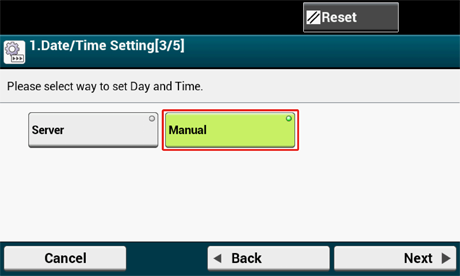
Press [Manual].
-
Enter the month using [
] [] or the numeric keypad on the operator panel.Use the numeric keypad on the operator panel to enter a value in the field with the
 (numeric keypad) icon.
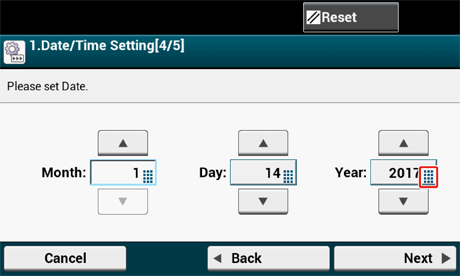
-
Press the [Day] entry box once to enter the day.
-
Press the [Year] entry box once to enter the year, and then press [Next].
-
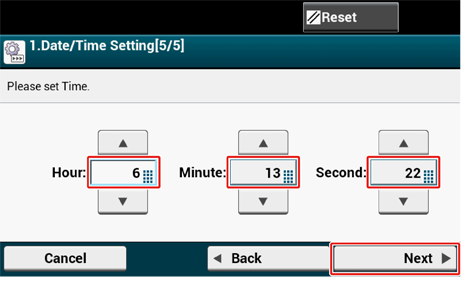
Use [
] [] or the numeric keypad on the operator panel to enter the current time in the same manner as the date entry, and then press [Next]. The setting values are updated.
-
Press [Close].
The screen goes back to the [Setup Menu] screen.
Memo
The screen switches automatically in about 7 seconds without pressing [Close].

Go to Fax Setup, Network Setup, and E-mail Setup.
Press [OK] to end setting. Press [Back] until the home screen is displayed.