
OKI LPR Utility
You can perform a print job via a network, manage print jobs, and check the machine status by using OKI LPR Utility.
To use OKI LPR Utility, TCP/IP must be enabled.
Note
OKI LPR Utility cannot be used for shared printers. Use the standard TCP/IP port.
How to install OKI LPR Utility
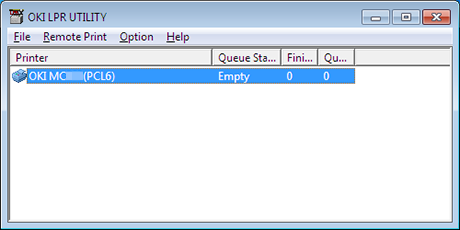
Starting OKI LPR Utility
-
Click [Start], and then select [All Programs] > [Okidata] > [OKI LPR Utility] > [OKI LPR Utility].
Registering a Printer to OKI LPR Utility
Add a printer to OKI LPR Utility.
Note
-
You must have the administrator rights.
-
If you cannot add a printer, exit OKI LPR Utility, and then follow the procedure below.
-
Click [Start] > [All Programs] > [Okidata] > [OKI LPR Utility], right-click [OKI LPR Utility], and then select [Run as administrator] to start.
-
Memo
You cannot add the printer that is already registered in OKI LPR Utility. To change the port, select [Confirm Connections] from [Remote Print].
-
Start OKI LPR Utility.
-
Select [Add Printer] from the [Remote Print] menu.
If the "You do not have sufficient privileges to complete this action." message is displayed, follow the procedure described in "If you cannot add a printer..." above.
-
Select [Printer Name], and then enter the IP address.
Network printers and printers connected to the LPR port are not displayed.
-
When selecting a network printer, select [Discover].
-
Click [OK].
Adding a Comment to a Registered Printer
You can add a comment to identify the printer that you have added to OKI LPR Utility.
-
Start OKI LPR Utility.
-
Select a printer.
-
Select [Confirm Connections] from the [Remote Print] menu.
-
Enter a comment, and then click [OK].
-
Select [Show comments] from the [Option] menu.
Checking the Status of a Registered Printer
-
Start OKI LPR Utility.
-
Select a printer.
-
Select [Printer Status] from the [Remote Print] menu.
Forwarding Print Jobs to a Registered Printer
This section describes how to forward selected print jobs to a registered printer using the OKI LPR Utility. This section also describes how to automatically forward a print job to a different registered printer when a problem occurs on the forward destination printer.
Forwarding the Selected Print Jobs
Note
-
Print jobs can only be forwarded to an OKI printer of the same model as your printer.
-
Before forwarding a job, you must add an OKI printer of the same model.
-
Start OKI LPR Utility.
-
Select [Job Status] from the [Remote Print] menu.
-
To forward a print job, select a job, select [Redirect] from the [Job] menu, and then select the destination printer.
Forwarding Print Jobs Automatically
If you are unable to print because the selected printer is busy, offline, out of paper, or due to other reasons, you can set so that a print job can be automatically forwarded to another OKI model printer.
Note
-
Print jobs can only be forwarded to the same OKI model printer as the one you are using.
-
Before forwarding a job, you must add another same OKI model printer.
-
You must log in as the administrator.
-
Start OKI LPR Utility.
-
Select the printer to set.
-
Select [Confirm Connections] from the [Remote Print] menu.
-
Click [Details].
-
Select the [Automatic Job Redirect Used] check box.
-
To forward jobs only if an error occurs, select the [Redirect only at the time of an error] check box.
-
Click [Add].
-
Enter the forwarding destination IP address, and then click [OK].
-
Click [OK].
Printing the Same Document from the Registered Multiple Printers
You can print from multiple printers with a single command.
Note
-
This function enables you to send a print command to multiple remote printers so that they can print at the same time.
-
You must have the administrator rights.
-
Start OKI LPR Utility.
-
Select the printer to set.
-
Select [Confirm Connections] from the [Remote Print] menu.
-
Click [Details].
-
Select the [Print to more than one printer at a time] check box.
-
Click [Options].
-
Click [Add].
-
Enter the IP address of the printer from which you want to print at the same time, and then click [OK].
-
Click [OK].
Opening the Web Page of the Registered Printer
You can open the Web page of this machine from OKI LPR Utility.
-
Start OKI LPR Utility.
-
Select a printer.
-
Select [Web Setting] from the [Remote Print] menu.
Memo
You cannot open the Web page when the Web port number has been changed.
For details, see "Setting the OKI LPR Utility Port Number".
Following the IP Address of the Registered Printer Automatically
You can set so that you can maintain the connection with the original printer even after the IP address of the printer changes.
Note
You must have the administrator rights.
Memo
The IP address may change if DHCP dynamically assigns IP addresses or the network administrator manually changes the IP address of the printer.
-
Start OKI LPR Utility.
-
Select [Setup] from the [Option] menu.
-
Select the [Auto Reconnect] check box, and then click [OK].
Setting the OKI LPR Utility Port Number
-
Select a printer.
-
Select [Confirm Connections] from the [Remote Print] menu.
-
Click [Details].
-
Enter the port number in [Port Numbers].
-
Click [OK].
Uninstalling OKI LPR Utility (Uninstall)
Note
You must have the administrator rights.
-
Check that OKI LPR Utility is closed.
-
Click [Start], and then select [All Programs] > [Okidata] > [OKI LPR Utility] > [Uninstall OKI LPR Utility].
If the [User Account Control] dialog box is displayed, click [Yes].
-
Click [Yes] on a confirmation screen.
Sending a File to a Printer That is Registered in OKI LPR Utility
If there is a printer that is connected via a network and registered in OKI LPR Utility, you can download the print data.
-
Click [Start] on a computer, and then select [All Programs] > [Okidata] > [OKI LPR Utility] > [OKI LPR Utility].
-
Select the printer to which the data is downloaded.
-
Select [Download] from [Remote Print].
-
Select a file, and then click [OK].
The file is sent to the printer.
Deleting an Unnecessary Print Job
You can use OKI LPR Utility to delete unnecessary print jobs.
-
Click [Start] on a computer, and then select [All Programs] > [Okidata] > [OKI LPR Utility] > [OKI LPR Utility].
-
Select [Job Status] from the [Remote Print] menu.
-
Select a job to delete.
-
Select [Delete Job] from the [Job] menu.
The unnecessary job is deleted.